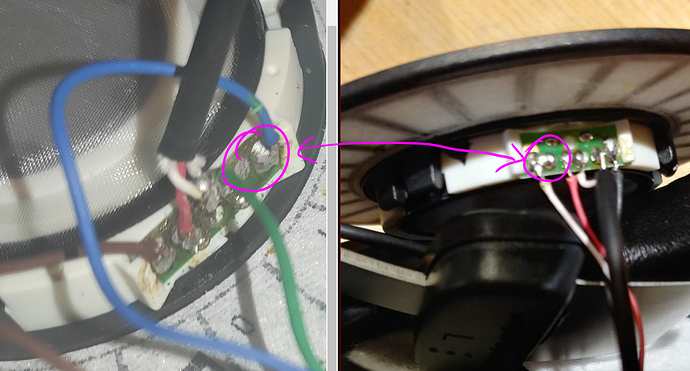
Looking at this guide they soldered the red and white wires both to the left channel of the chassis…?
That is a swapped L/R then.
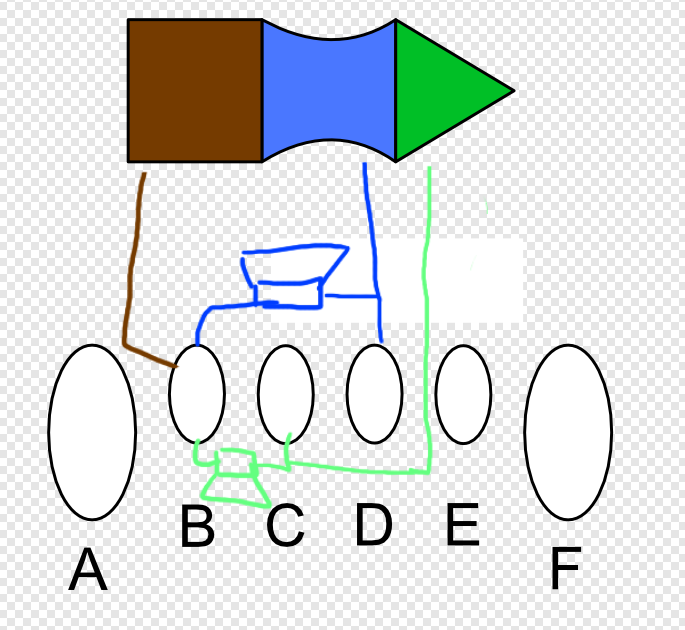
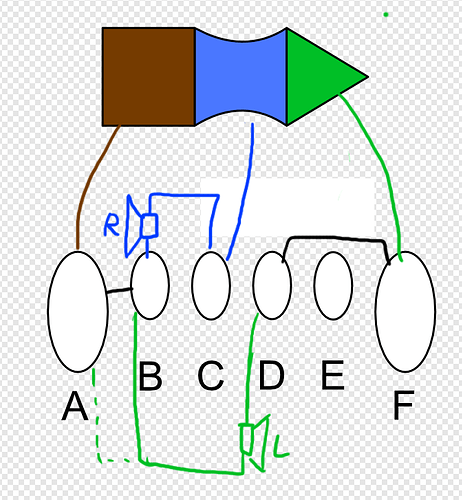
Wire arrangement should be this here:
(Unless I am making a collosal idiot out of myself or can’t read)
I would use the A and F solder pads because they are connected by the PCB (= black lines) and only have one set of wires on it. Not sure why E pad is not used.
The drawing also relies on your measurements being correct ![]()
Yeah I think I just butchered something. I have now tried pretty much any permutation and it just isn’t happening. In the guide I sent (DT770) They hook up the right channel directly to the connection on the jack chassis, I tried that but all that got me is that my right channel is also no longer working 
Thanks for the help though, you’ve taught me a lot!
That would also be an option…
I wonder why it did not work for you ![]()
I get the urge to buy a DT-series just to get my damn drawing right!
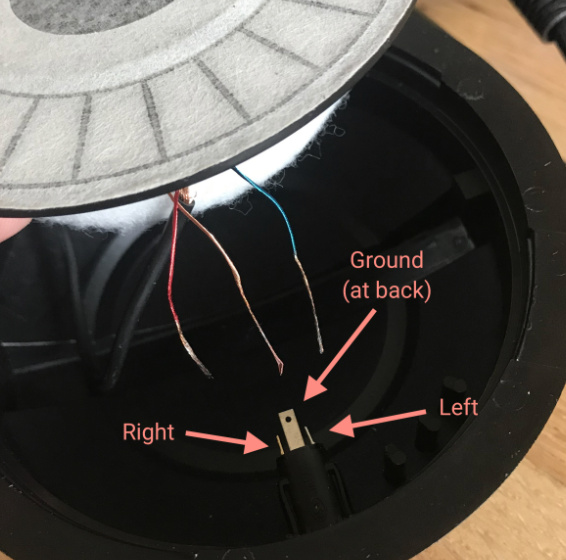
From the guide:
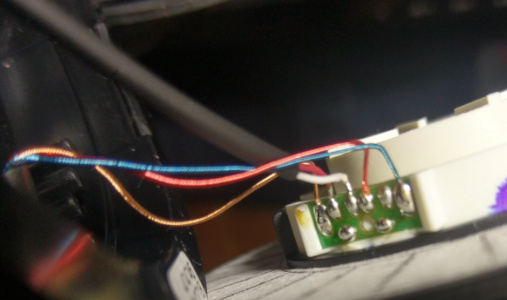
From here:
Connection table with resistanes:
| Cons | A | B | C | D | E | F |
|---|---|---|---|---|---|---|
| A | brown | 0 | (250) | ? | ? | ? |
| B | 0 | right Cup | 250 | ? | 250 ? | x |
| C | 250 | right Cup | ? | ? | ? | |
| D | red | ? | ? | |||
| E | - | ? | ||||
| F | blue |
Yeah I shouldn’t have disconnected the shieldet wires that go to the other cup. I can’t seem to solder these, they just melt…
That’s exactly what I had. After a lot of effort I managed to get everything wired up again but still nothing on the left driver. Also because I had so much trouble with the wire of the right cup the solder is now connecting everything to each other, so I can’t get any readings from the multimeter anymore. Right channel is still working though, so I got that going for me.
I think I’ll just order a new driver and see if I can find out what I’m doing wrong with the little cables from the right cup. I’m a bit devastated at my failure though.
Have you got a solder vacuum?
Solder Wick (= Solder Braid) would work too.
Nope, I do use wick to remove it.
Yeah I already did that the first time, I can fix it. However I need to find out a good way to solder that annoying stringy wire from the right cup before I get the new driver. Maybe I should buy some flux and just cover it with flux before soldering?
did you tin the wires?
They melted when I tried
There is no way a wire should melt at soldering temperatures.
I know right. So it’s a big rubber thing, in it are 2 shielded wires. I can’t for the life of me seem to strip these wires (I do know how a wire stripper works) which is the first odd thing. When I do manage to get a bit of it stripped, within are a couple strands of copper and a lot of synthetic strands of some sort. These synthetic strands melt a bit and get dark when heated, and I’m having loads of trouble getting solder to stick to it. For the other wires I use regular copper wire which I salvaged from a UTP cable, and this I can solder just fine.
Yes, those cables are a nightmare to strip. I used a disposable razor to VEEEERRRRYYY gently cut around and remove the rubber housing. You also need to remove the synthetic so it’s only the copper.
Keep in mind that when I say gently, whatever you’re thinking oof is still too much force lol.
Even then I STILL stripped some copper along the way, but once you have the copper exposed, you can tin that just fine. So if you have the option of using different cables, it’s worth the peace of mind. Once that is done, they are much easier to solder.
I’ll see if I can get that to work when I get the new driver in, hopefully I won’t screw it up again  .
.
I’m really curious now to find out what broke, maybe I’ll actually try to disassemble the driver to see if I can find anything.
BTW:
Did you solder those annoying shielded wires back to the driver or did you solder them to the jack-chassis connector thing?
I only removed cables from the drivers, used only the existing cables to solder to the new outputs.
I still have trouble believing you screwed up the driver. There isn’t really anything that can go wrong, unless you remove cables, then maybe.
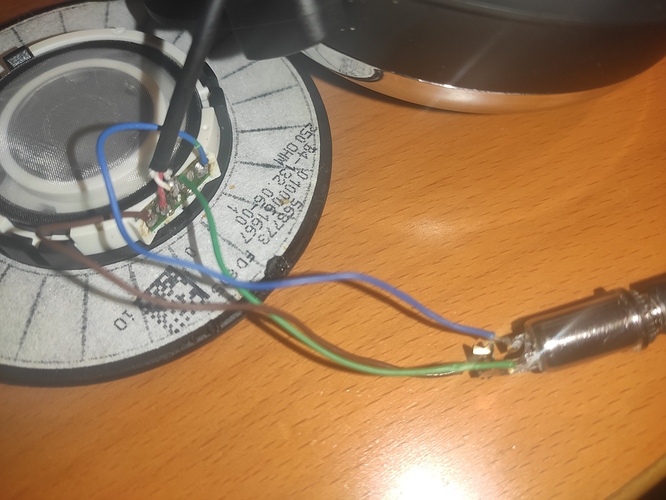
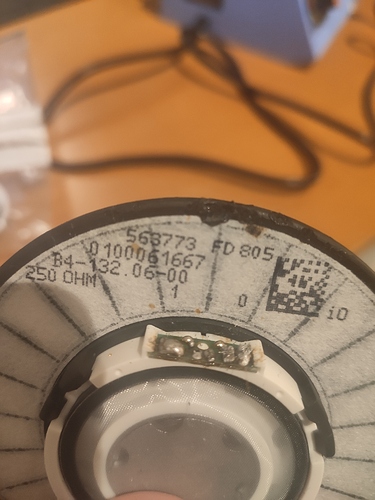
Don’t judge the soldering job please. It was very neat the first two attempts but in the end I got a bit frustrated.
I did check the resistance again and I do get good measurements now. When I measure the multimeter from the jack to the solder points I get a good connection on all of them. The only thing I find that is not correct is the fact that there’s no sound from the left driver…
Is the driver in the picture the left side one?
Because the big difference between your photo and the ones in the guide is these two pads being bridged by solder:

