I wanted to share my Foobar setup with you. If you like how this looks, you can use the post below to set it up just like I have.
Hopefully, you have the basic Foobar setup including Wasapi support and any other codecs you require. And that you have put these components in the Foobar folder so it will detect it once you open your Foobar for the first time. Let us begin.
- Open your Foobar and select Default User Interface
- Open up the sandbox
- Add two vertical splitters (these will be your side columns)
- Split the two vertical columns made in point 3 in half with a horizontal splitter.
- Move these two columns to either side of the screen
- This will leave behind a large amount of space in the center of your screen.
- Add two horizontal splitters in the center space. Now you center has three splits and the sides have two splits.
Now that our layout is complete, let us begin adding components.
Left Hand Side
In the left column, on the top half, add the following component- foobar2000: Components Repository - Facets
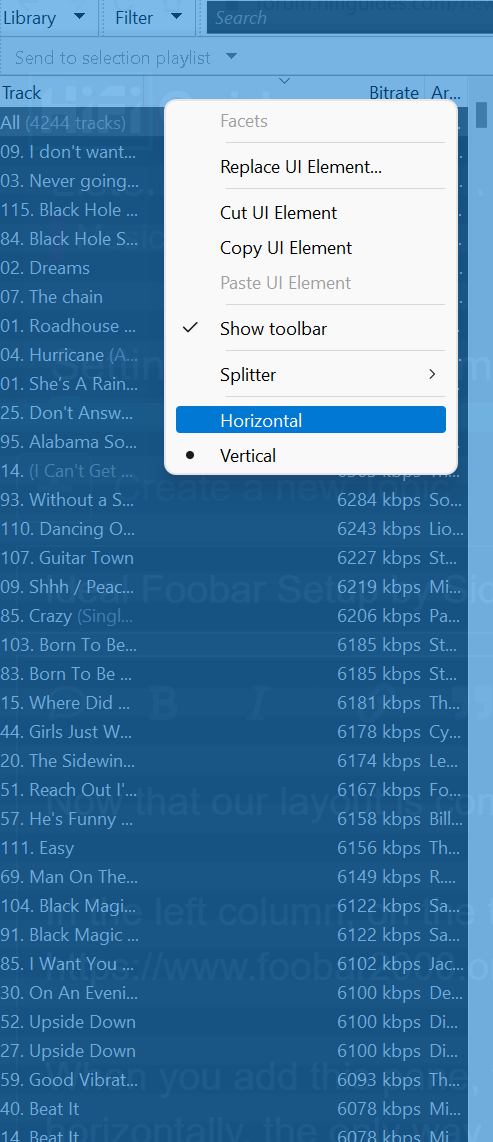
When you add this pane, the columns will be stacked horizontally, the only way to fix this is to individually remove each column by right-clicking and clicking remove column.
Once you have removed each column, an option will appear allowing you to choose the layout as horizontal/vertical with horizontal preselected. Instead, click vertical. Refer to the image below.
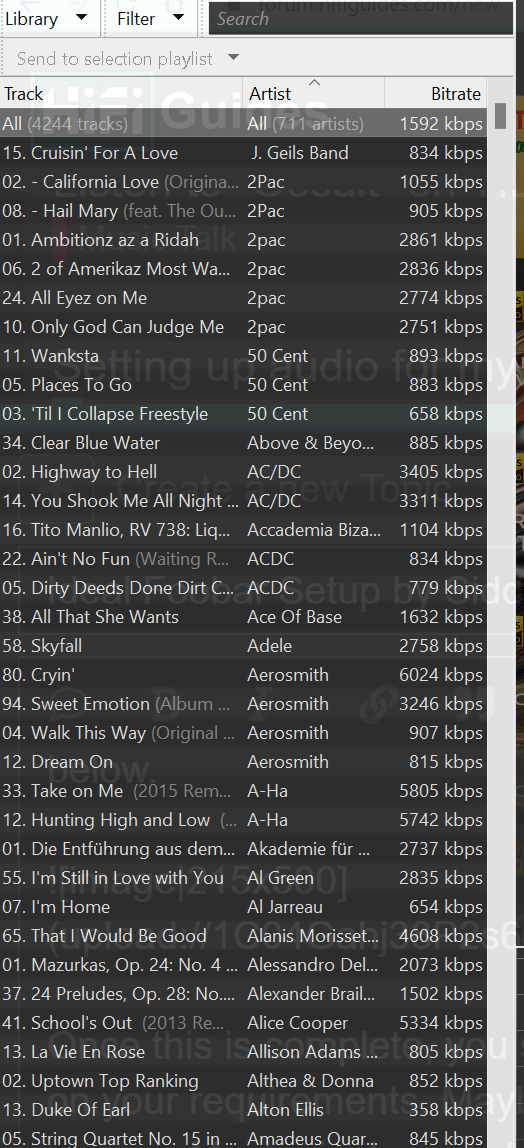
Once this is complete, you should look to modify Facets based on your requirements. Maybe you want to browse artists and genres. Maybe just one list of all your tracks is fine for you. Like the image below:
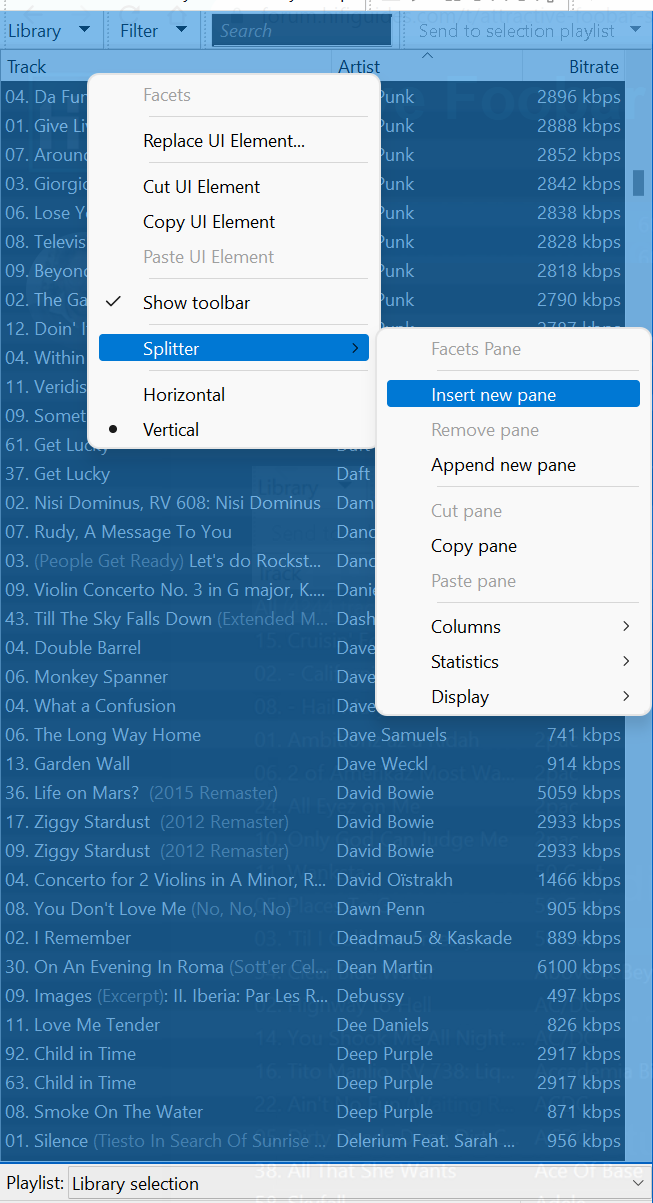
If you want to add more sections, one below each other with different ways to segment your library you can do so by right-clicking and adding panes. See the image below.
So far, we have filled one-half of our leftmost column. There is still a section below that needs a component. We will put two components here without needing to make space. Here is how:
- Right-click empty space, and add toolbar, it will automatically stick to the top of the empty space.
- Right-click the toolbar and remove everything except the Playlist switcher, this is to enhance the functionality of the component that will come below.
- Right-click the space below the Toolbar and add Playlist view, now you can see all your selected songs as well as switch between playlists of your choice.
- Now the leftmost side of your Foobar is complete with Facets, Toolbar, and Playlist view.
Right Hand Side
- Split the right vertical panel into two
- Add open lyrics to the top -foobar2000: Components Repository
- Add selection properties to the bottom - This is inbuilt just look for it.
Middle Space
- At the top, add coverflow - foobar2000: Components Repository - Coverflow
- In the middle, add the enhanced spectrum analyzer. - foobar2000:Components/Enhanced Spectrum Analyzer (foo_enhanced_spectrum_analyzer) - Hydrogenaudio Knowledgebase
- At the bottom add the waveform seekbar. - foobar2000: Components Repository - Waveform Seekbar
Further optimizations:
- Go to preferences, go to coverflow, and change the cover display to the one you prefer. I went for the design known as “shelf” but you can change it and click compile/apply to see its effect on your screen.
- Right-click the enhanced spectrum analyzer, click UI theme integration, assign theme and colors and reset peak and RMS.
- Also click on options, remove all ticks in measuring points, remove all ticks in crest factor, and reduce refresh time to 75ms and average time to 1500ms.
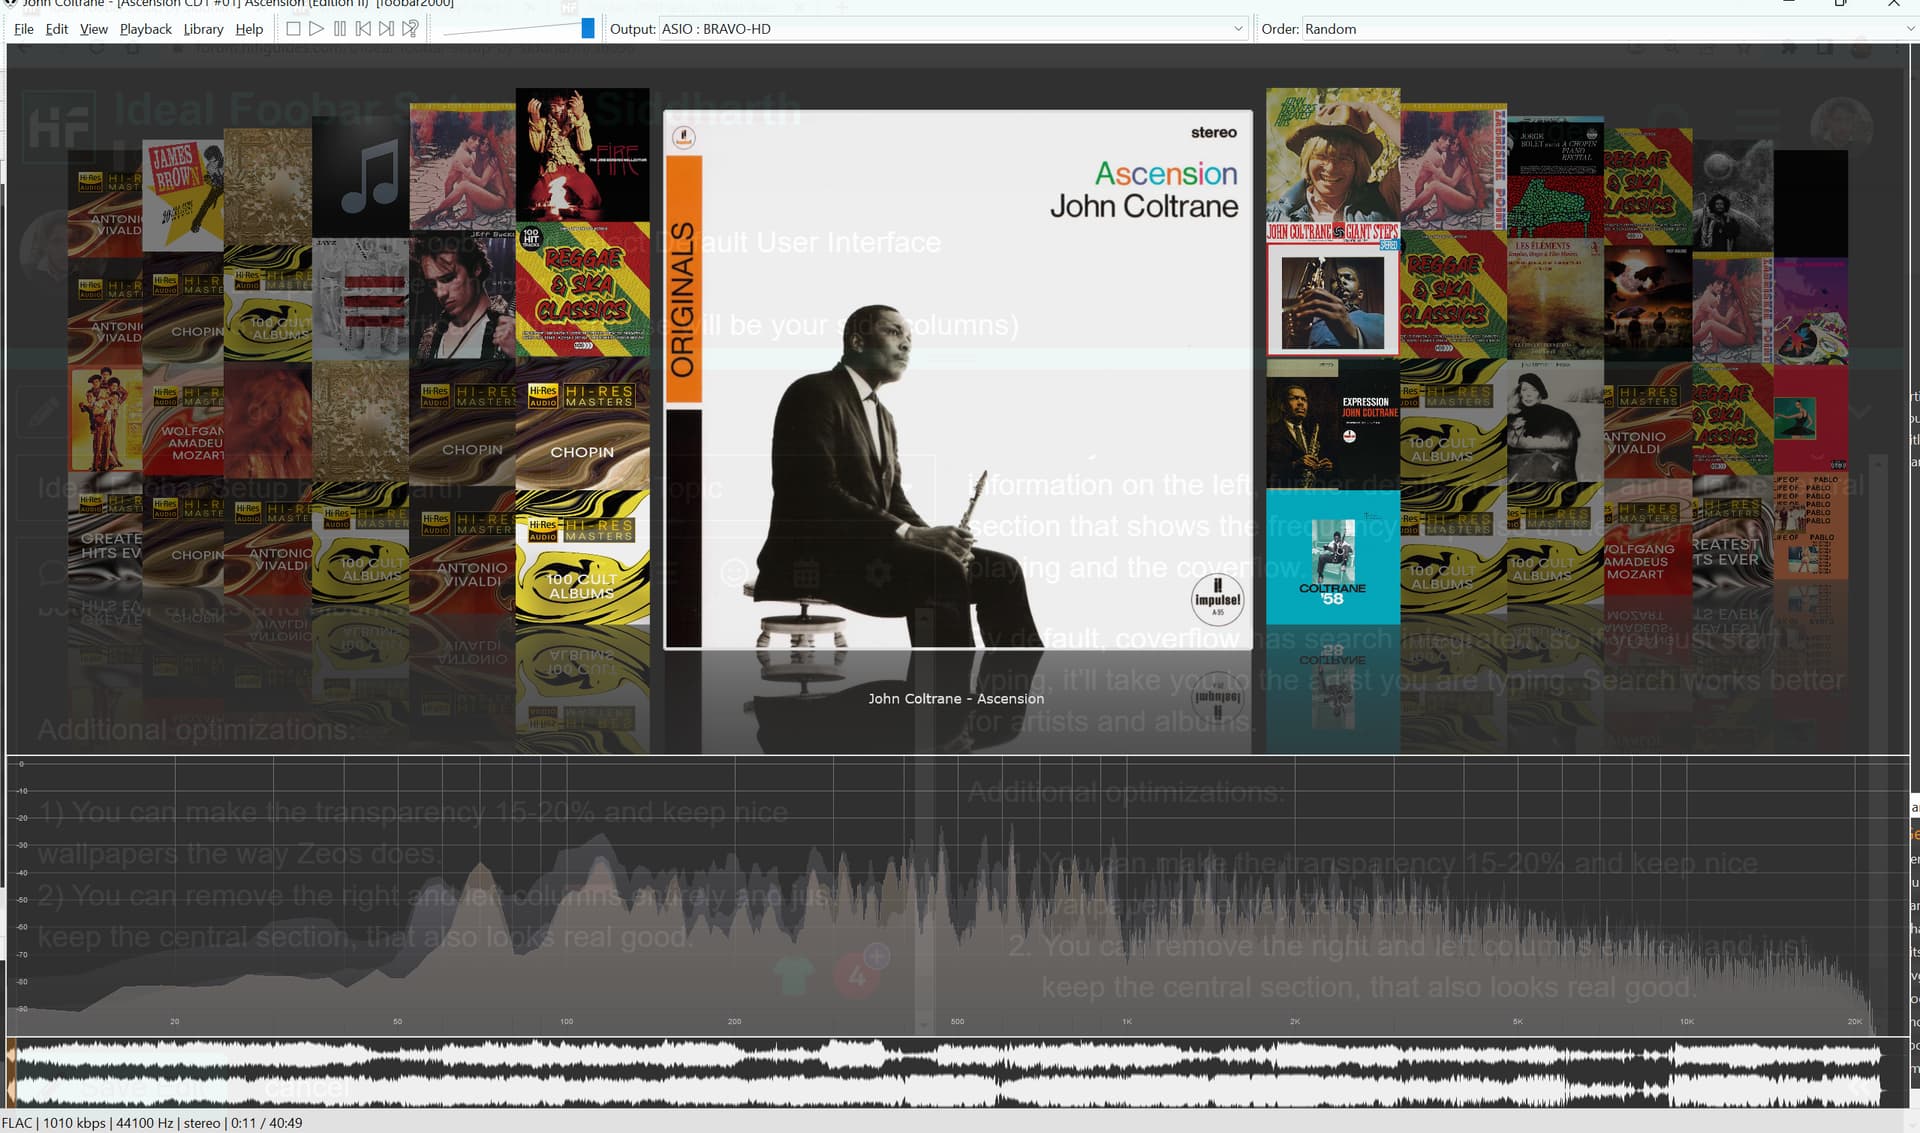
Click okay. It is done. Your foobar is now gorgeous with your song information on the left, further details on the right, and a large central section that shows the frequency response of the song you are playing and the coverflow.
By default, coverflow has search integrated, so if you just start typing, it’ll take you to the artist you are typing. Search works better for artists and albums.
Additional optimizations:
- You can make the transparency 15-20% and keep nice wallpapers the way Zeos does. (In the image below, you can see the same hifiguides post in the background)
- You can remove the right and left columns entirely and just keep the central section, that also looks real good.