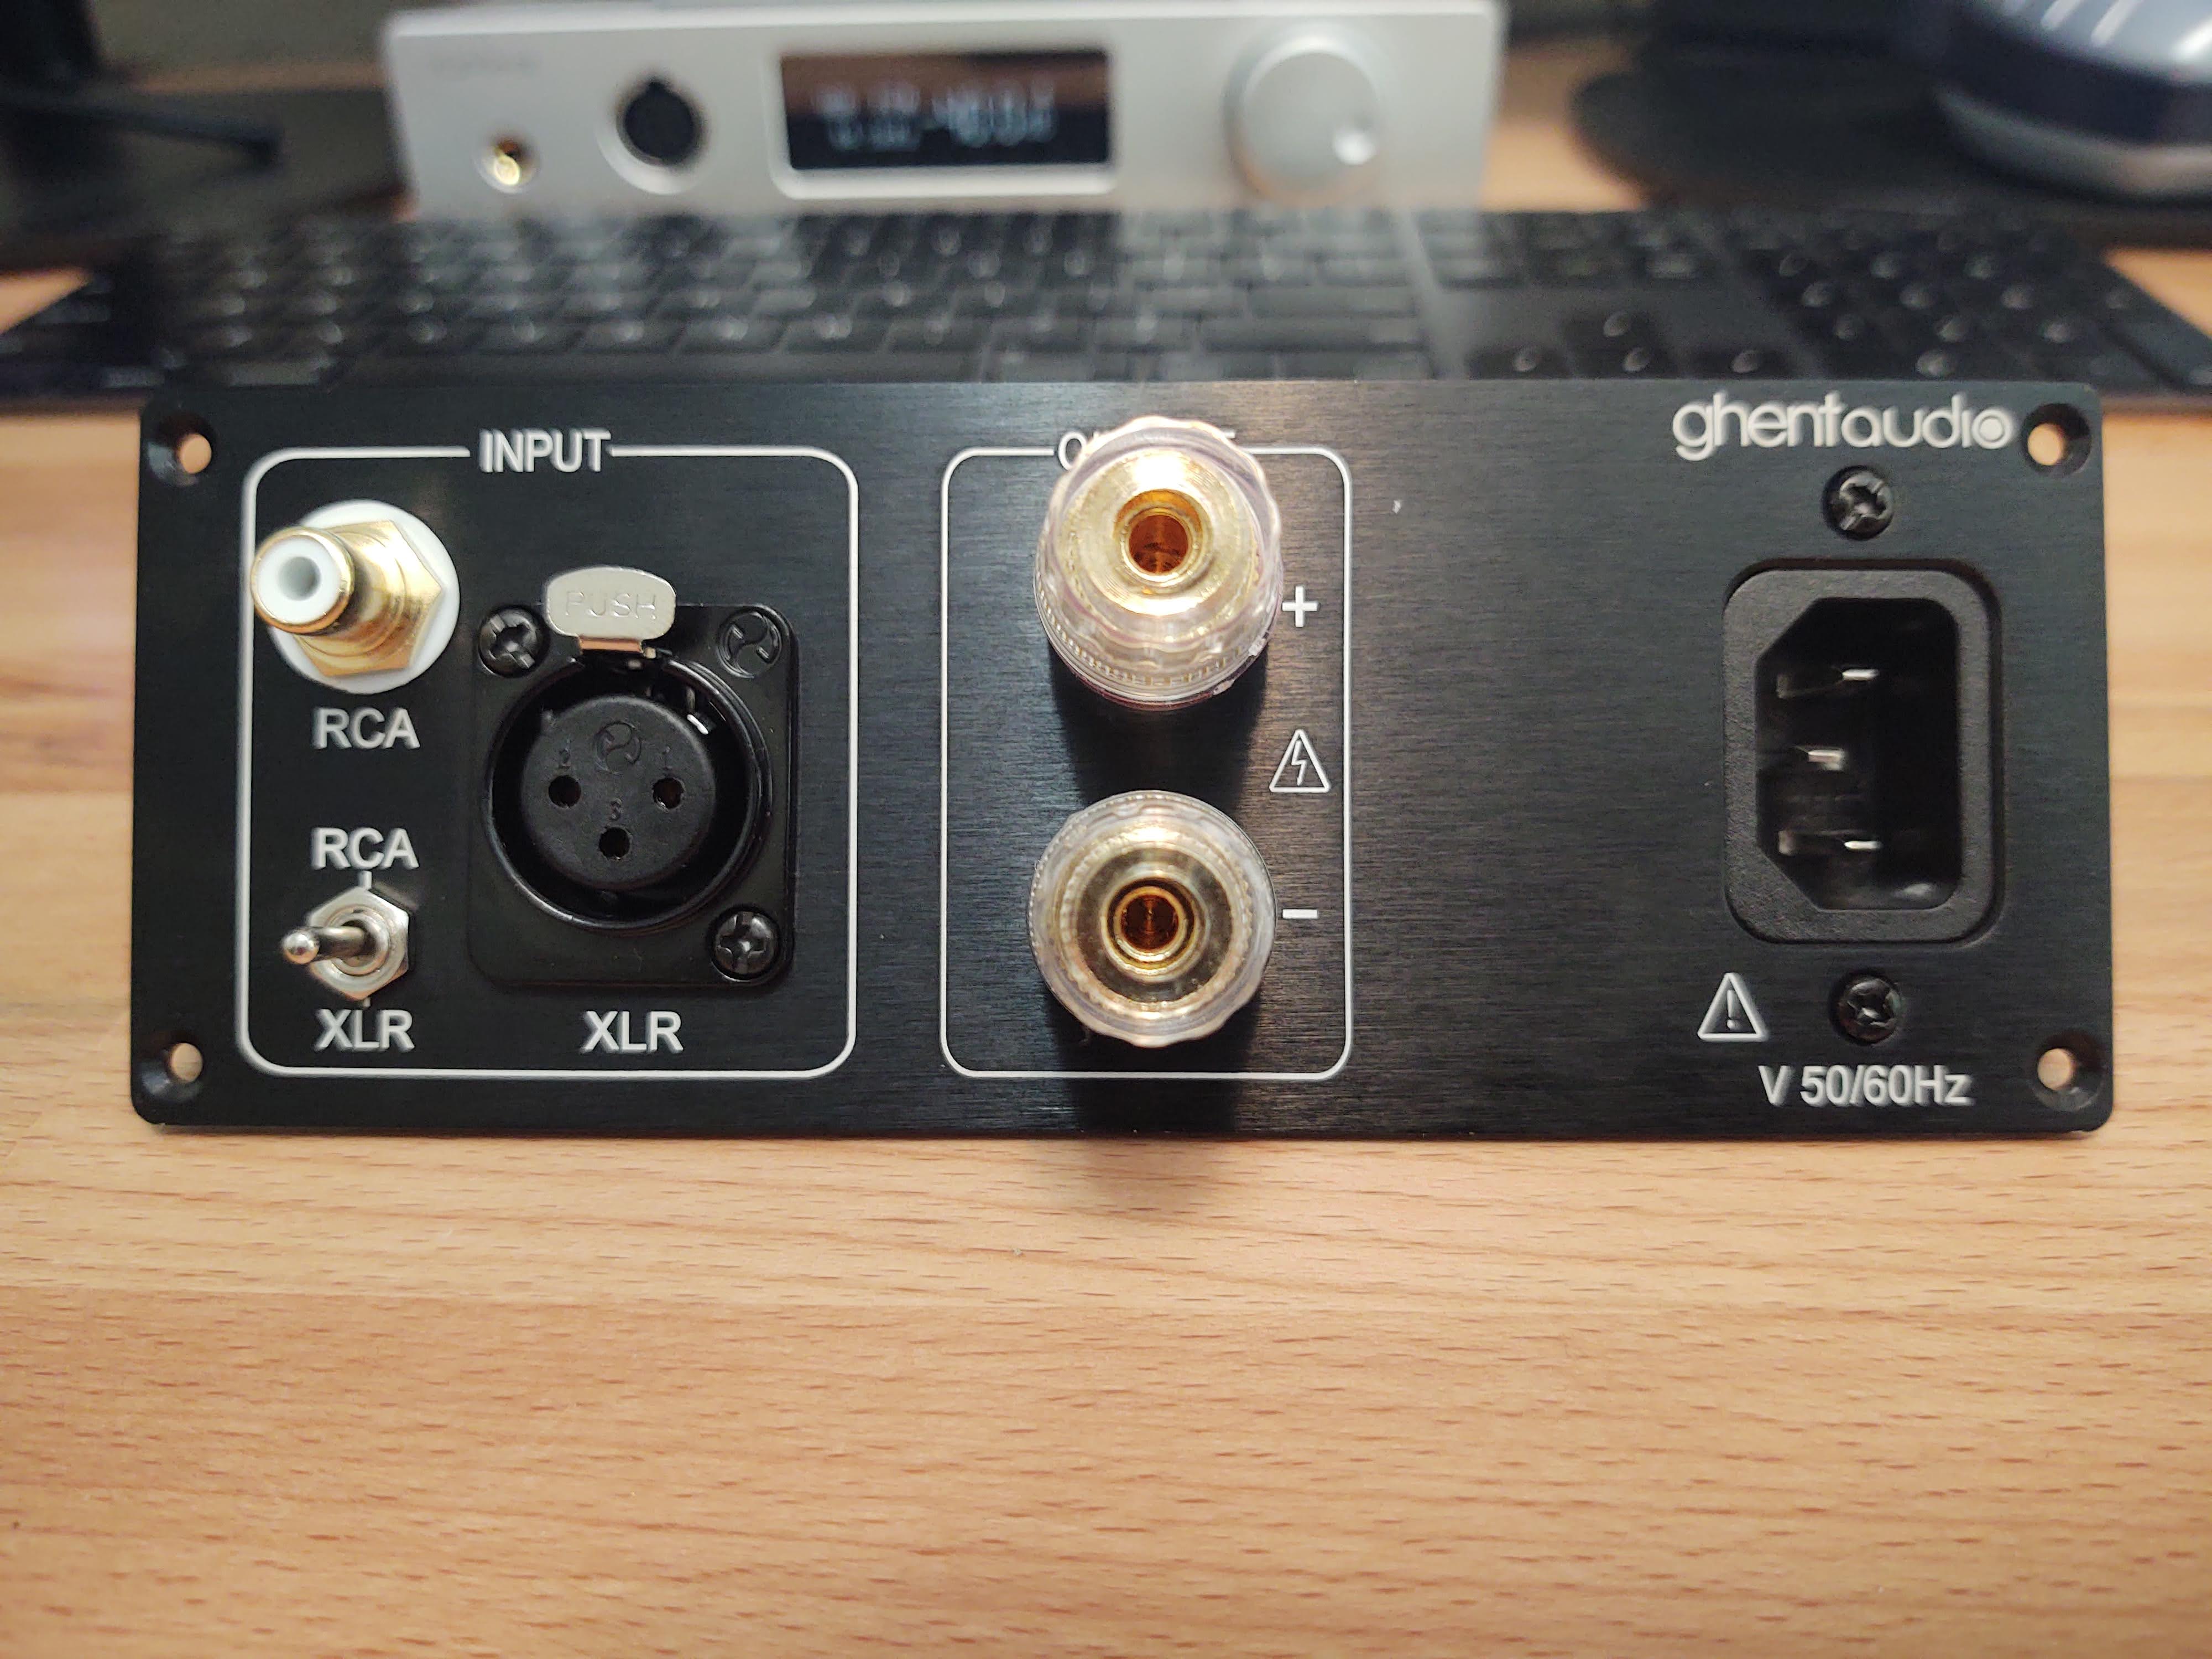
These 200ASC monoblocks work out to about $220 each (The PA-1 is $299 each). For me, the main pros for the DIY kit is that it uses 3 pin XLR and RCA inputs. The PA-1 is only 1/4" XLR.
If you’re on a tight budget, you can build a stereo version using a 200ASC and a 200AC in a single chassis. Here’s a good video detailing that process:
should give the same performance as 2 monoblocks as well. the 200ac is just the amp part of the 200asc. just no controller unit. saves about 120$ total between 200asc and 200ac price, plus only having to buy 1 chassis.
but if you have the extra funds, i recommend the dual mono blocks like evilgnome is doing. they will dissipate heat better then both in 1 chassis.
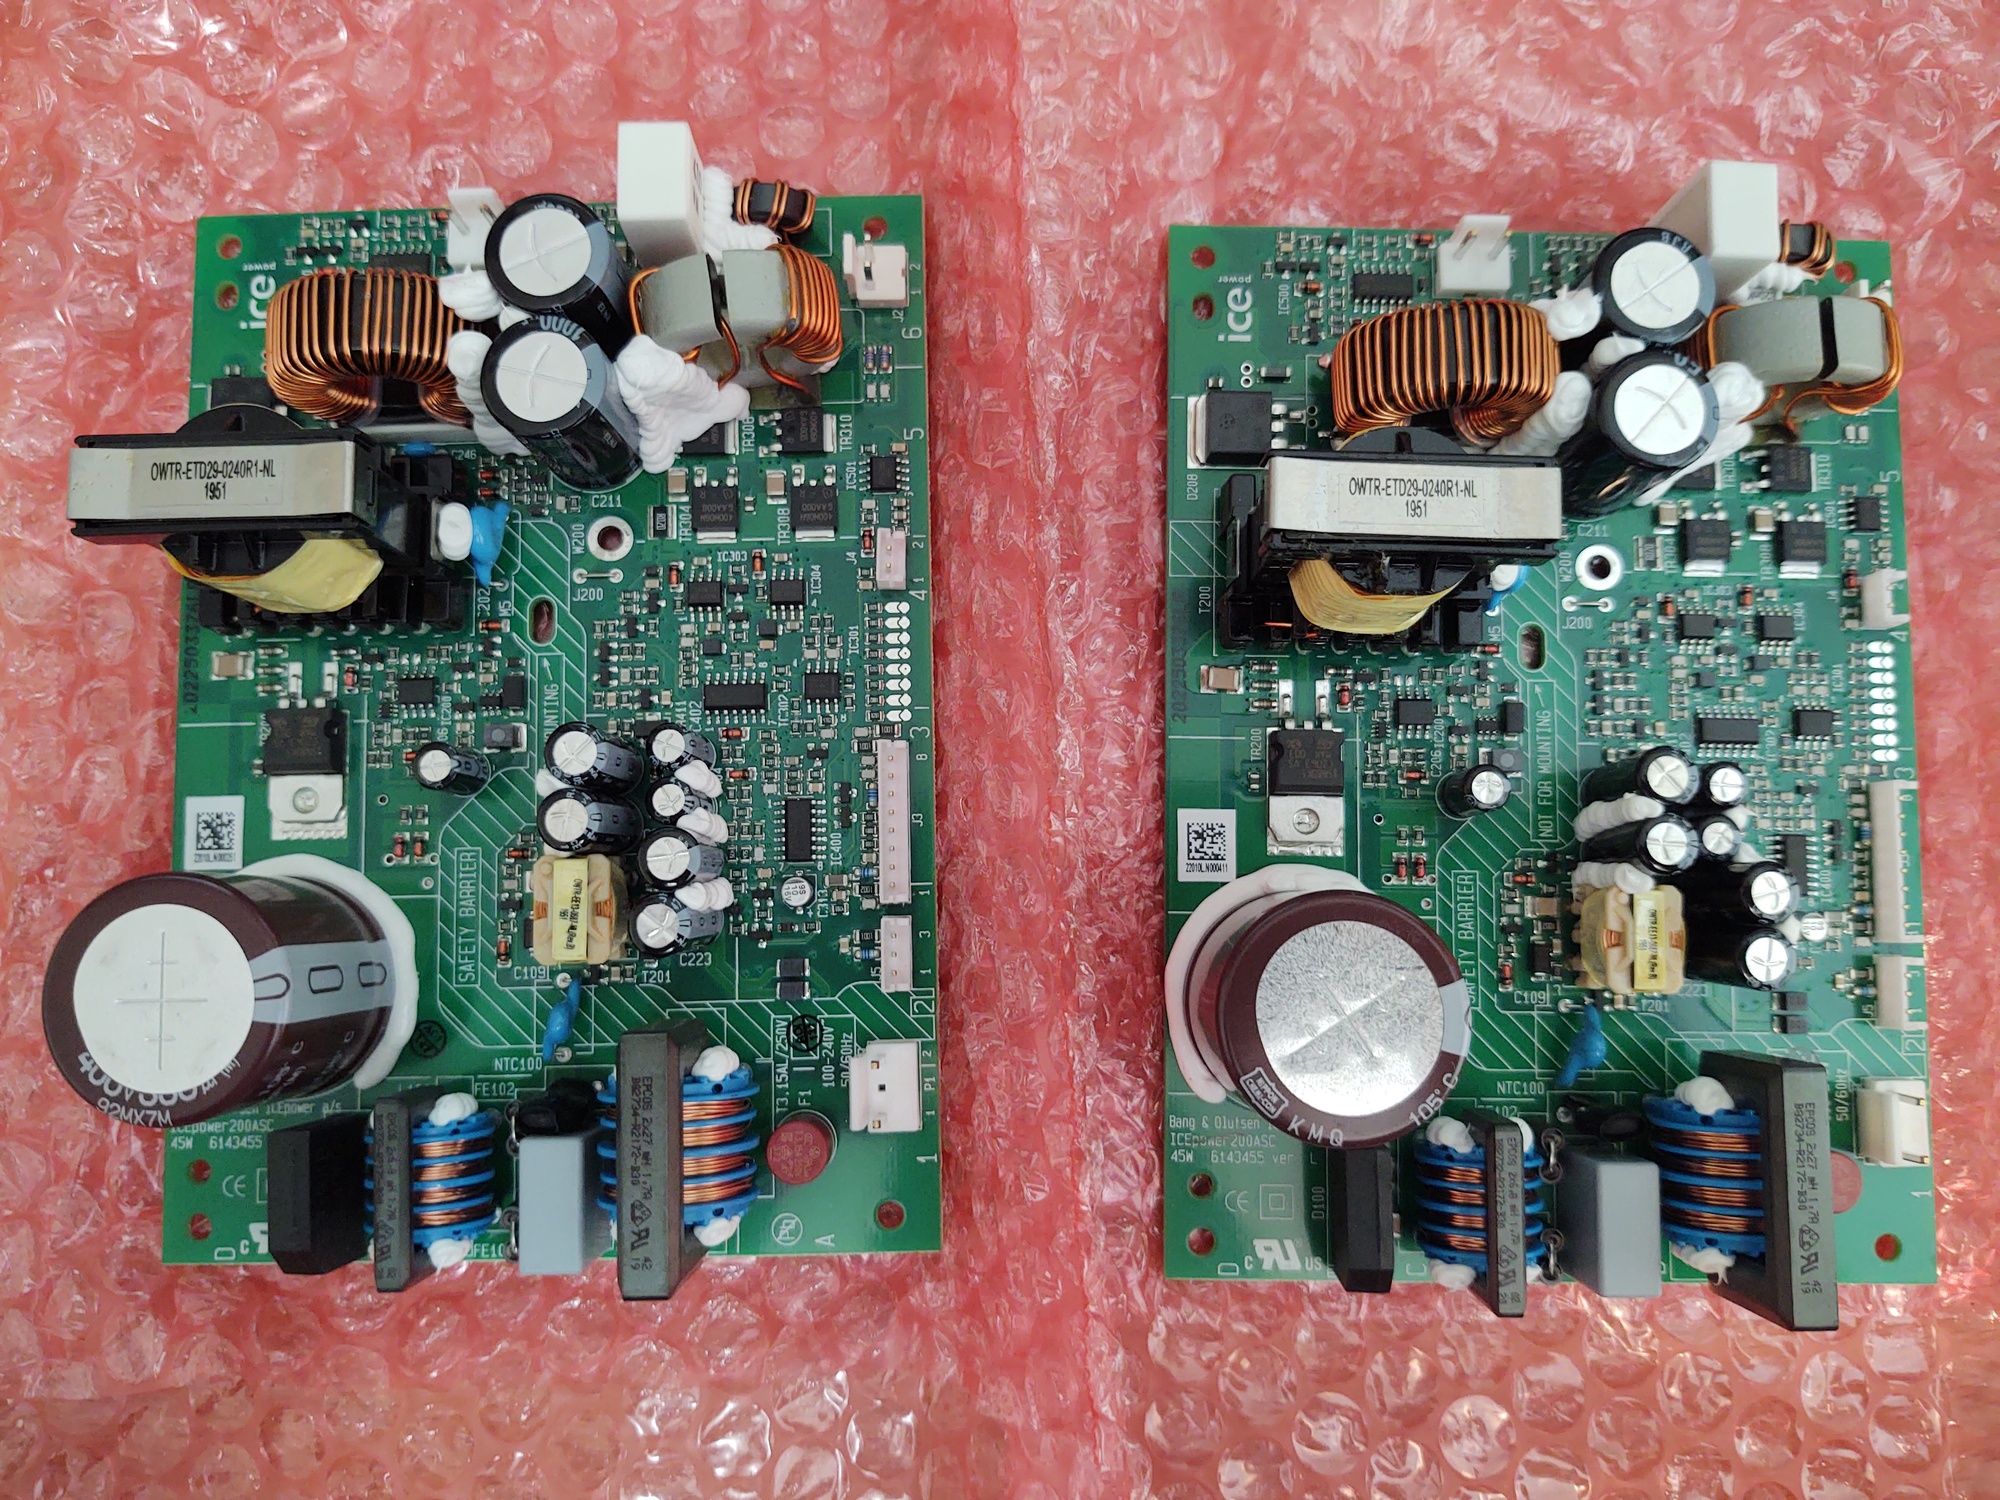
The cases with the cables and connectors arrived 10 days after ordering. It took almost a week to ship even though I paid extra for the expedited shipping. I chose to be forgiving since these are troubled times.
It should also be noted that the case does not include any documentation, wiring instructions or anything else. It’s just a bunch of parts, but at least they were nicely packed.
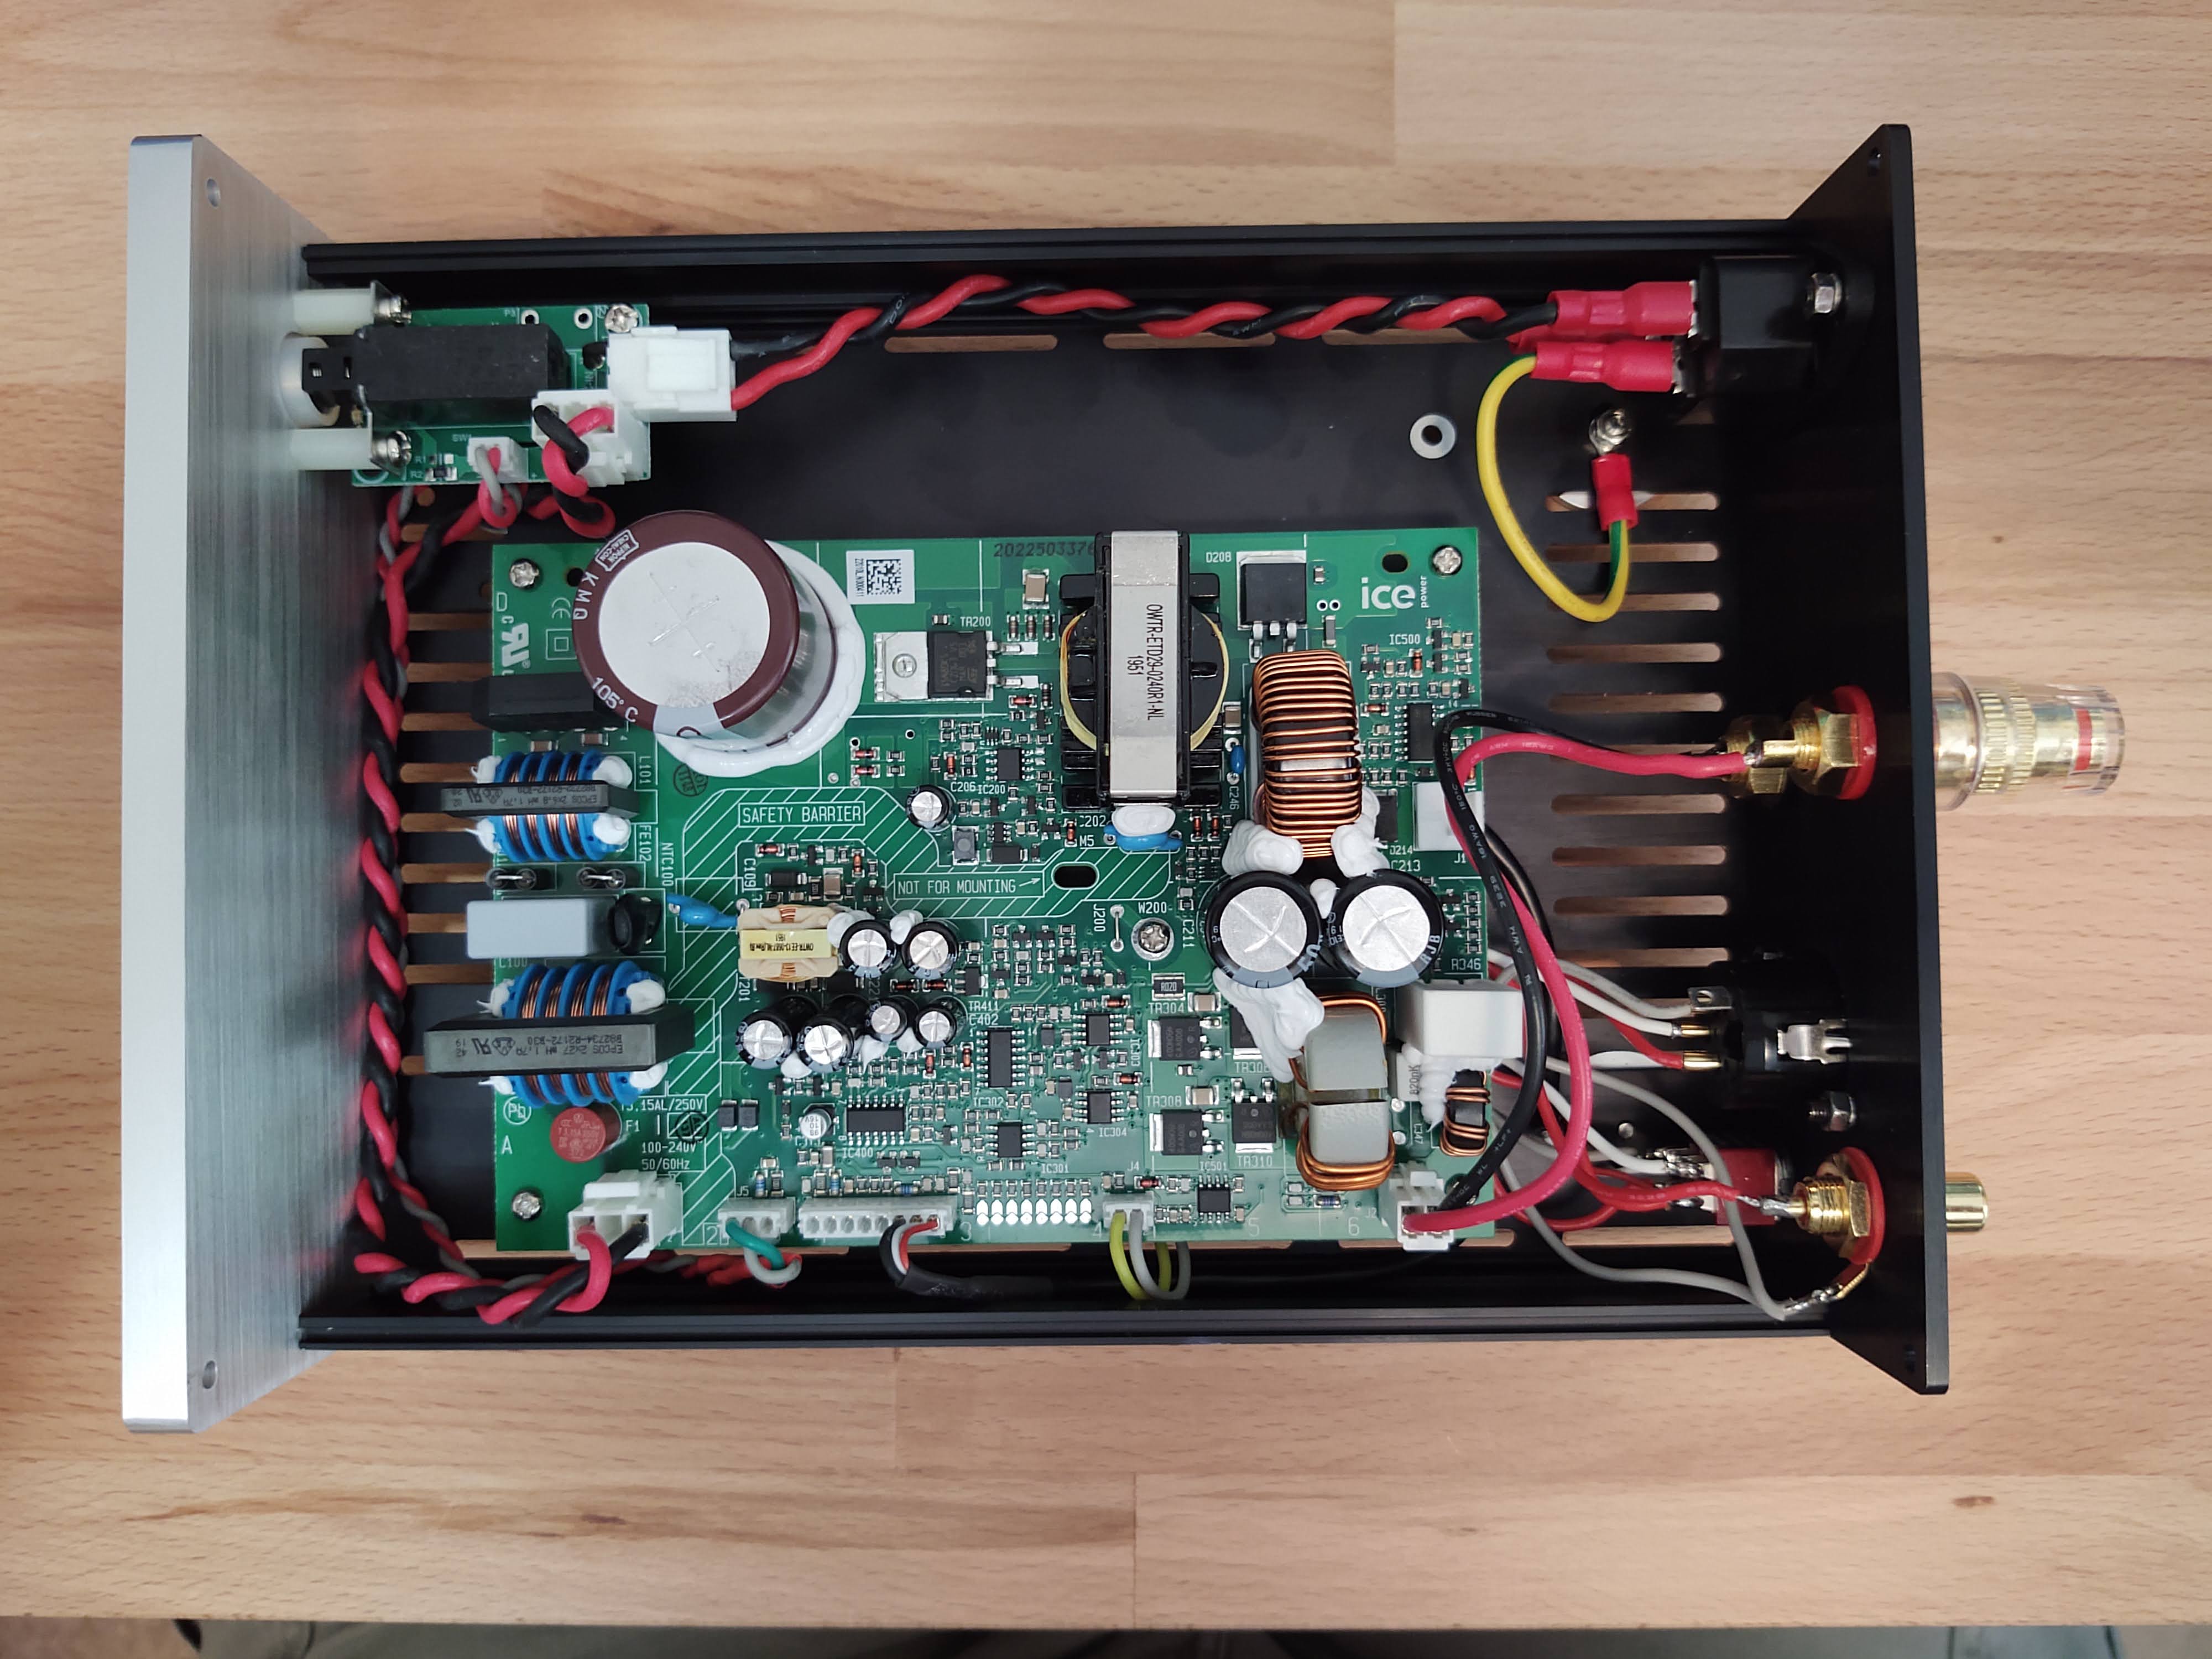
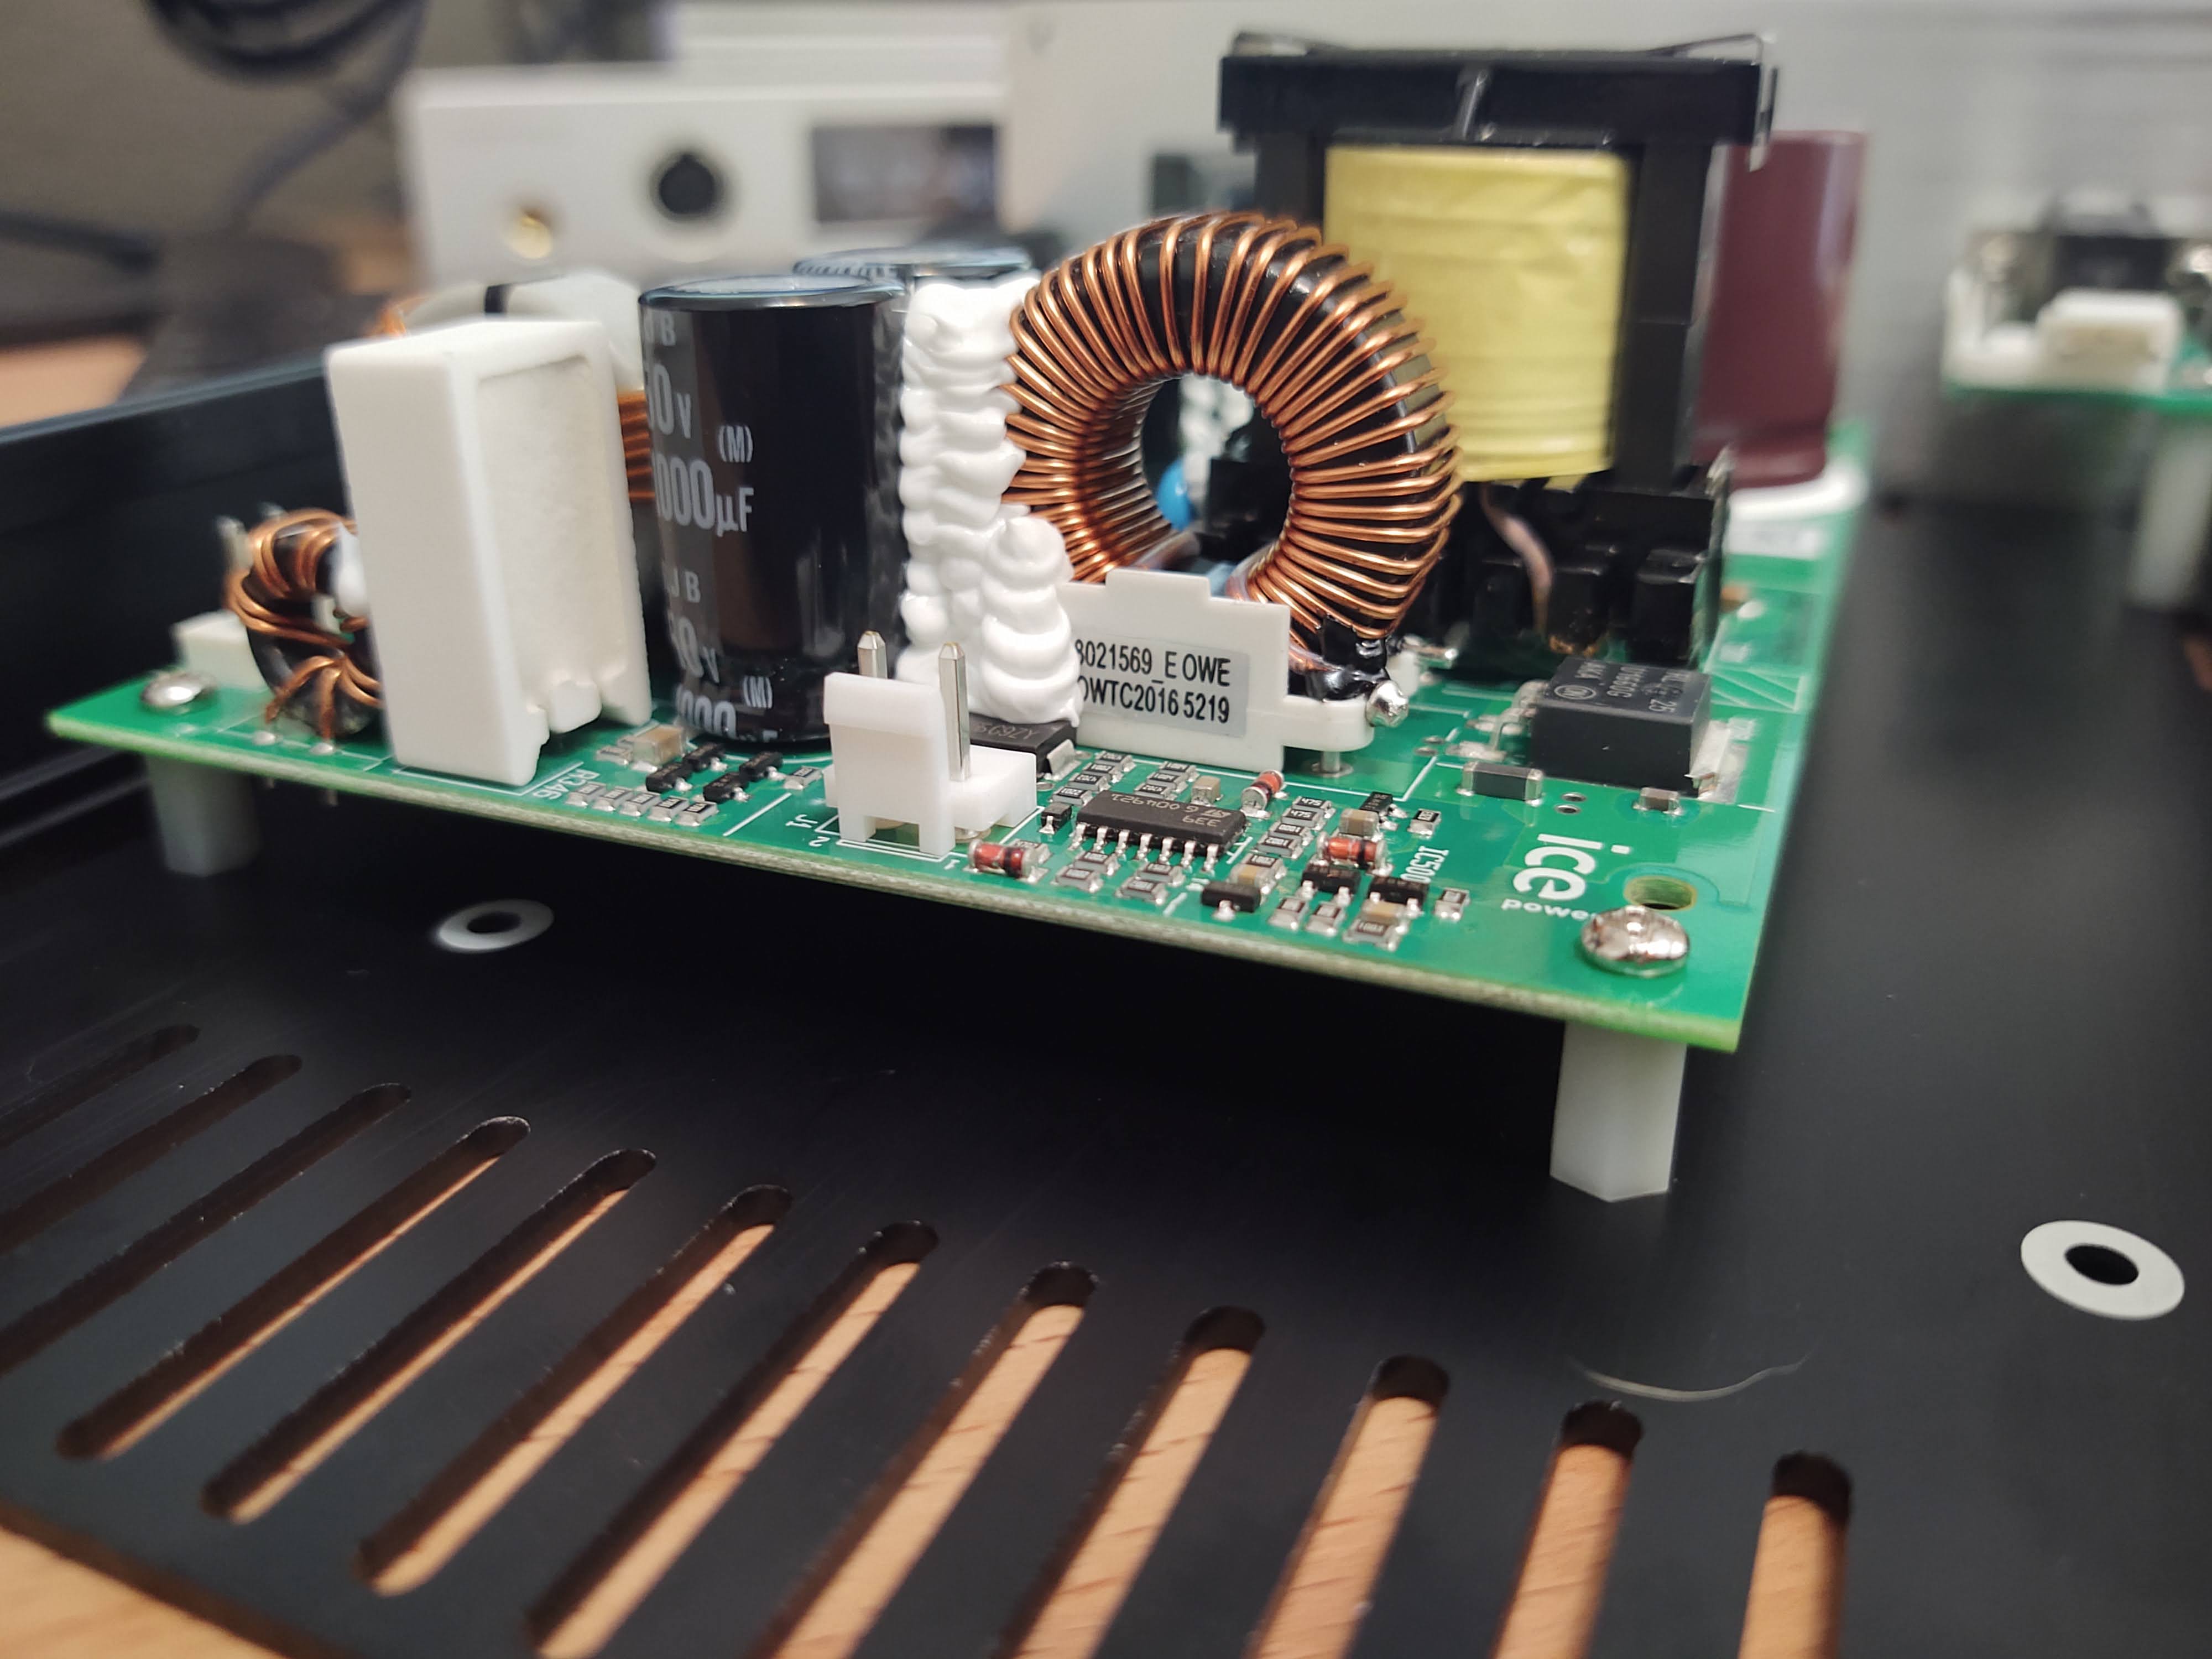
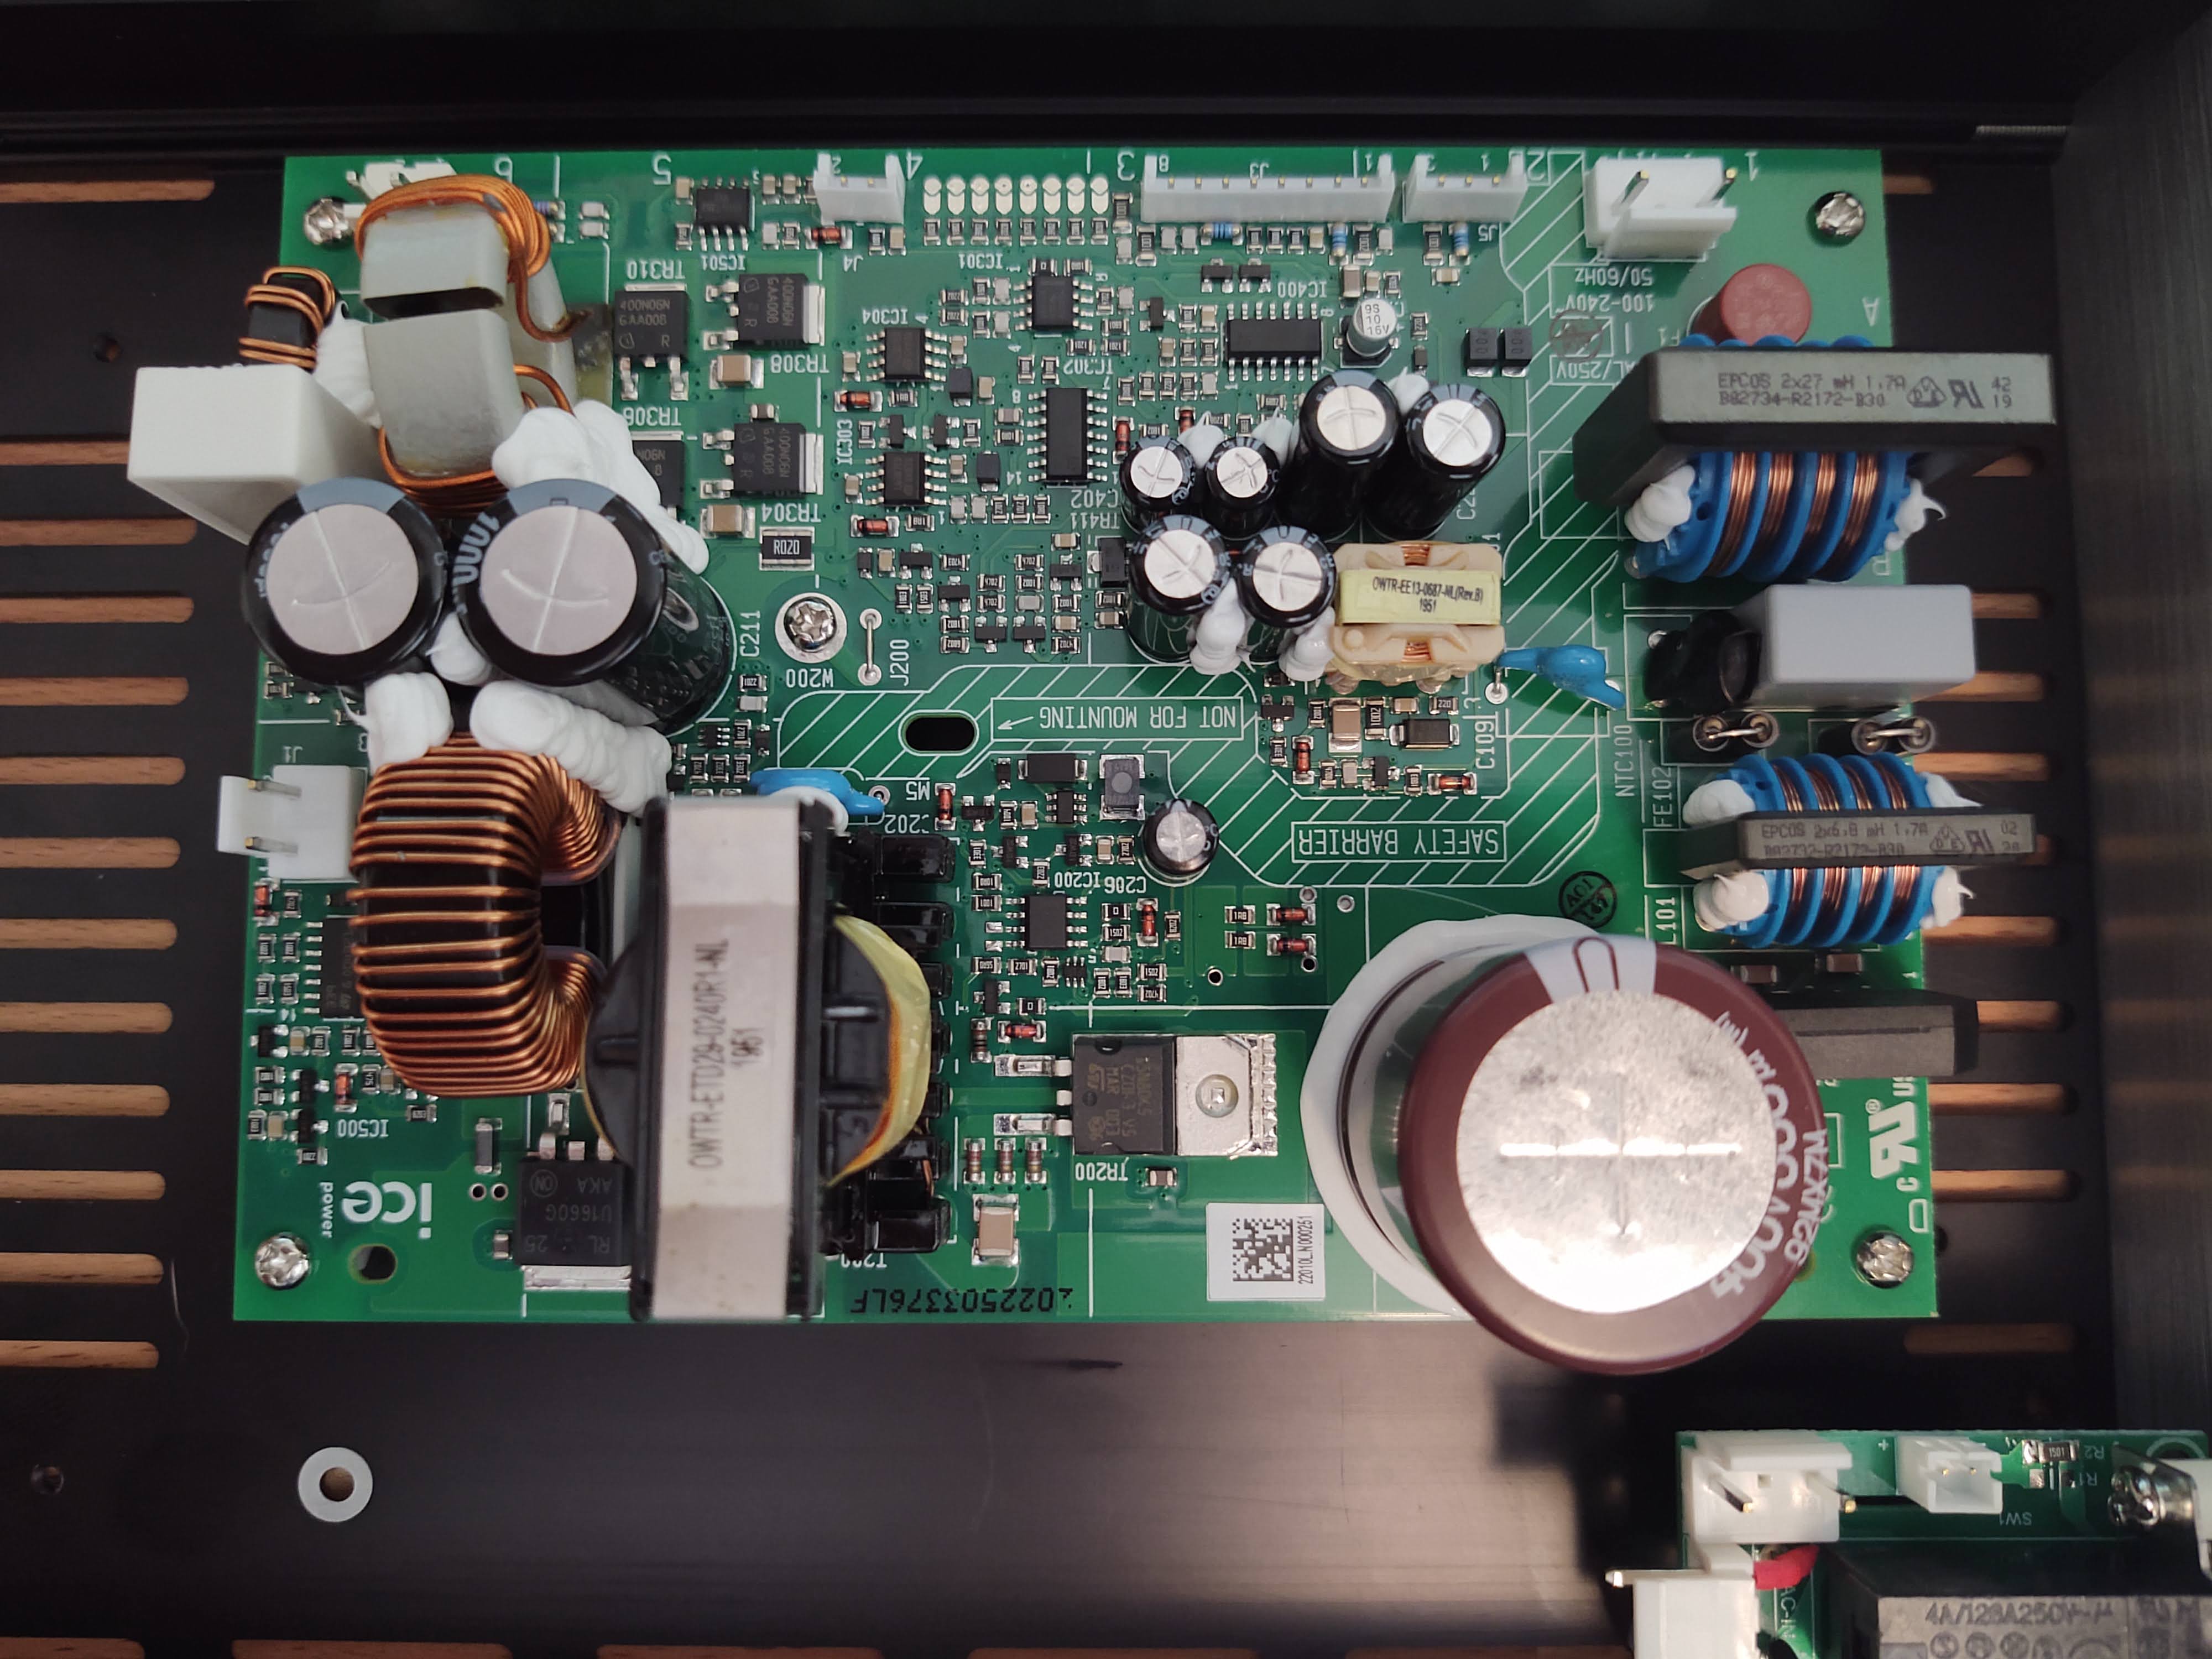
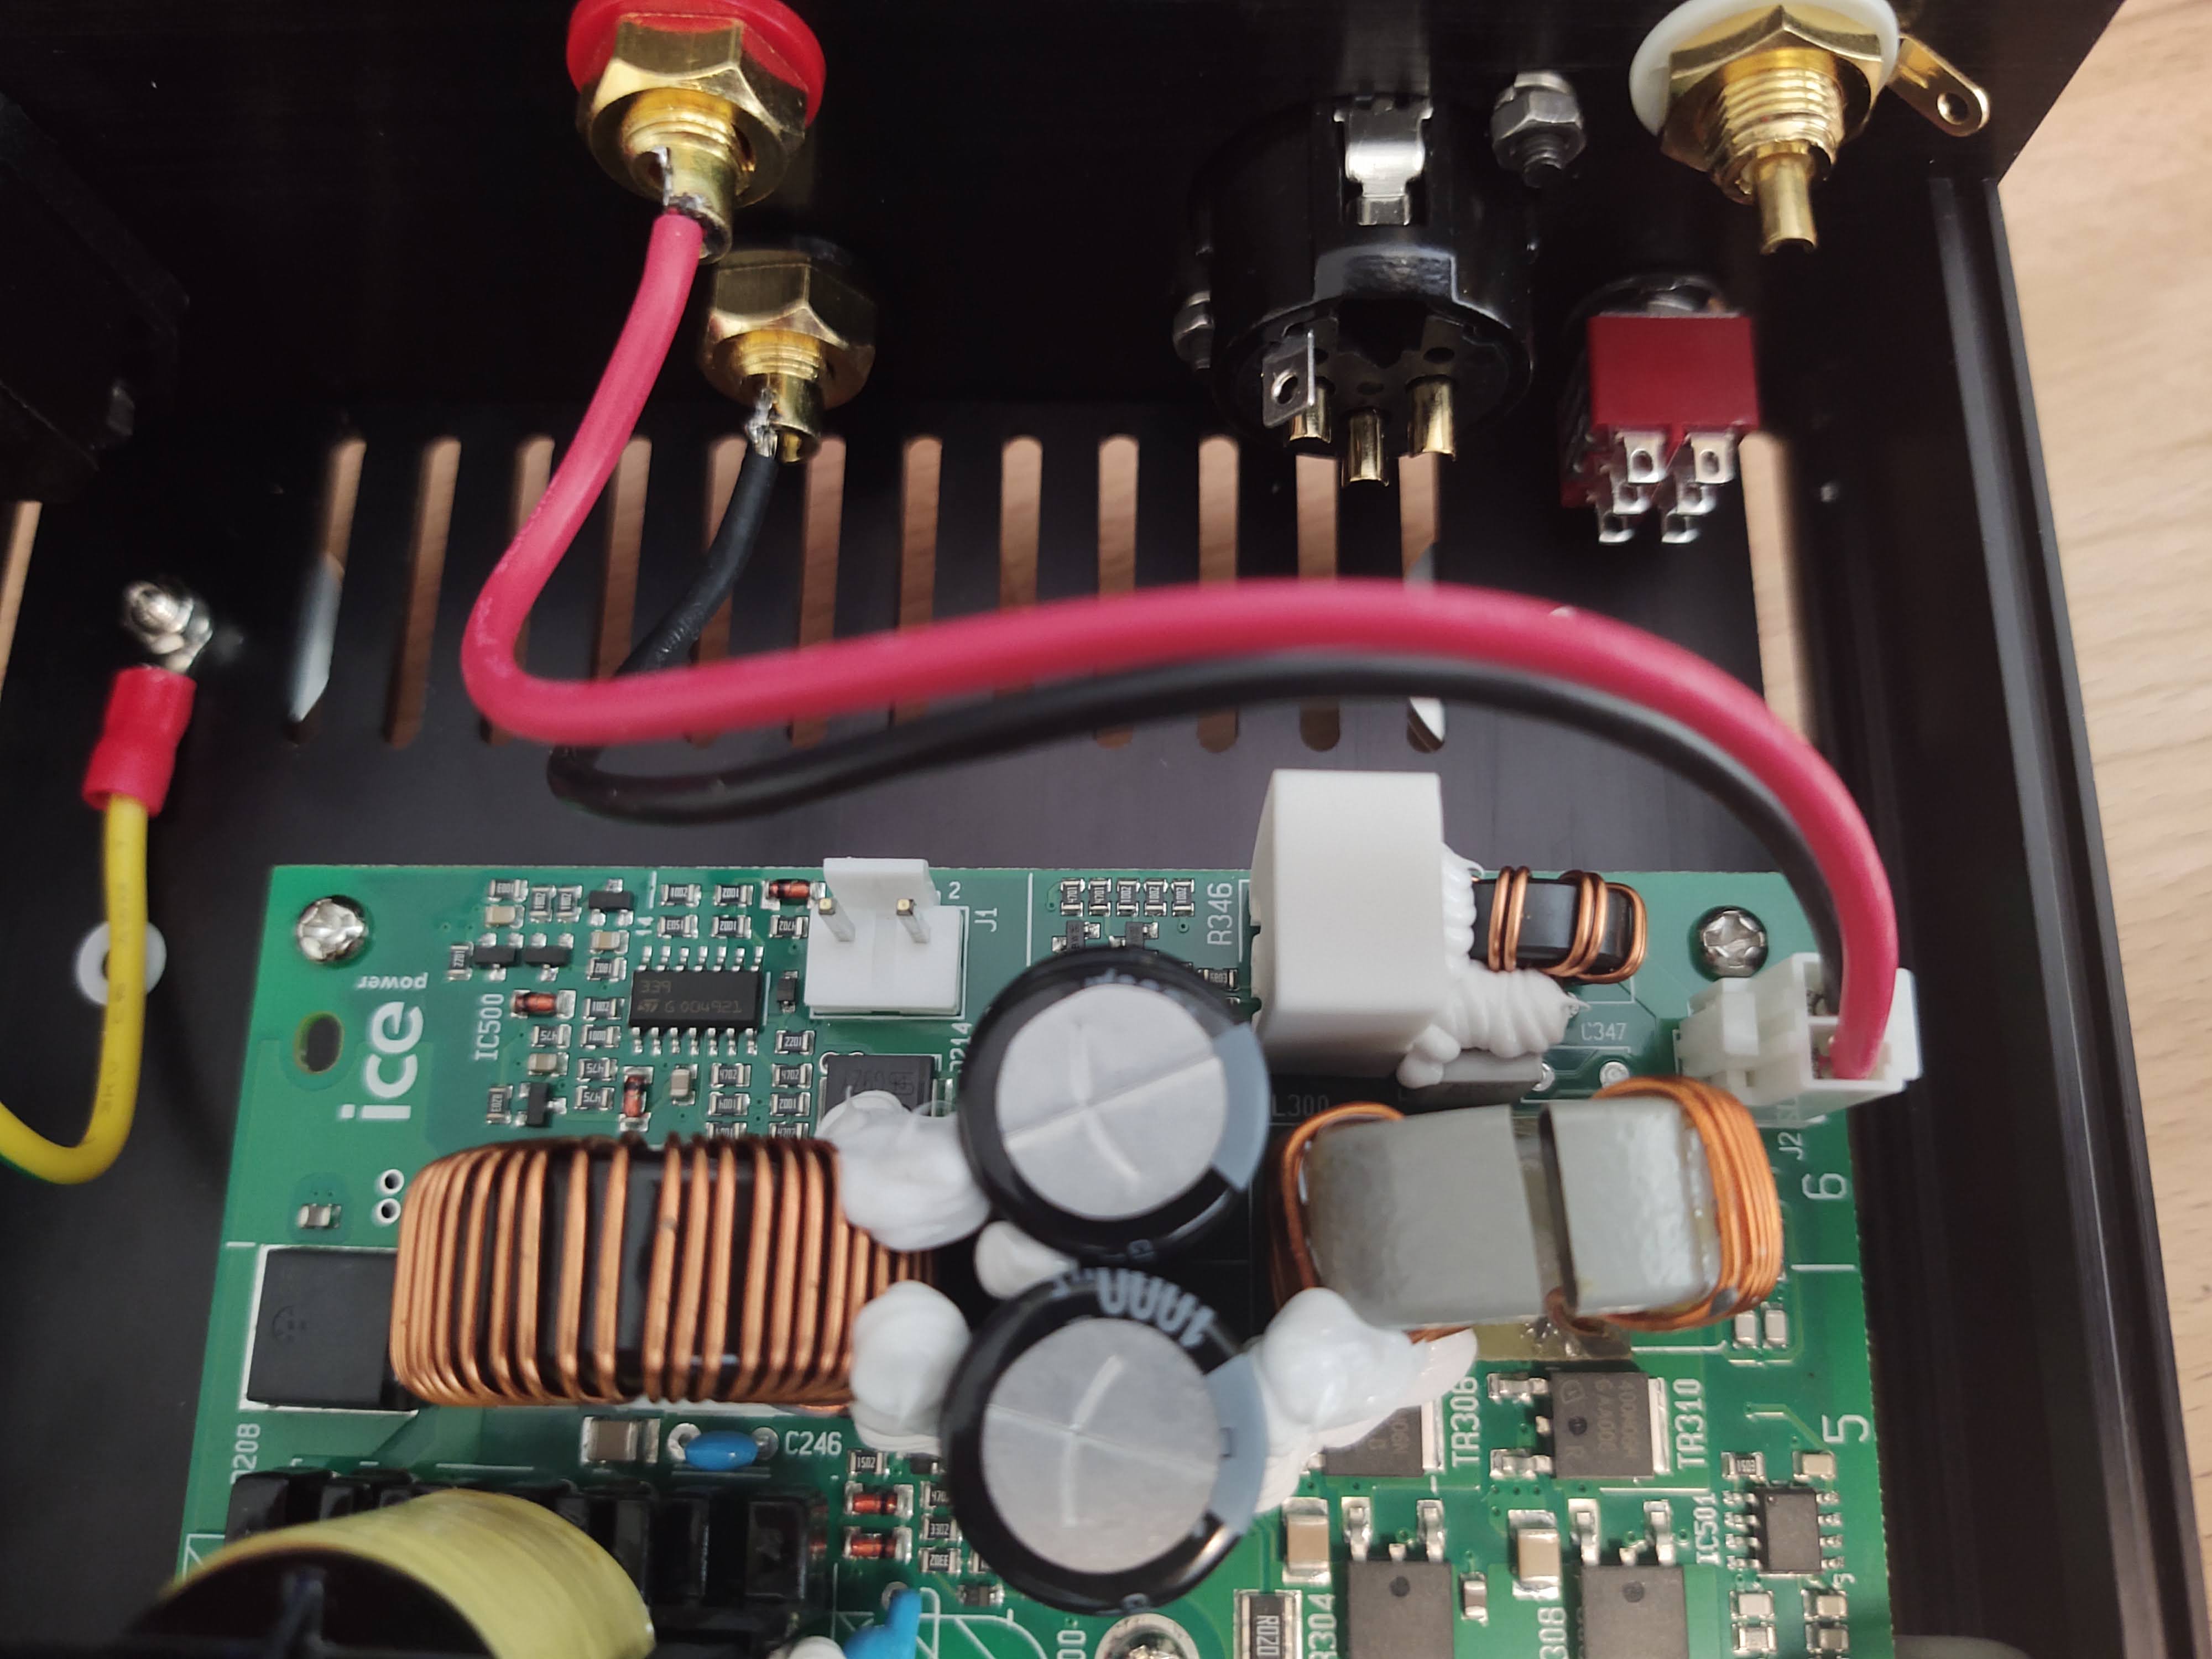
Friday night I did the mechanical assembly and Saturday afternoon, I did all the cabling. I would say total time was about 3 hours. This was mostly because I was relying on a combination of YouTube videos, the amplifier schematic and some random drawings to figure out how everything needs to go for this specific build. But in the end, it worked! The only problem I had was that the RCA/XLR switch had to be rotated 180 inside the chassis.
When I find time to assemble the second one, I will carefully document each step and take pictures.
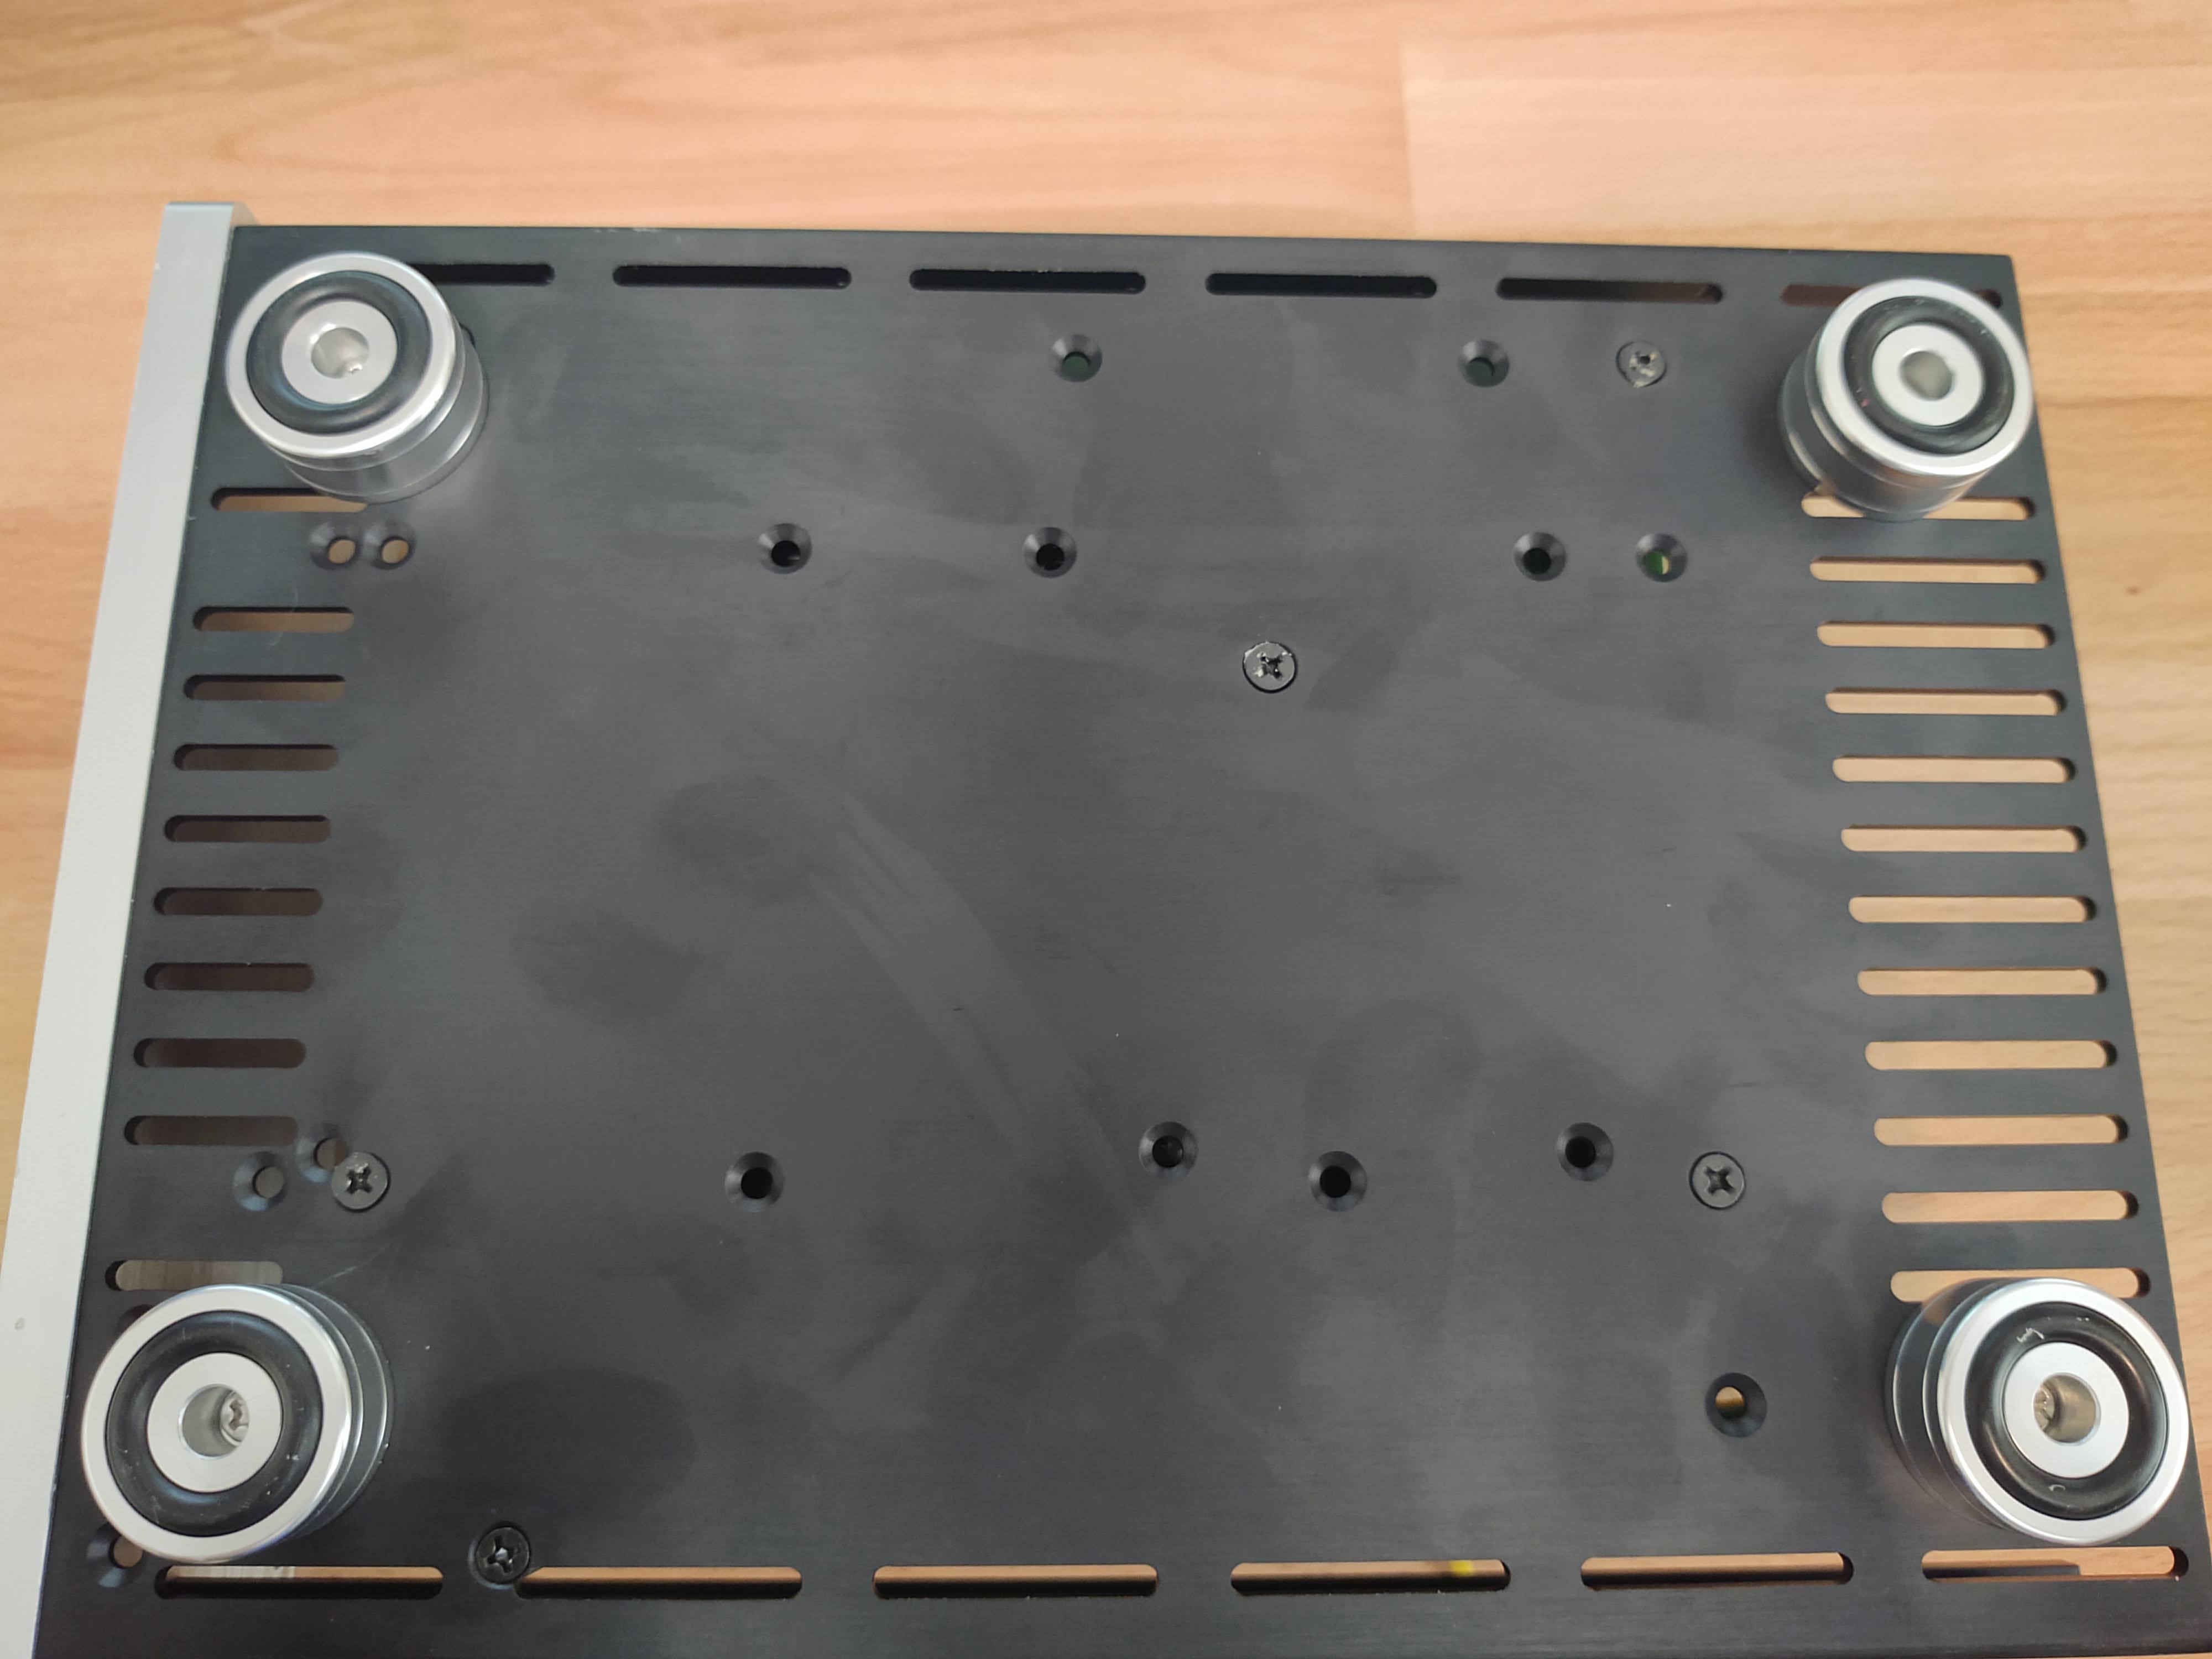
Mount feet to case. One of the feet will line up below the power socket and one of the screws will be longer than the others. Use the long screw where the power socket will be located when the back plate is attached.
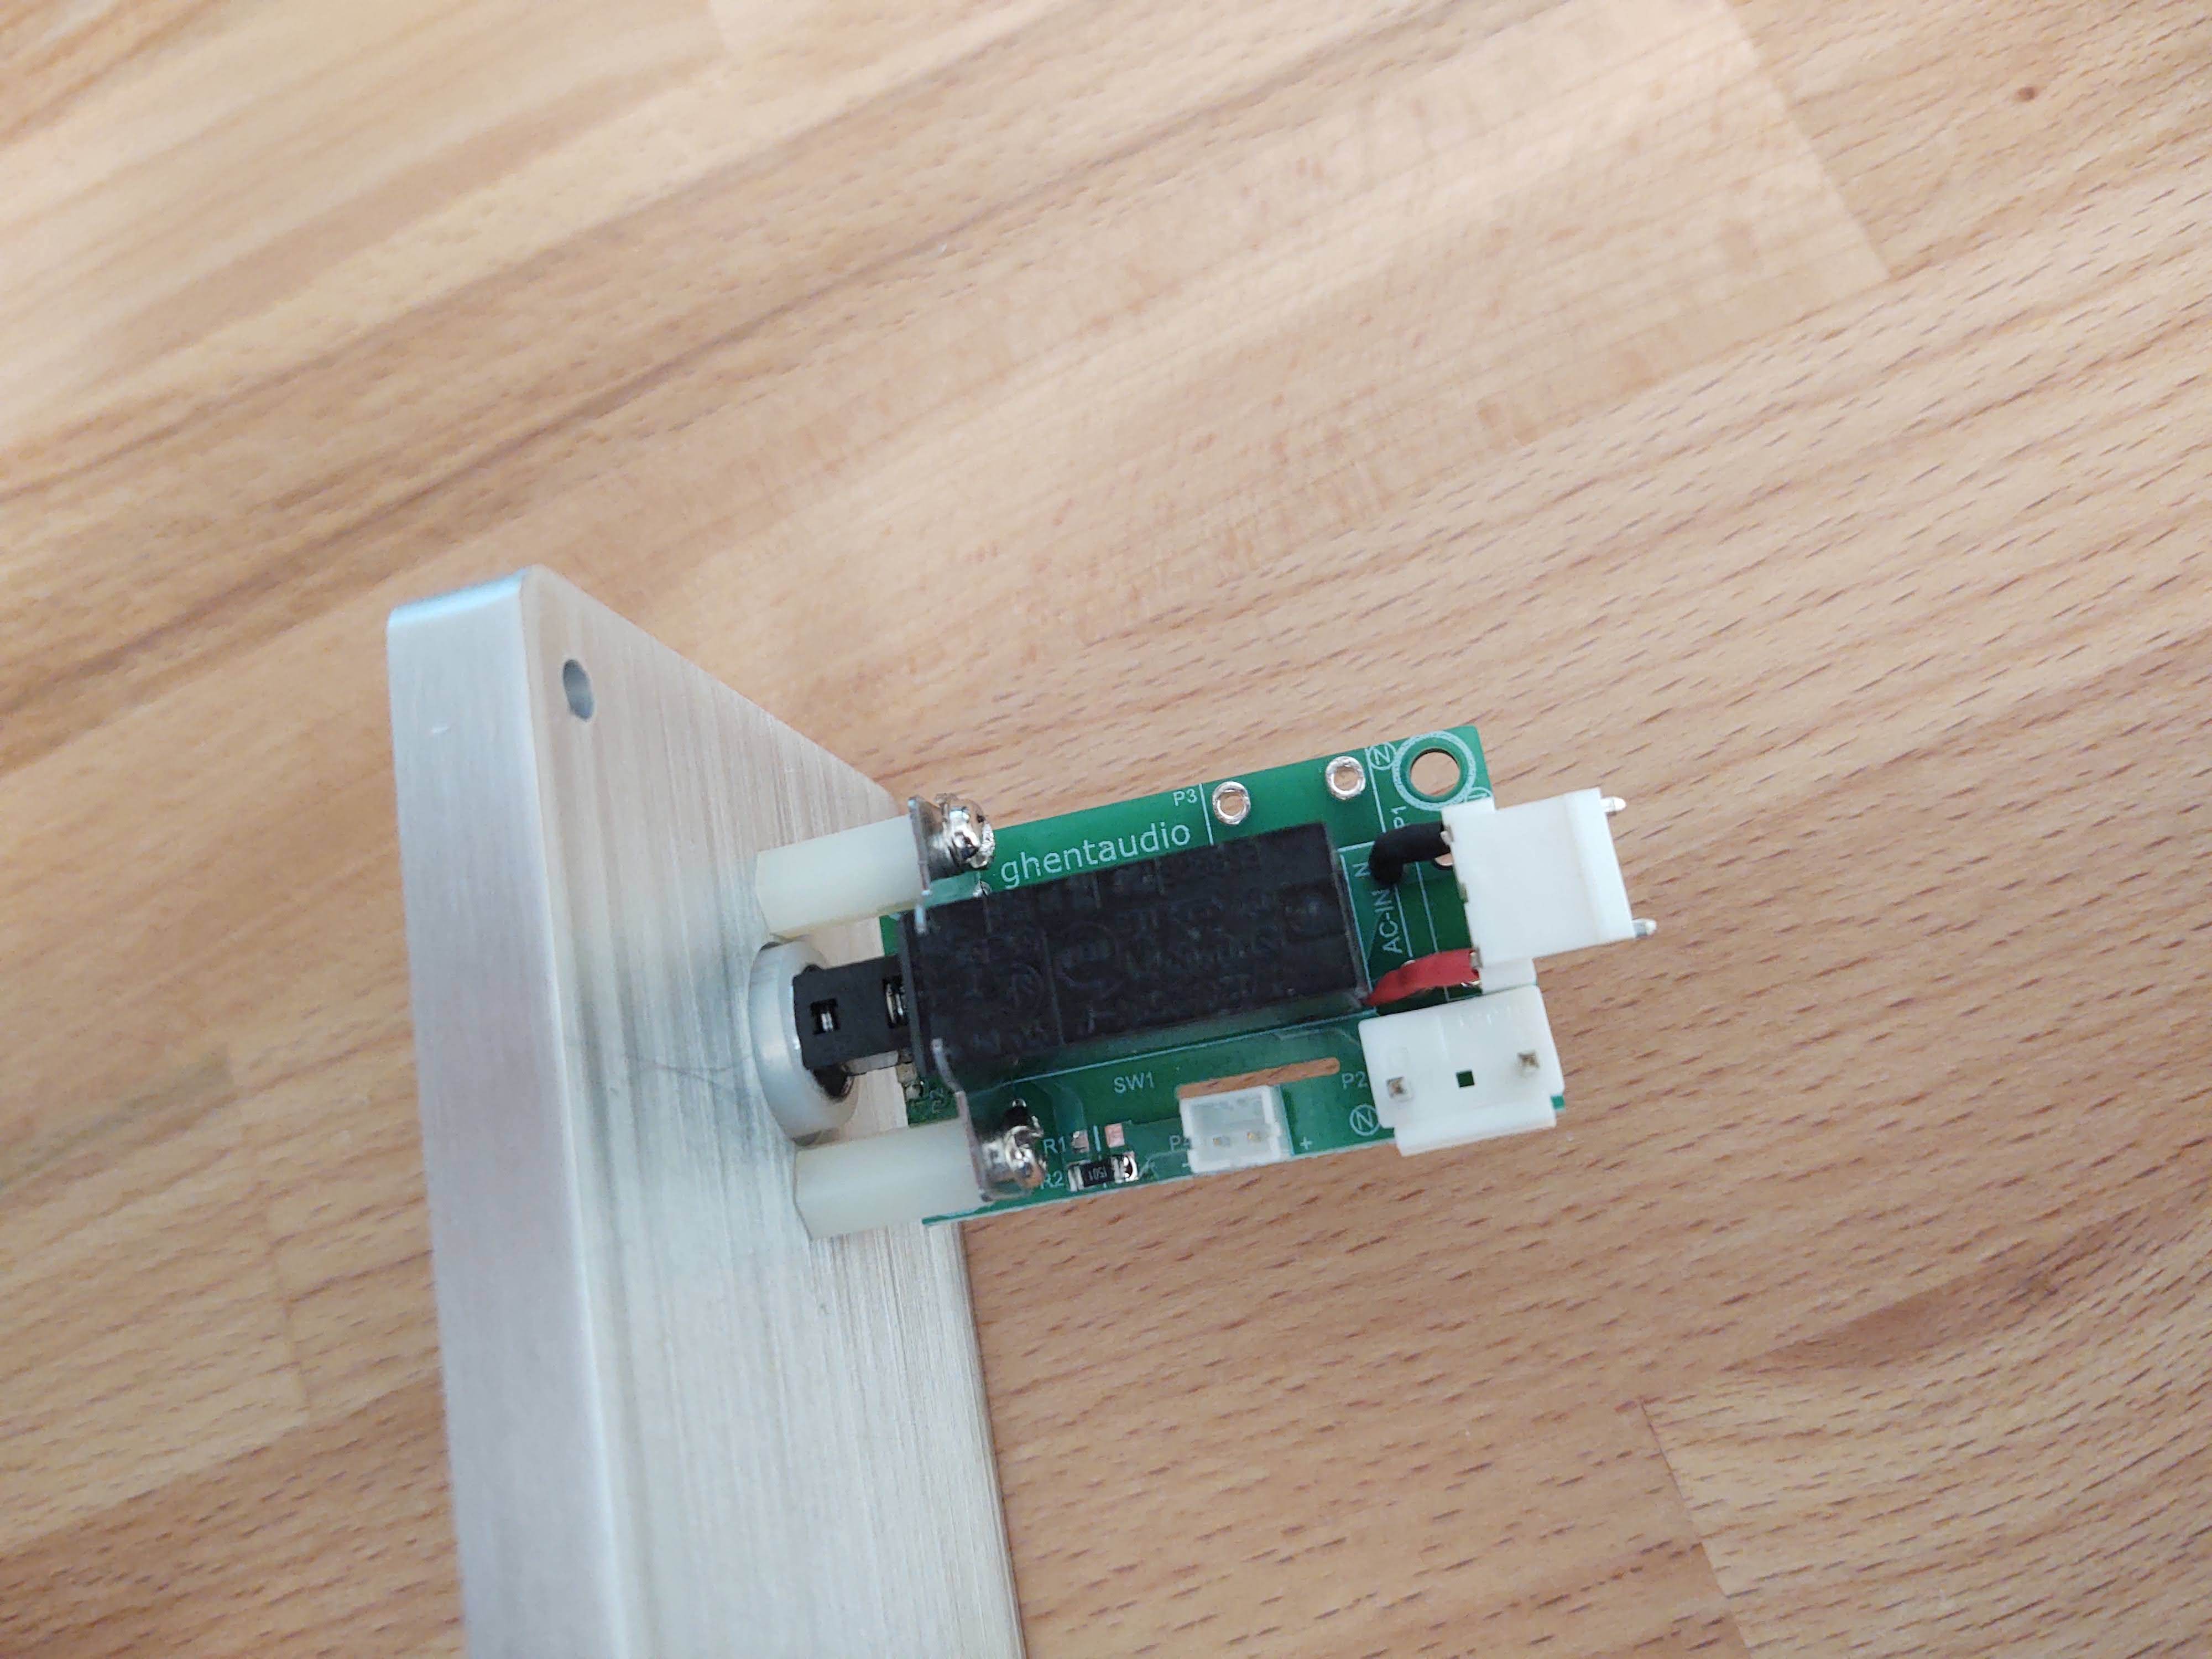
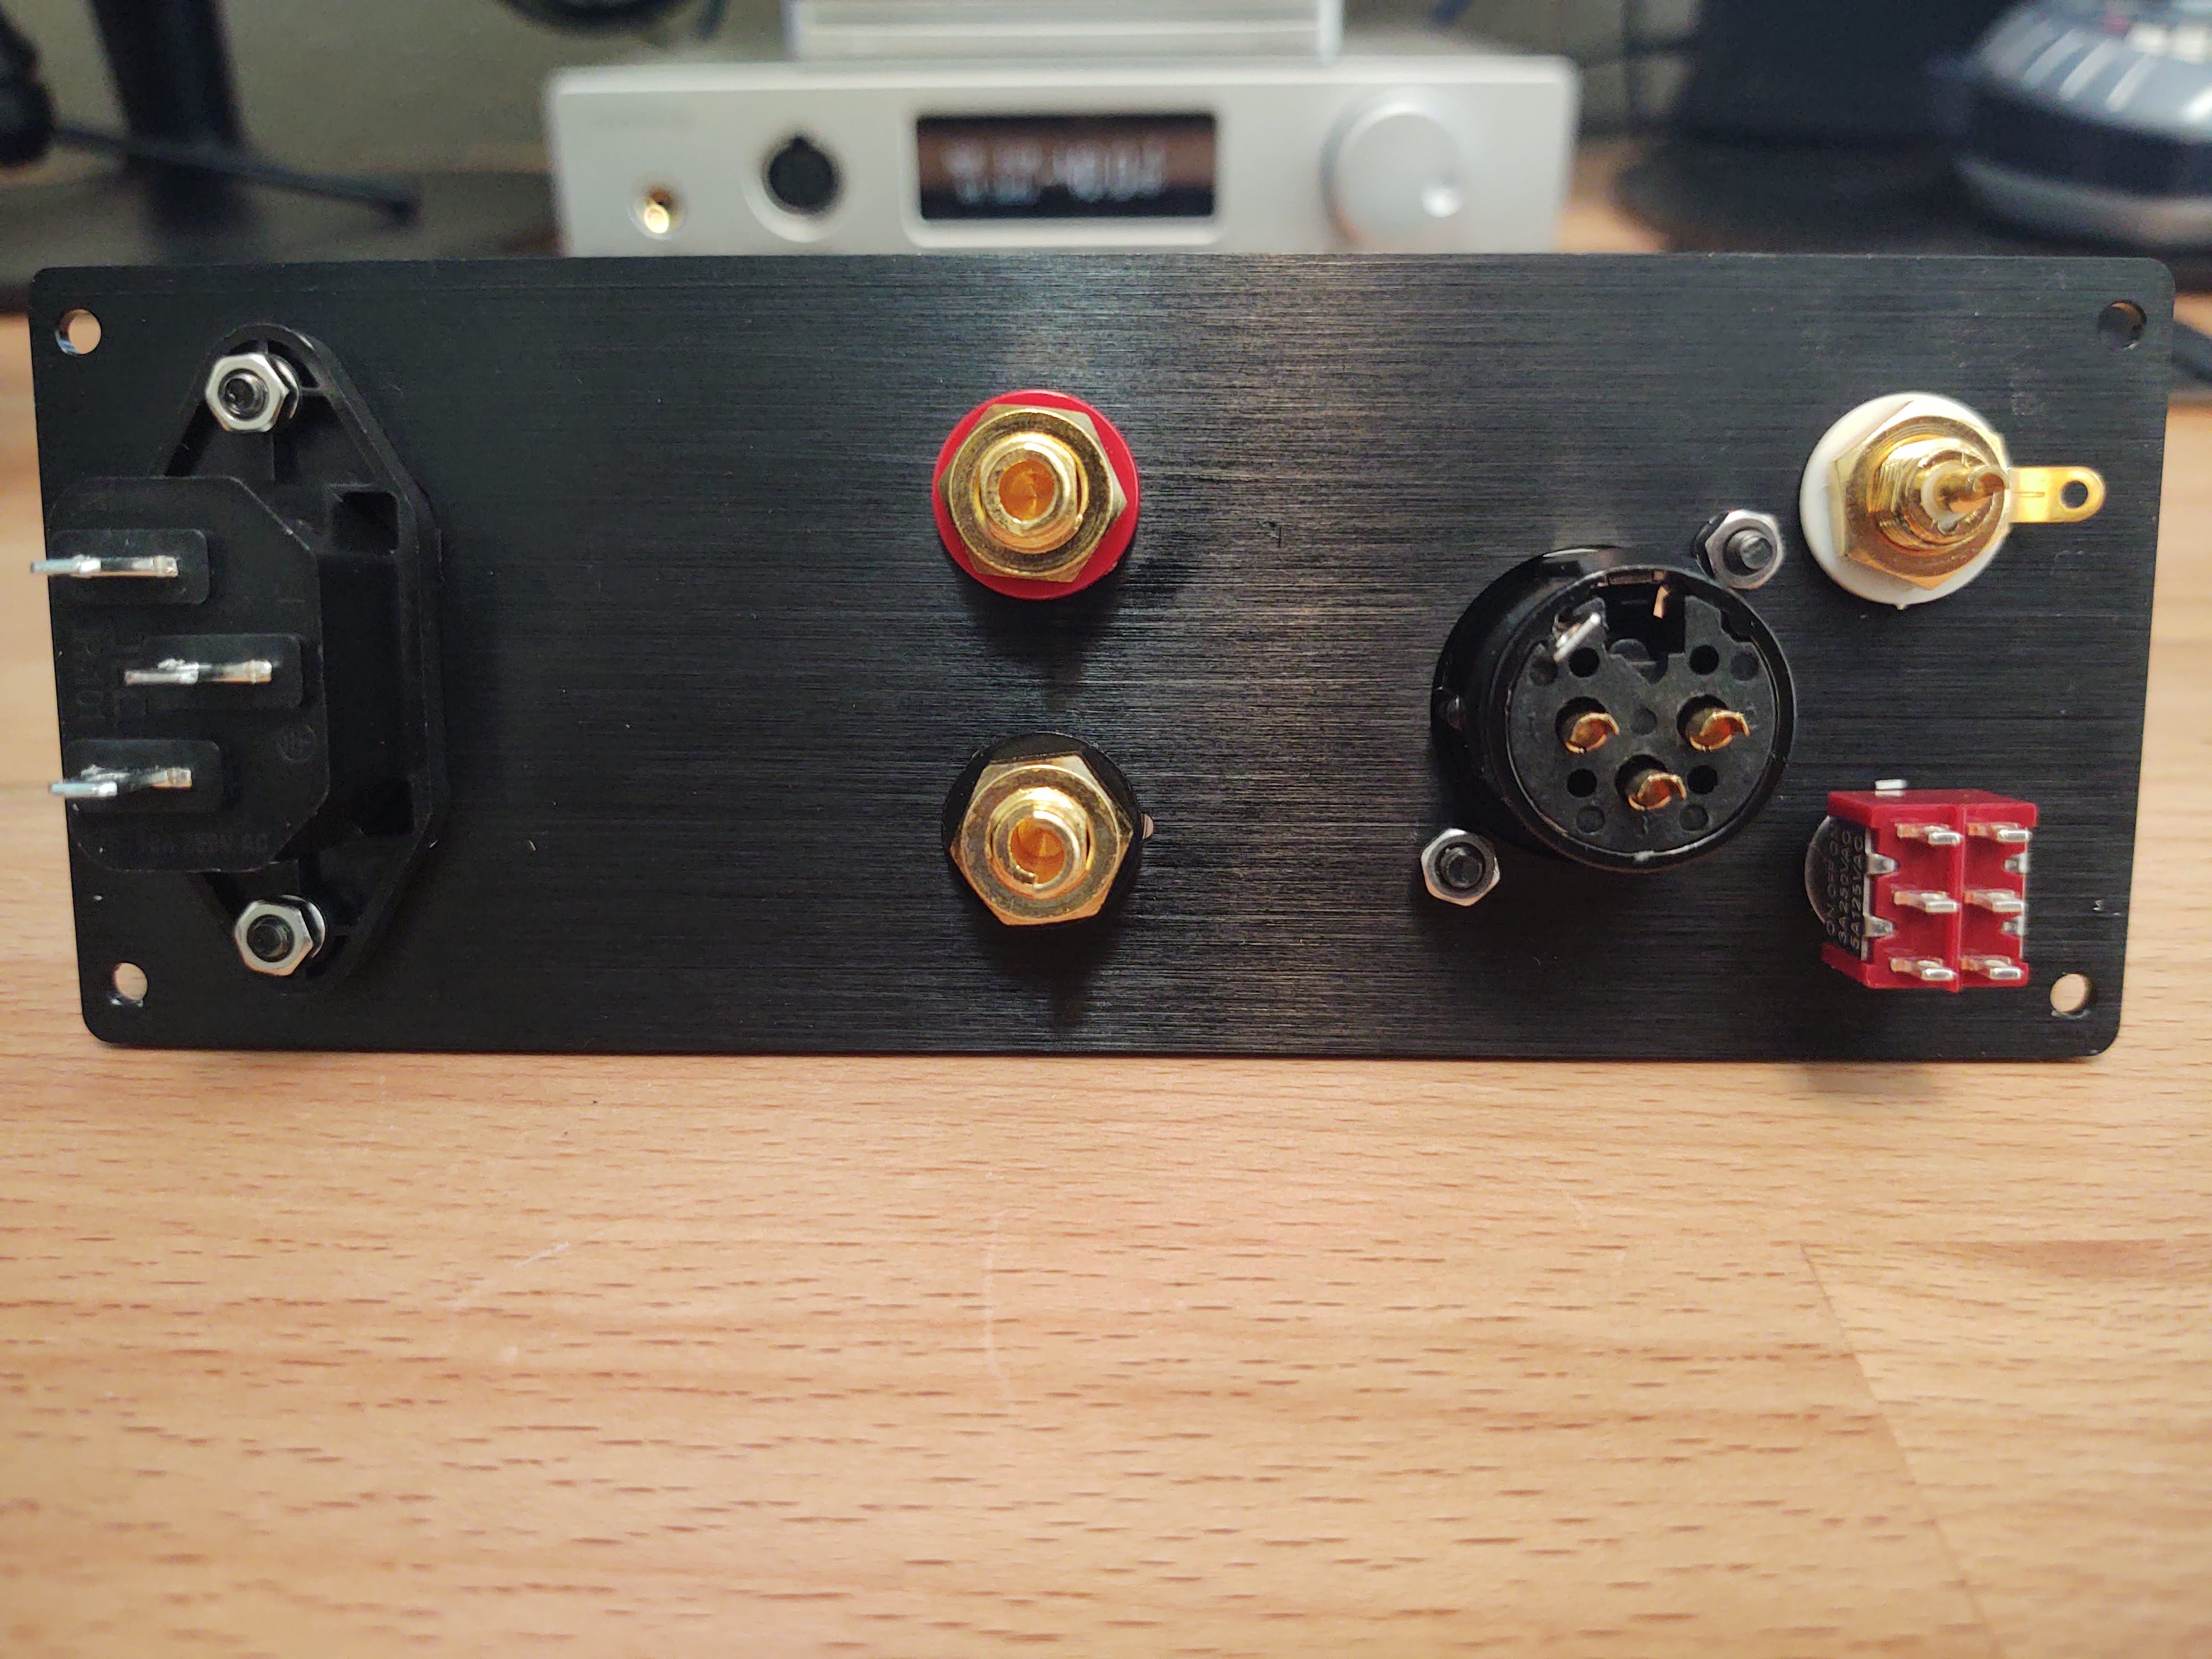
Mount back panel on bottom of case and run the power cable from the power socket to the power switch (Neutral to Neutral, Live to Live). Also connect the ground wire mounted to the chassis through the foot screw.
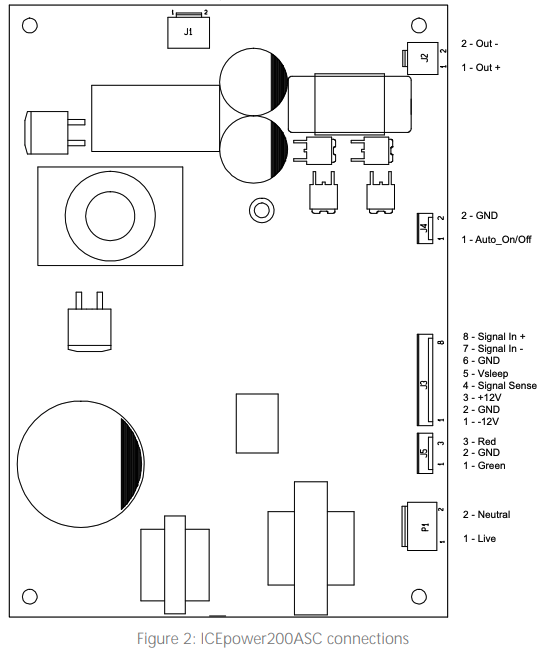
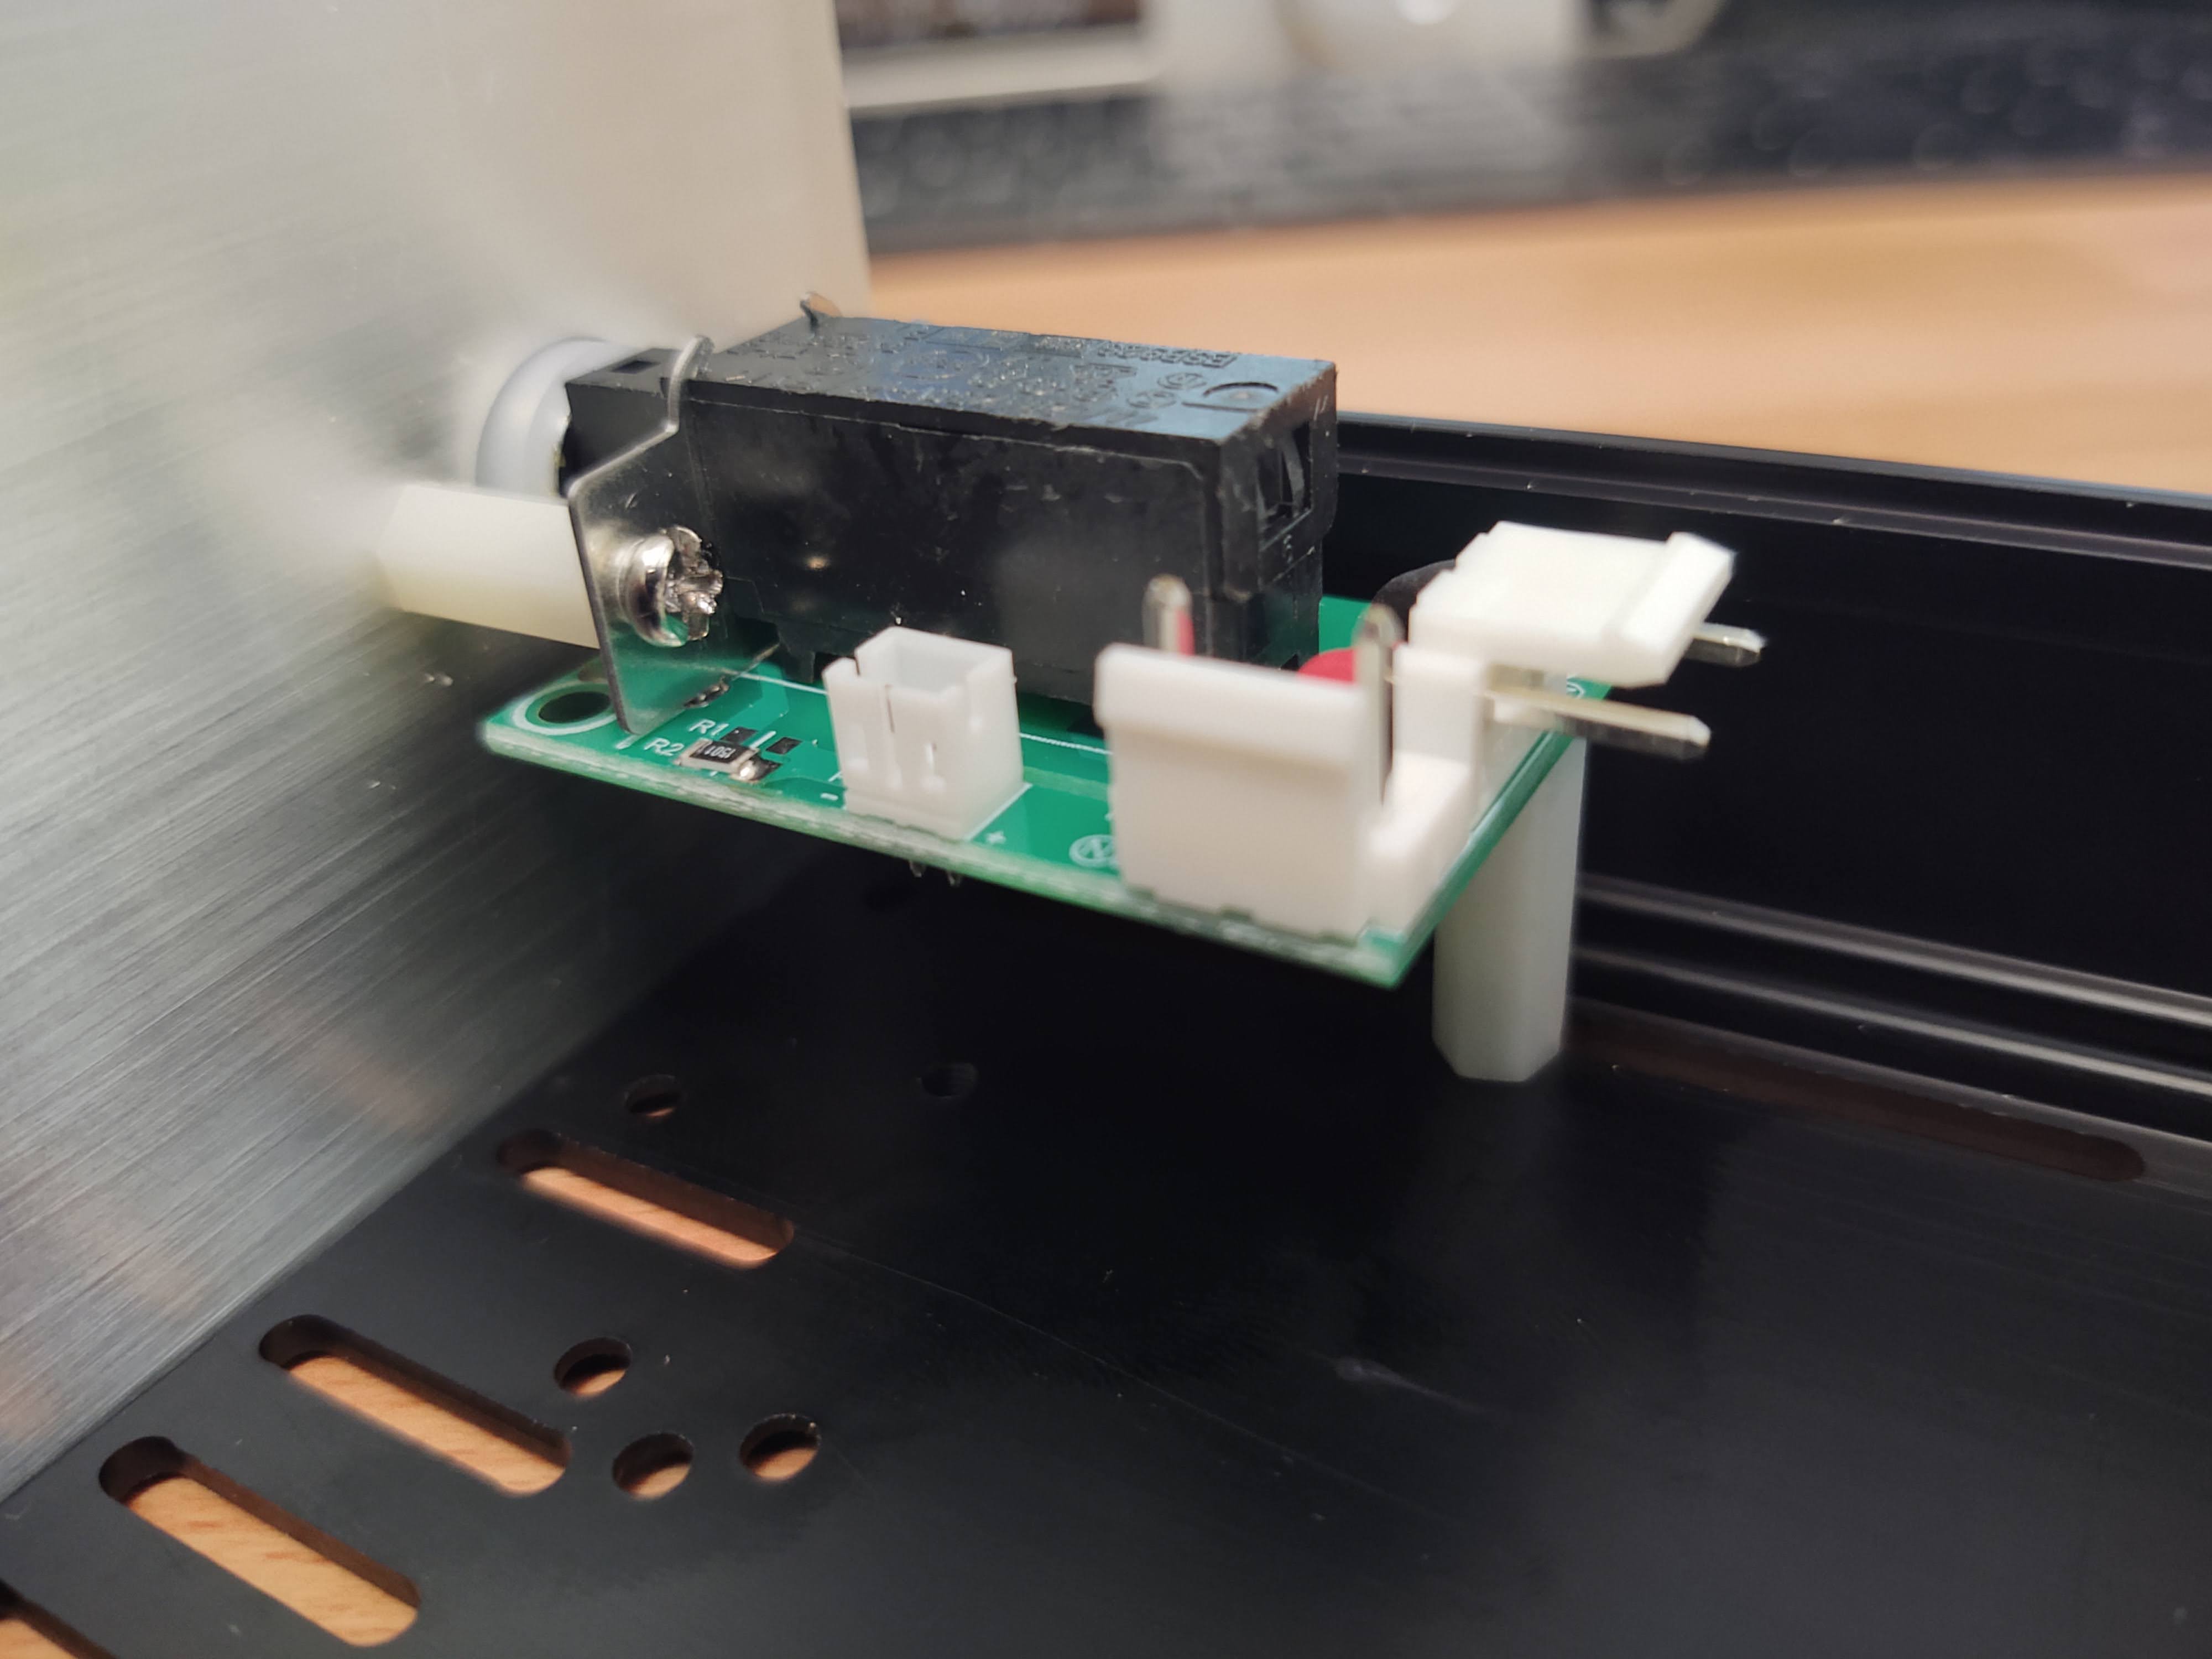
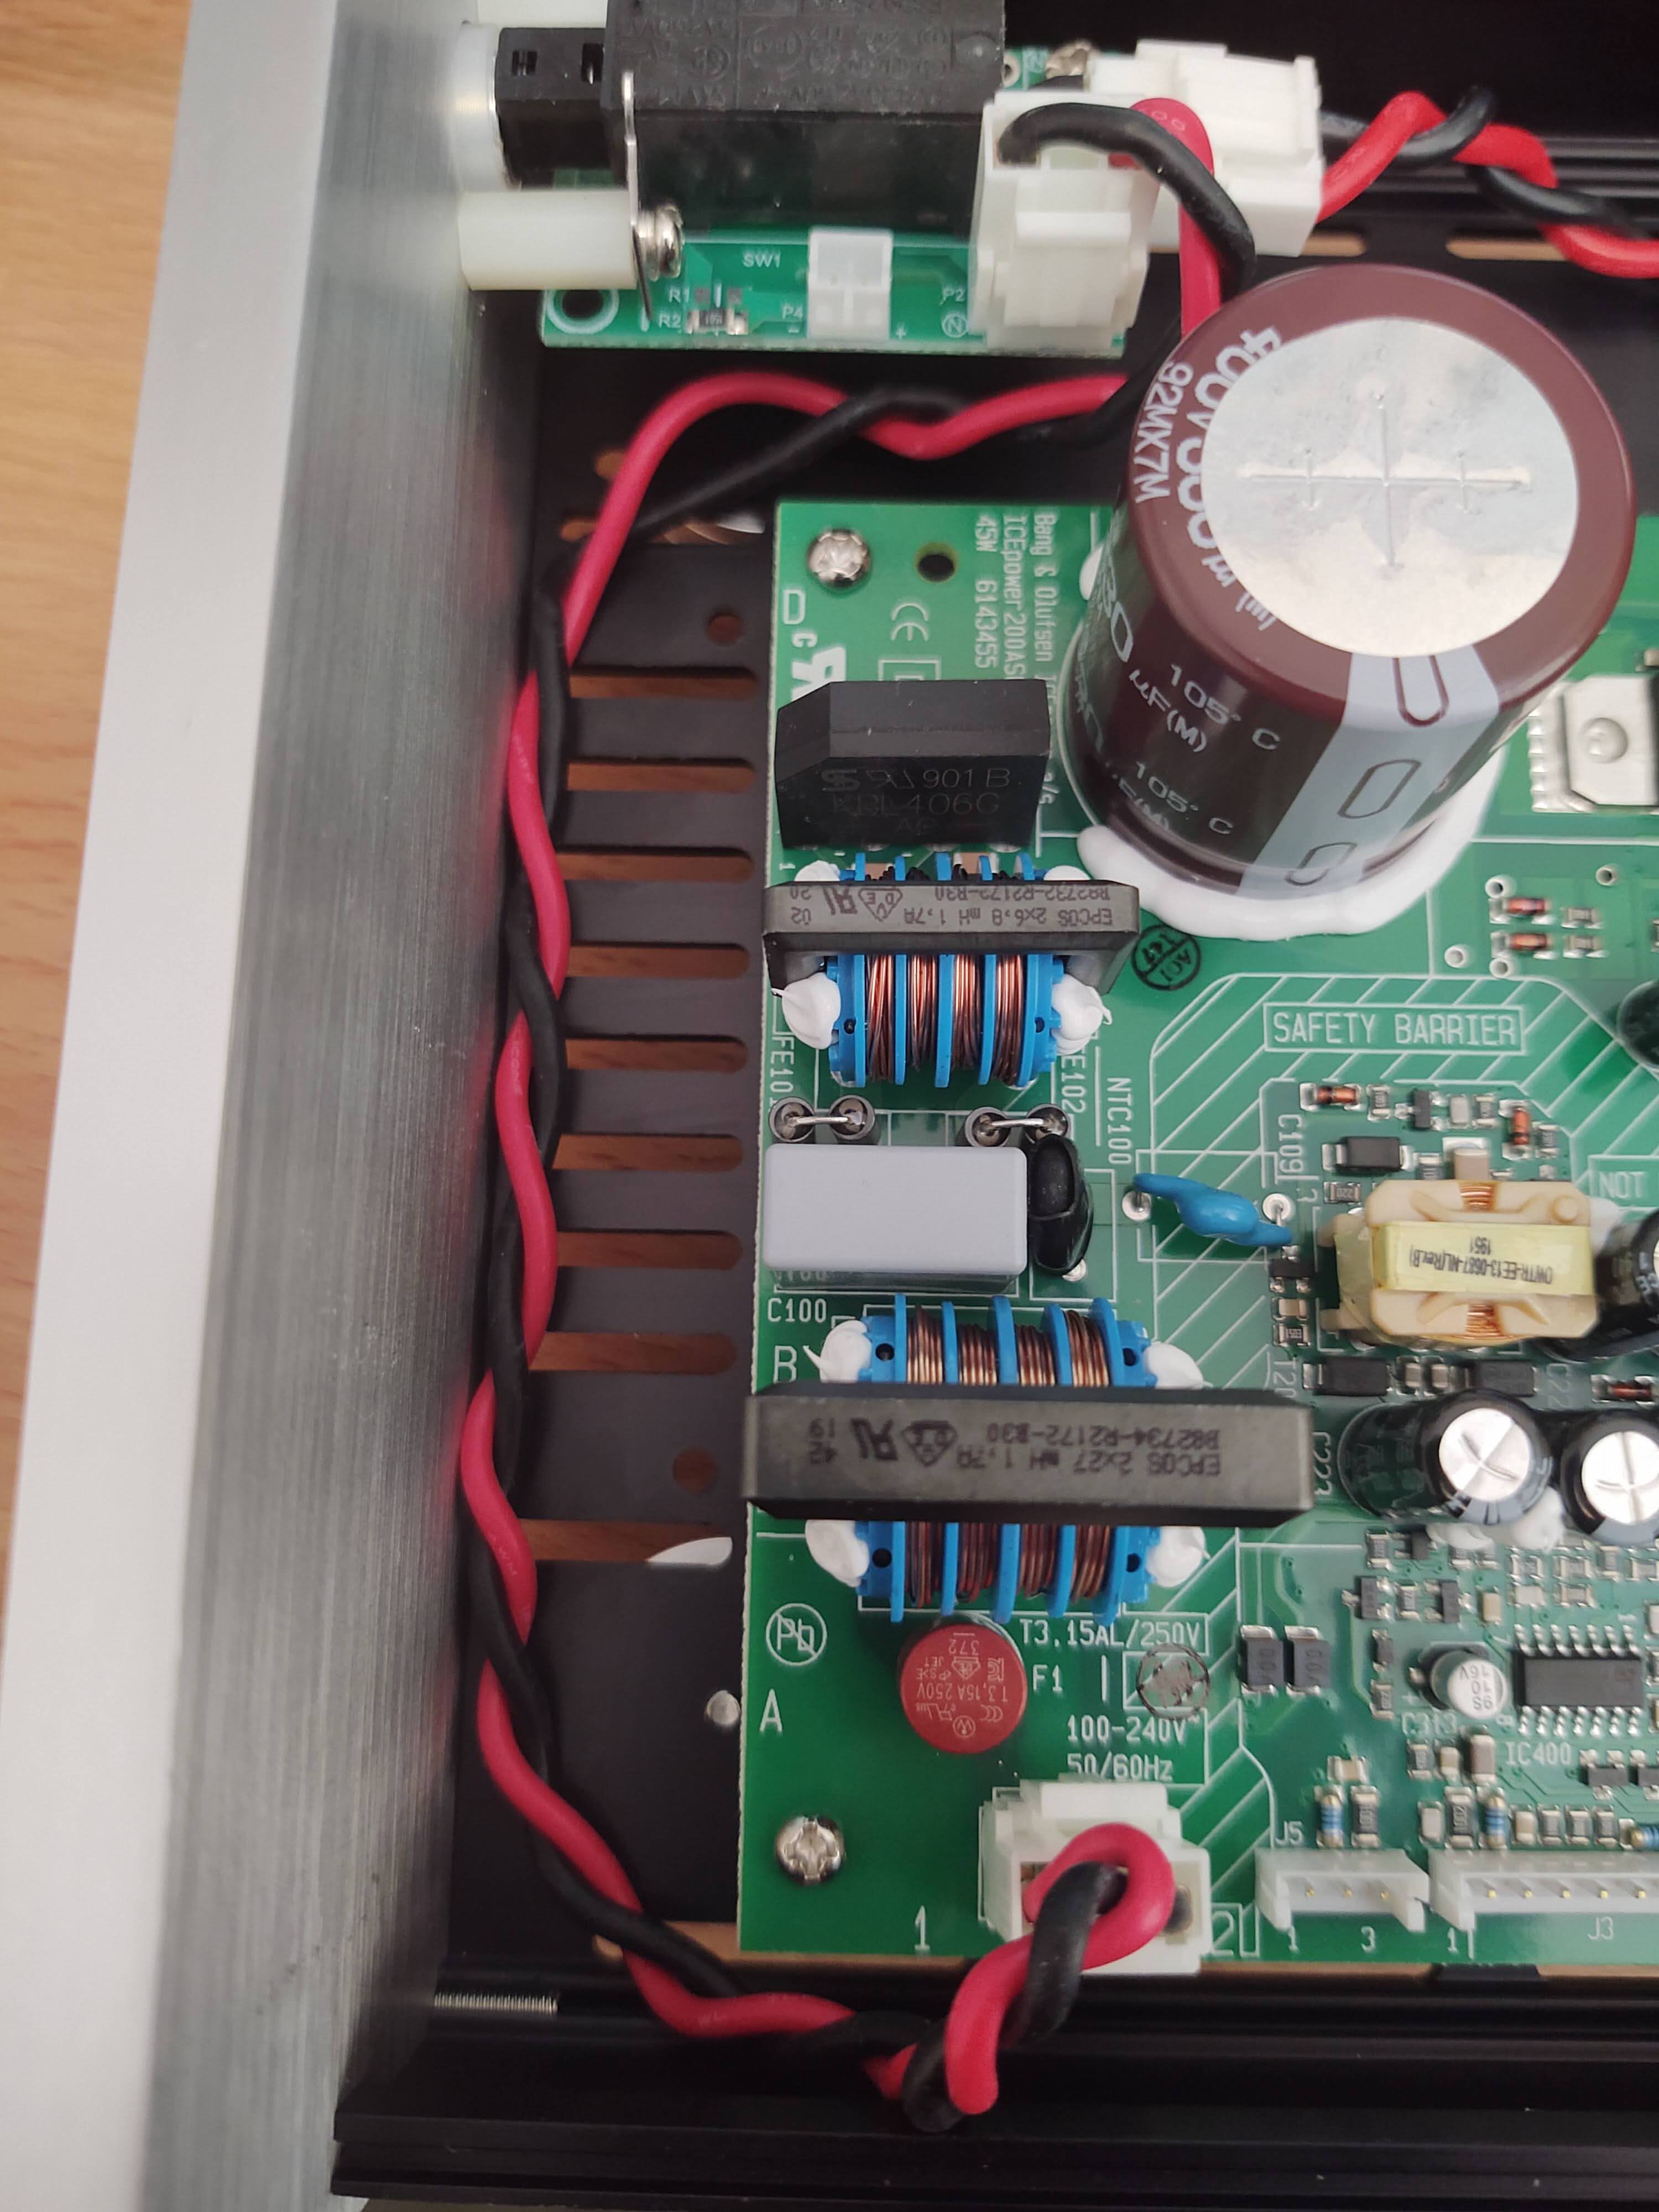
Using two cables (soldered together) connect P4 of the power switch to connector J5 of the ICEpower board (- to Pin 1, + to pin 2). Pin 3 is unused and you can trim/remove the unused wire.
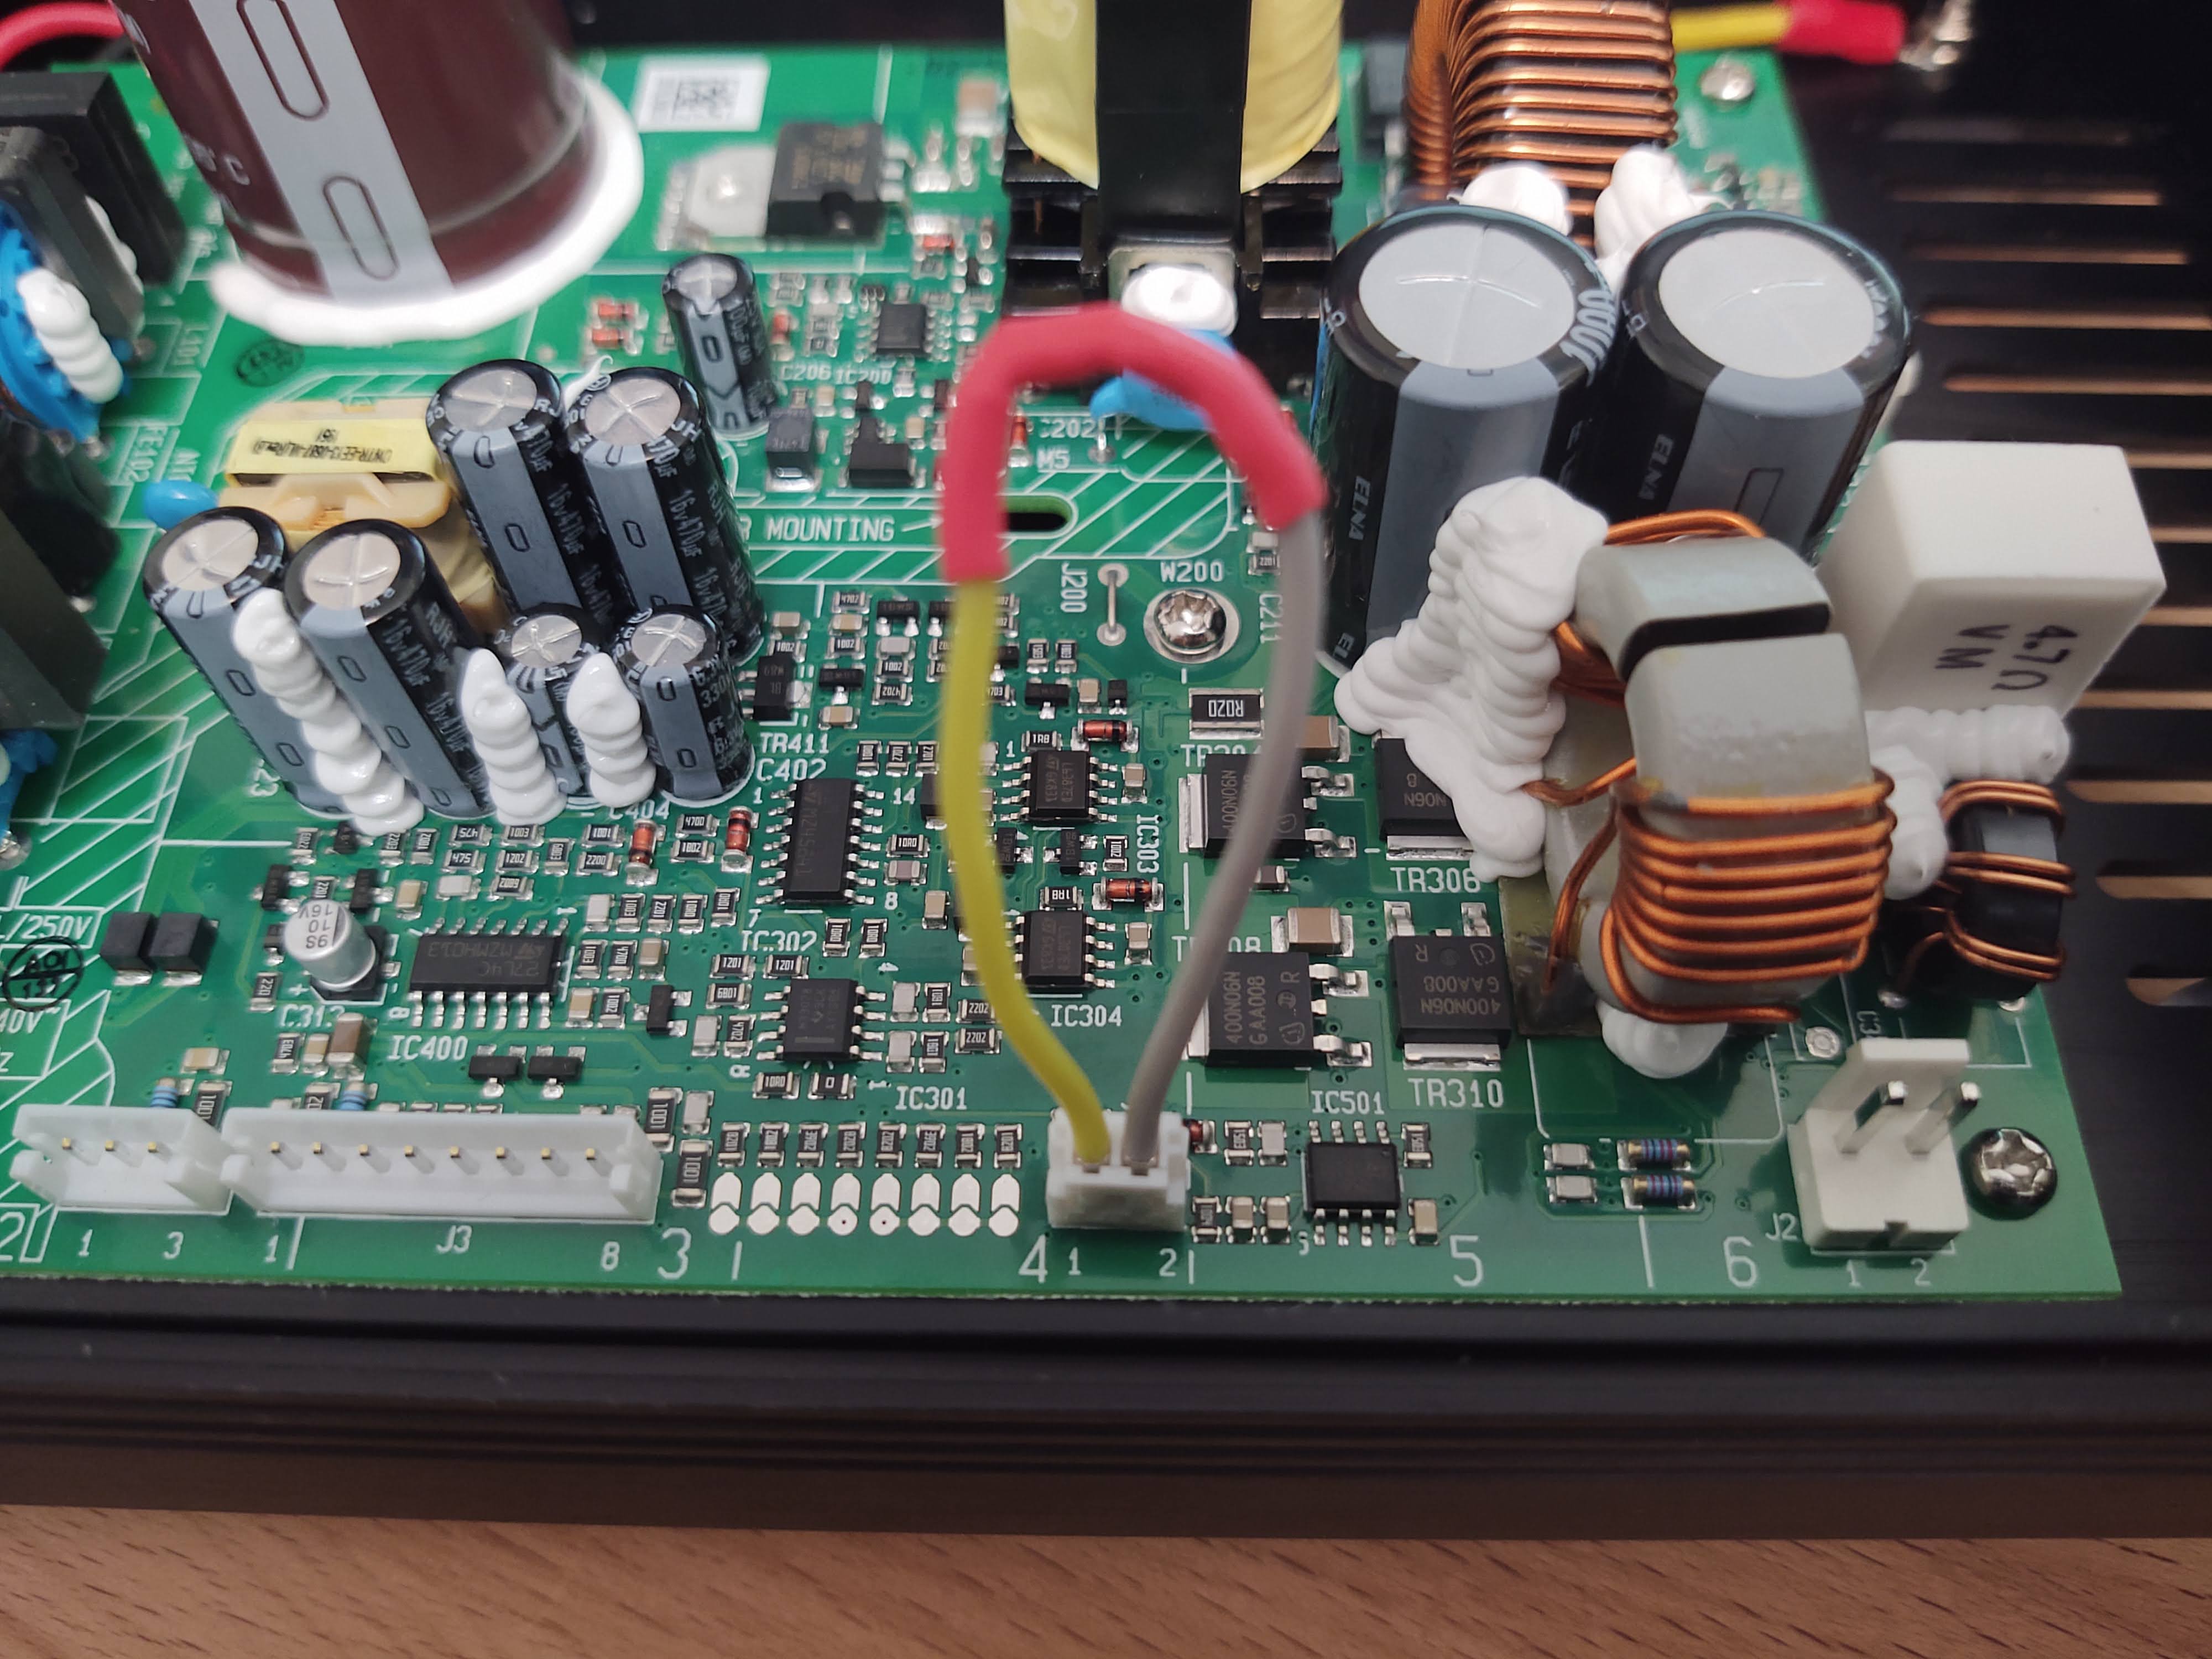
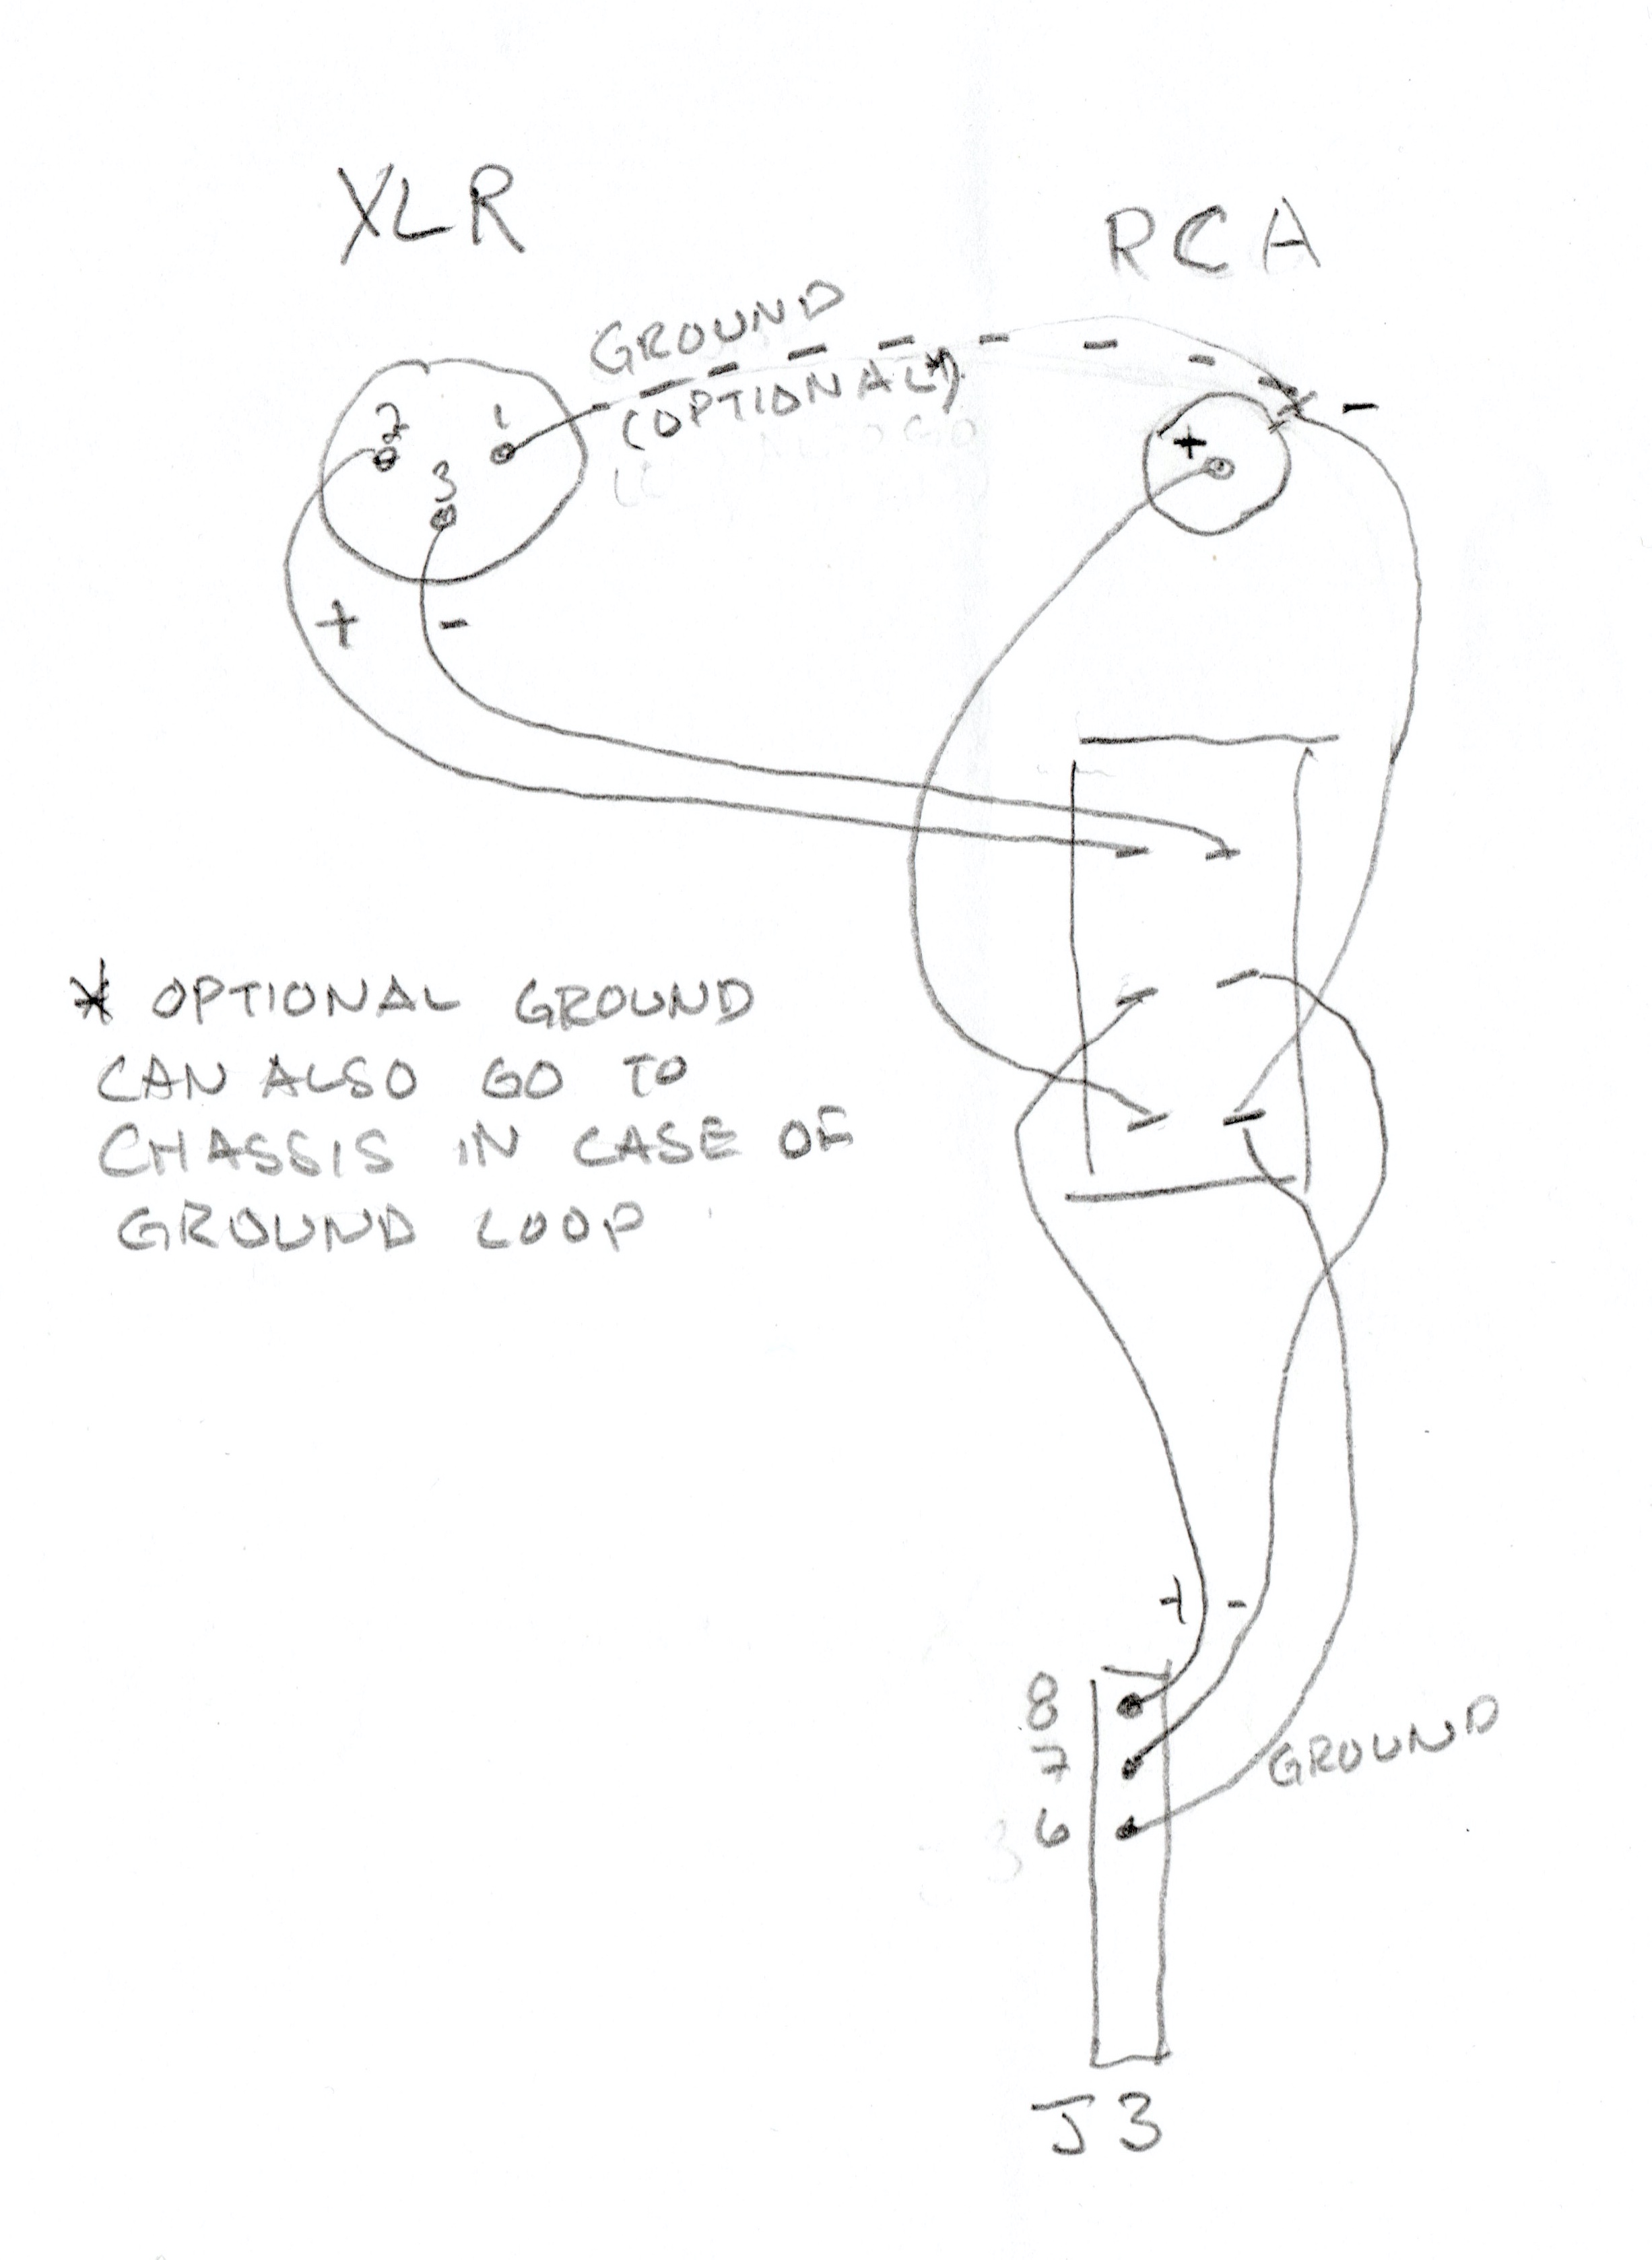
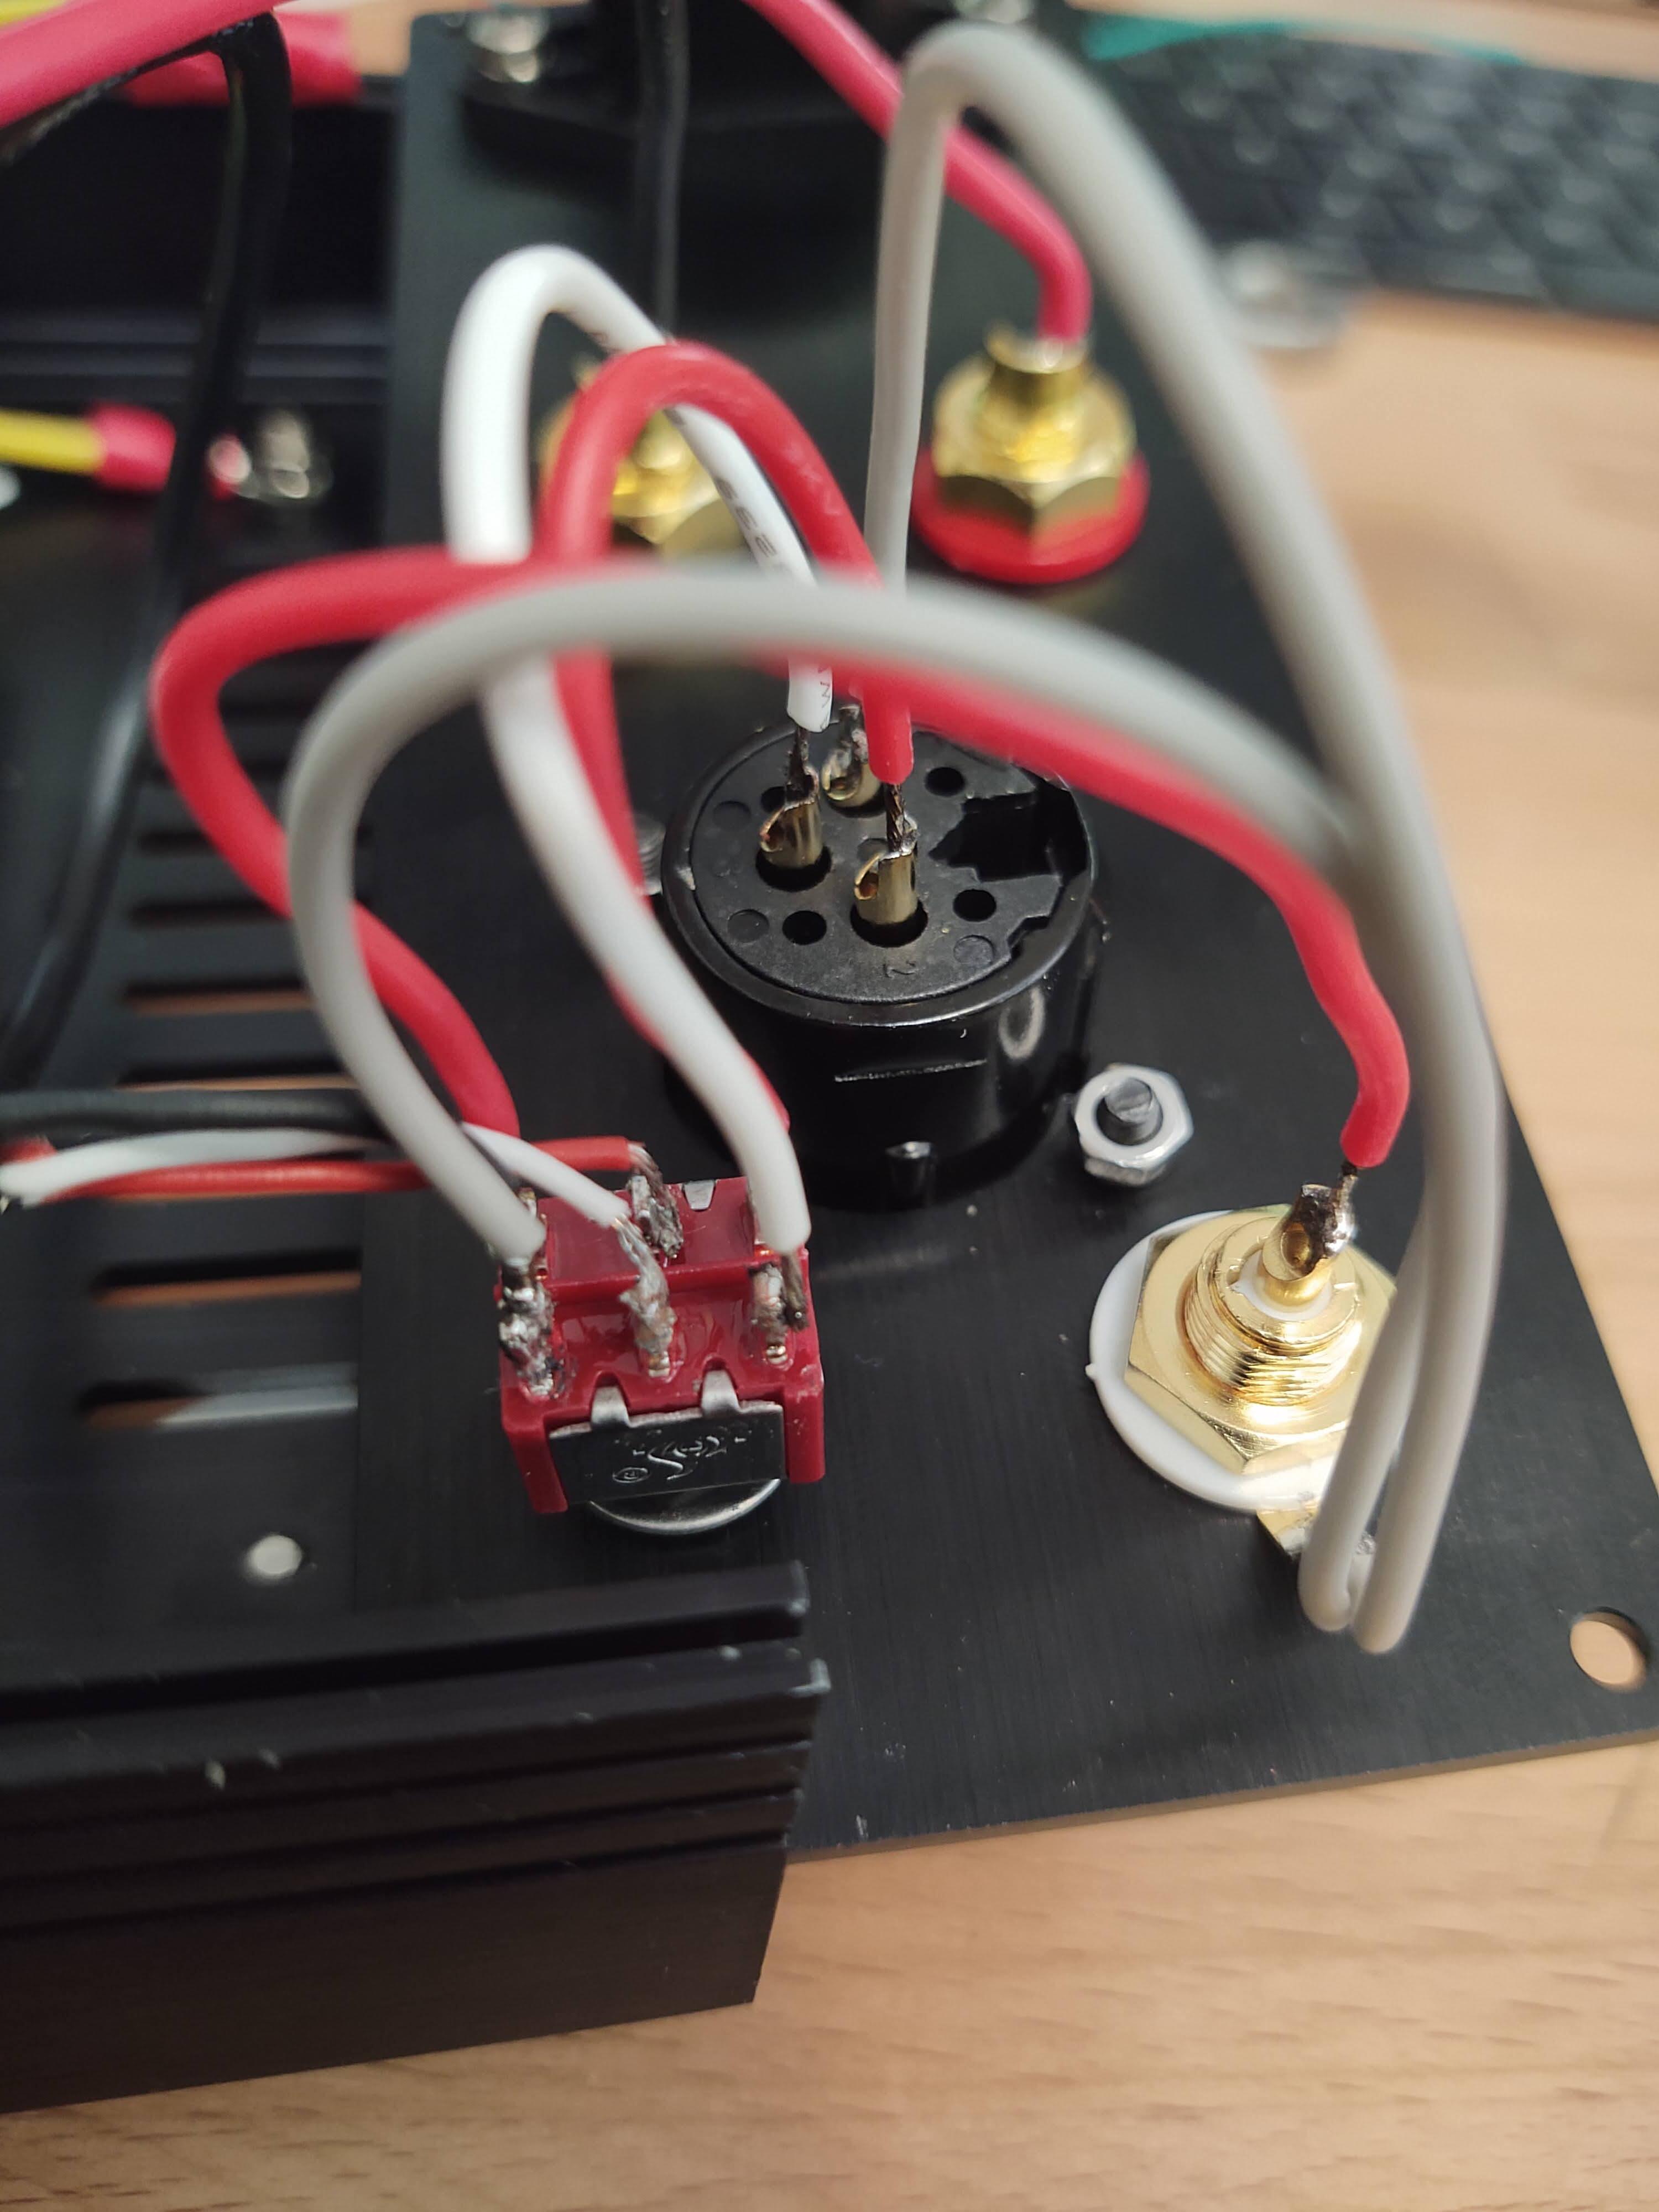
Run input cables from J3 pins 6, 7 and 8 to the RCA/XLR switch, RCA connector, and XLR connector. Pins 1-5 are unused and you can trim/remove the unused wires. You can use the unused wires to solder the connections between the connectors. Use the wiring diagram below as a guide (note that the physical arrangement of Pin 1 and 2 of the XLR are reversed. Use the number on the connector to make sure you’re going to the right one). It will be hard to reach the pins with your soldering iron so you might need to remove some connectors or loosen the back panel to get it all done.
I don’t believe you connected your ground wire to the proper location on the bottom of the case. I believe it should be attached to the pre-polished hole where anodized fish has been removed to get a proper ground.
Have you had a chance to try these amplifiers with speakers yet? Just curious on your opinion and how you are using them. Very nice job documenting the build, nice pictures and commentary thank you much and happy listening!
I just picked up a pair of Q Acoustics 3030i last week and finally got a chance to put these amps through their paces. Here are my initial reports:
Noise is very, very low. If you place your ear right up against the tweeter, you can hear some of the typical Class D hiss but it is not noticeable from a several inches away. Maybe, just maybe if you have super-sensitive speakers and you’re using these at a desktop could it be a audible, but I doubt it would be an issue.
I don’t have another power amplifier to compare with to comment on the sound signature but they seem to be pretty much transparent. Between the monoblocks and the 3030i I’m getting great tone with lots of body. There’s no harshness at all. Bass control is spot on. Kick drums and snares have a nice thump that you can feel. Extended bass notes are very well controlled and tuneful. The high end is not quite as etched and detailed as the Adam Audio T5V that I was listening to before but those AMT tweeters are almost too revealing. This is a much more enjoyable balance to my ears.
These amps have plenty of power. I can play uncomfortably loud without a hint of distortion or a drop in quality. You turn up the volume and everything just gets louder without changing character.
Overall, I doubt you’re going to find better value than doing a project like this. If you want to watch a review of a stereo amp using this module, check out this review. The only real difference is that the monoblocks have separate power supplies.
You can also look at reviews of the XTZ Edge A2-300 for a commercial implementation using a slightly more powerful ICEpower module.
These might not be the ultimate in refinement and detail, but they’re very good sounding amps capable of driving damn near any speaker.