Problem is that there’s no much space, so you need to find something small enough to fit. Kobiconn 161-7900-EX might fit.
Even looking at it, I can tell you it’s way too big to fit. For the DT770 it could, but because of the back padding on the DT880, there is less internal space for things to go.
1 Like
You can always do the superlux thing and run a 4 pole 2.5mm female or male off a short piece of cable. That’s how I balanced an old pair of T90’s. What I actually did was cut the stock cable about 6" from the cup and pulled out the three inner wires and fished four new wires through the old sleeve so I can keep the stock strain relief. I terminated in four pole male so it can be used with balanced 2.5mm to xlr extensions. If you don’t mind the pig tail it is pretty easy.
1 Like
How do you fish the wires through the sleeve? That’s pretty tight, even with the original 3 wires.
The wires I used were a little thinner than the stock ones. I was able to slide two through fine then had to super glue the other to the wires I already got through and used that to pull the rest through. After getting it through you just cut the wire below the glue. You will have scrap but if the jacket is thin enough you should be able to do it. I think I used 24awg wire. I’m not 100% certain though. It could have been 26awg.
1 Like
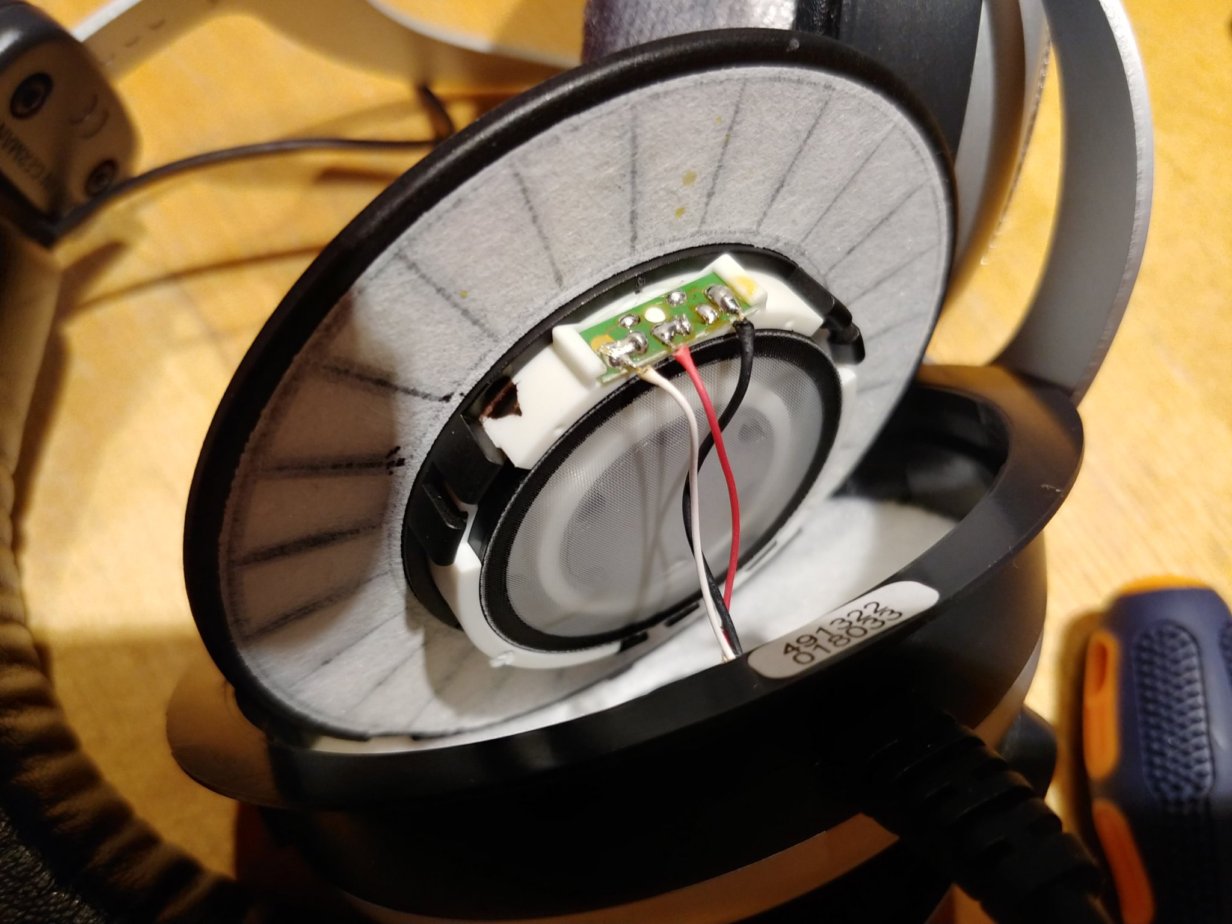
Firstly, a huge thank you for bringing out these instructions. They help a ton! Even though I’m not doing the mod just yet, I decided to take apart the headphones to see how they’re constructed, just because I seemed interesting. I’m going to do the balanced mod on my next visit to my trusted cable shop. However, I came across something peculiar on my left driver:
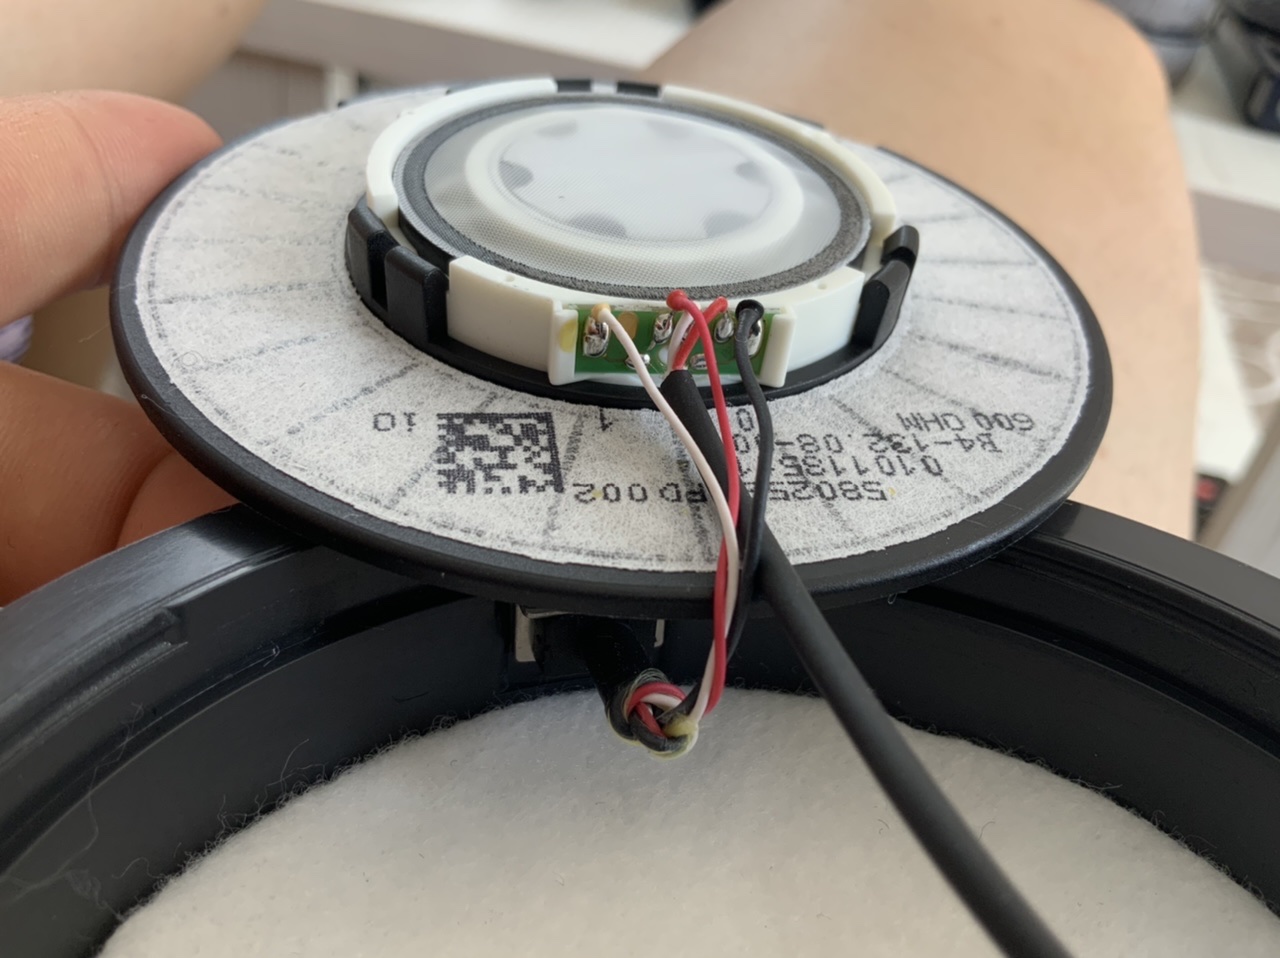
The Ground and Hot cables on the left side of my pair have different colors than on your pair. Another thing I’ve realized is that the yellow sticker next to the left-most white cable is next to the right cable on your picture (so it looks kind of mirrored on my set).
Do you think the ground and hot cables on my left driver are mirrored, or are they like yours?
Cheers,
Vichy
2 Likes
Is your an older model or a newer one? Mine is at least 18 months old (I bought it second hand).
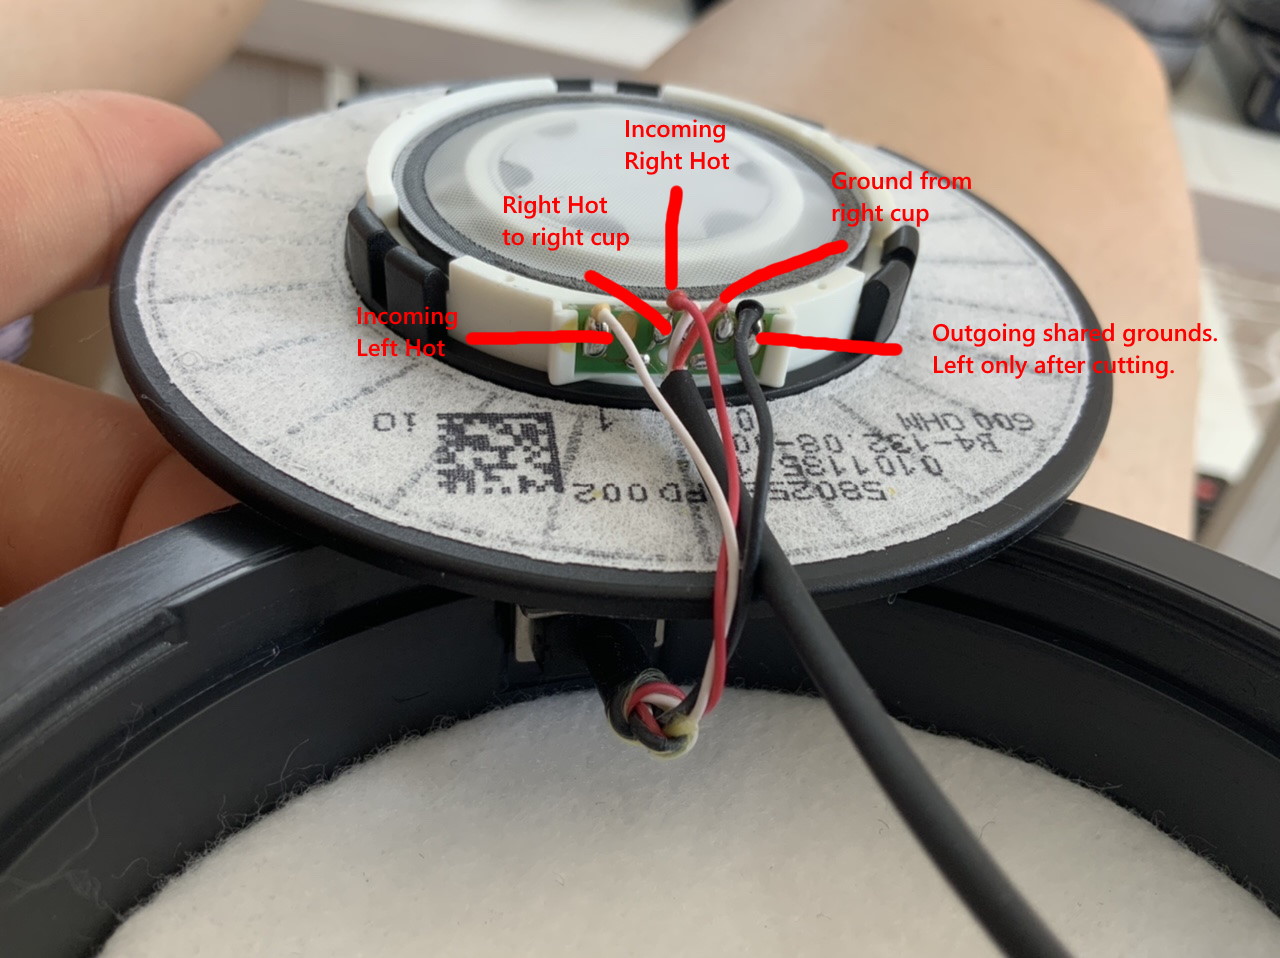
Yeah it does look like a mirror of mine. I’ve taken the liberty of labeling them. Hopefully you’ll be able to see the middle wires properly. Remember, the red wires from the right cup are the grounds, and not to be confused with the red incoming right hot wire (which is connected to the white wire leading to the right cup).
That’s still very interesting though how it’s mirrored. But don’t worry, it should still be fine however you want to mod it.
Addendum: I’ve uploaded a new labeling for the wires and reworded the reply to reflect the correct terminology thanks to @theFritz for pointing it out. Sorry, I really only just started learning about these things not too long ago, so I describe as I see rather than using the right terms.
1 Like
I think the labeling is not applicable for all.
a) The white wire on the left in your picture should be labeled “incoming hot” for the left driver. And
b) In my case the connections are mirrored as well:
If you unsolder the wire to the right cup, you end up with these connections from the main cable where the red one in the middle is the right-hot-signal but while black is still common ground, it is on the other side of the board:
( If you’re interested on how I modded mine, have a look here: The lazy person's *reversible* DT880/600_Ohm balanced mod )
1 Like
Took me a while to understand your post because I realise being new to electronics (only started soldering 6 months ago), your terminology is actually correct. I’ll edit the labeling. I was actually labeling it as I see it on the cup, not as actual “electrons come in here, go out there”.
Thank you too for your detailed response  I’m actually looking to completely remove the stock internal wires completely in order to replace them with aftermarket
OCC silver ones, thus I have to know which connection goes to which side of with driver. I also read your thread on the lazy person’s balanced mod and it’s interesting how you have to use the cups upside down there
1 Like
Yes please. It would be a godsend so I can show the pics to the cable shop  Thanks for taking the time to make the labels!
1 Like
Welcome. It is indeed a bit confusing that Beyerdynamic chooses inconsistent color-coding for the wires. Would have been helpful to stick to a more common scheme. However, I would recommend to really measure the resistances and always keep track of the polarity when modding them.
1 Like
Suggestion for people following the guide, don’t try to replace the wires, it’s very easy to mess up and damage the drivers. Do not attempt unless you have a steady hand, and take into account the risk.
I killed the left driver, apparently I knocked out the tiny wire. Another person melted the driver, so… be careful.
Now I’m trying to get a replacement driver.
2 Likes
Yeah, I know someone who melted the driver from trying to solder new wires. You just don’t. I’ve had that experience with Koss headphones, so it sorta carries over to this one.
Just reuse the wires that comes with the headphones. It’s less of a hassle.
Lol, had to deal with something similar modding my T90’s. I was just going to open them to see if I could tame the sibalance and apparently the glue they used to hold the little pcb the voice coil wires attach to failed and it was flopping around loose. It ripped one of those tiny wires out. Luckily I had a thin enough tip for my soldering iron to run a wire in to the driver and got them fixed but the solder joints look terrible because of my fear of melting the driver. Thankfully they still work though.
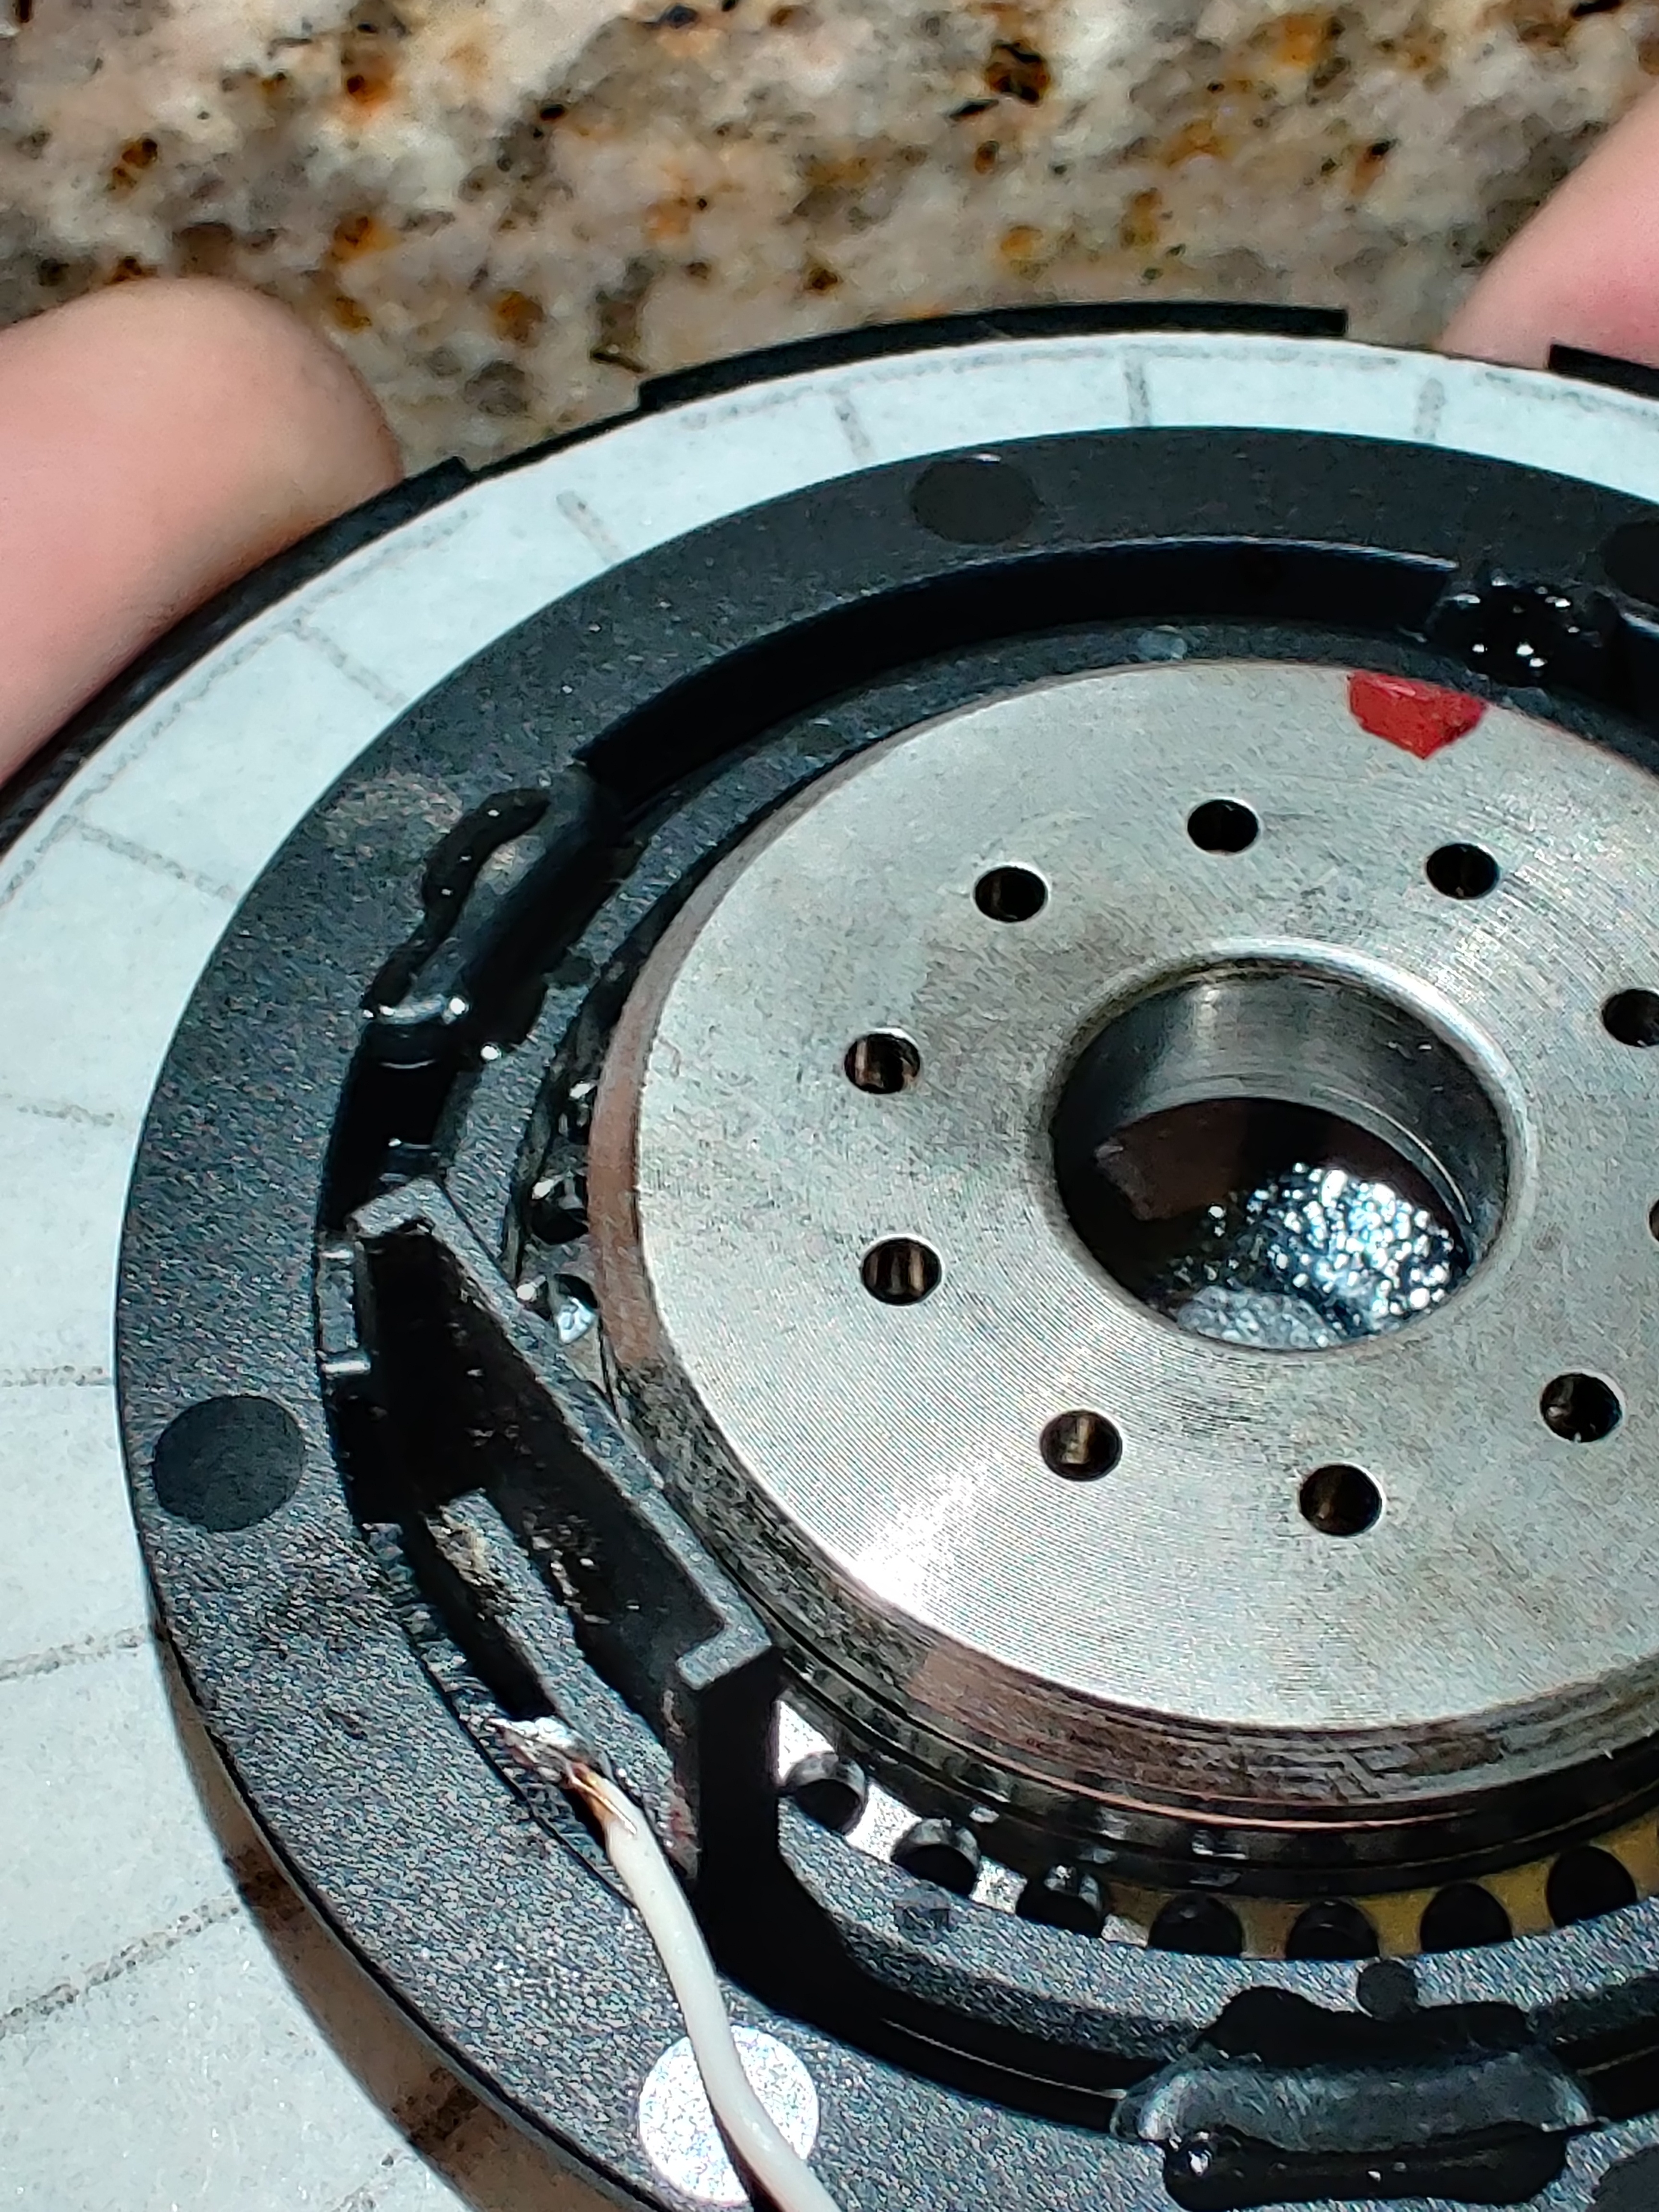
I couldn’t find a final pic but this is after I “fixed” the longer wire and don’t think you can even see the other wire. It was a crap solder job but I was terrified having heat that close to the driver. lol
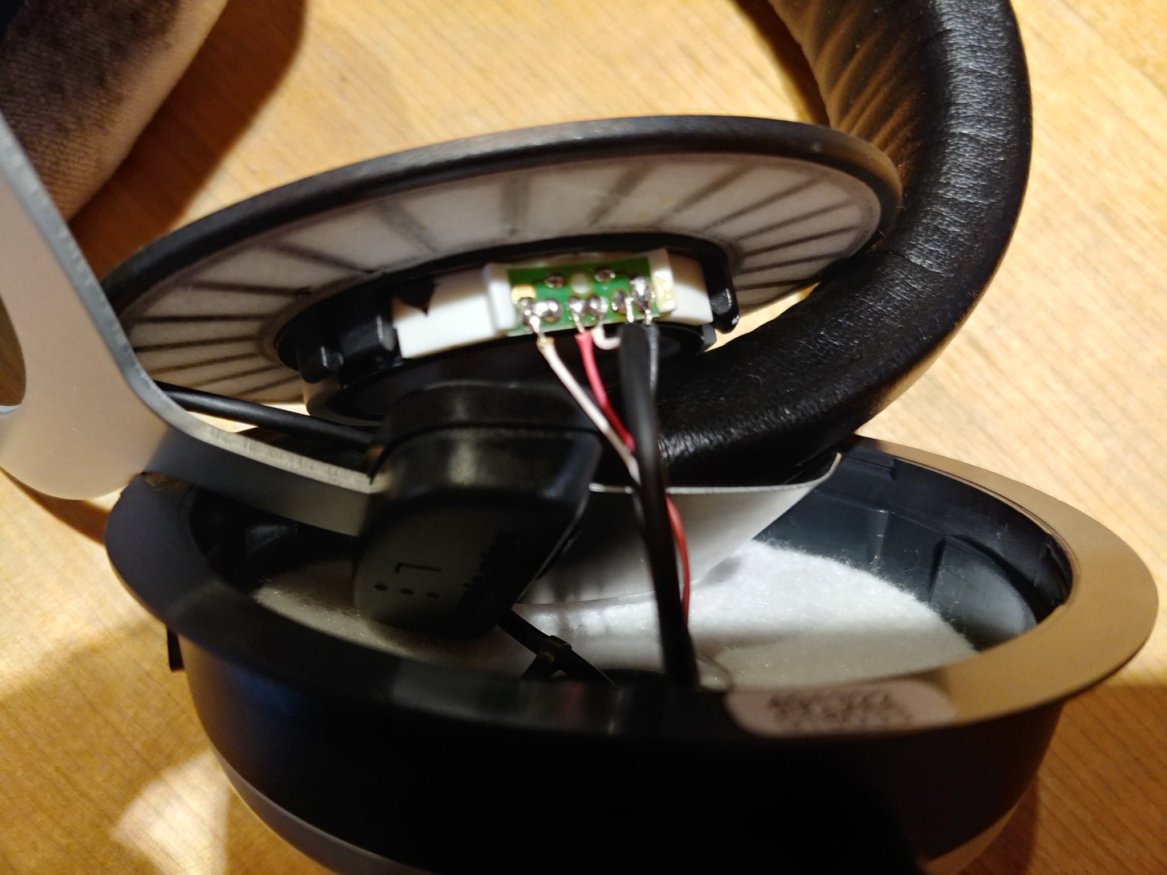
My amps played the DT880 well. I especially preferred them on my tube amp which is single ended. The main reason for me doing a cable mod for the DT880 was that I hated that long and heavy non-detachable stock cable.
I had the spare parts and ZMF compatible cables so I went with mini 4-pin xlr, otherwise I’d have to source 2x 3.5mm or 2x 4-pole 2.5mm which I have laying around and I’d rather not.
The 4-pin mini xlr I had are inside mounting, and those turn out pretty clean.

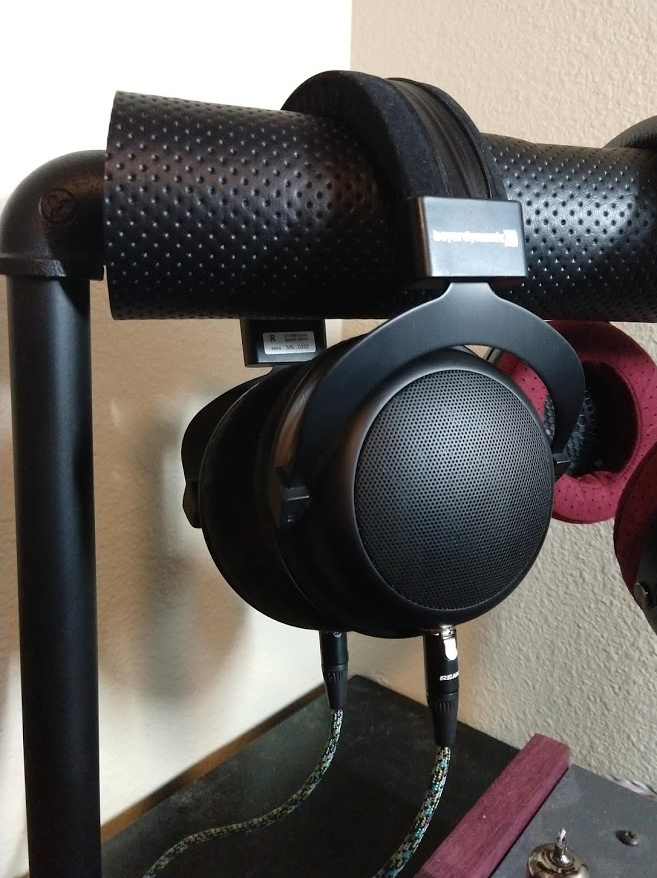
9 Likes
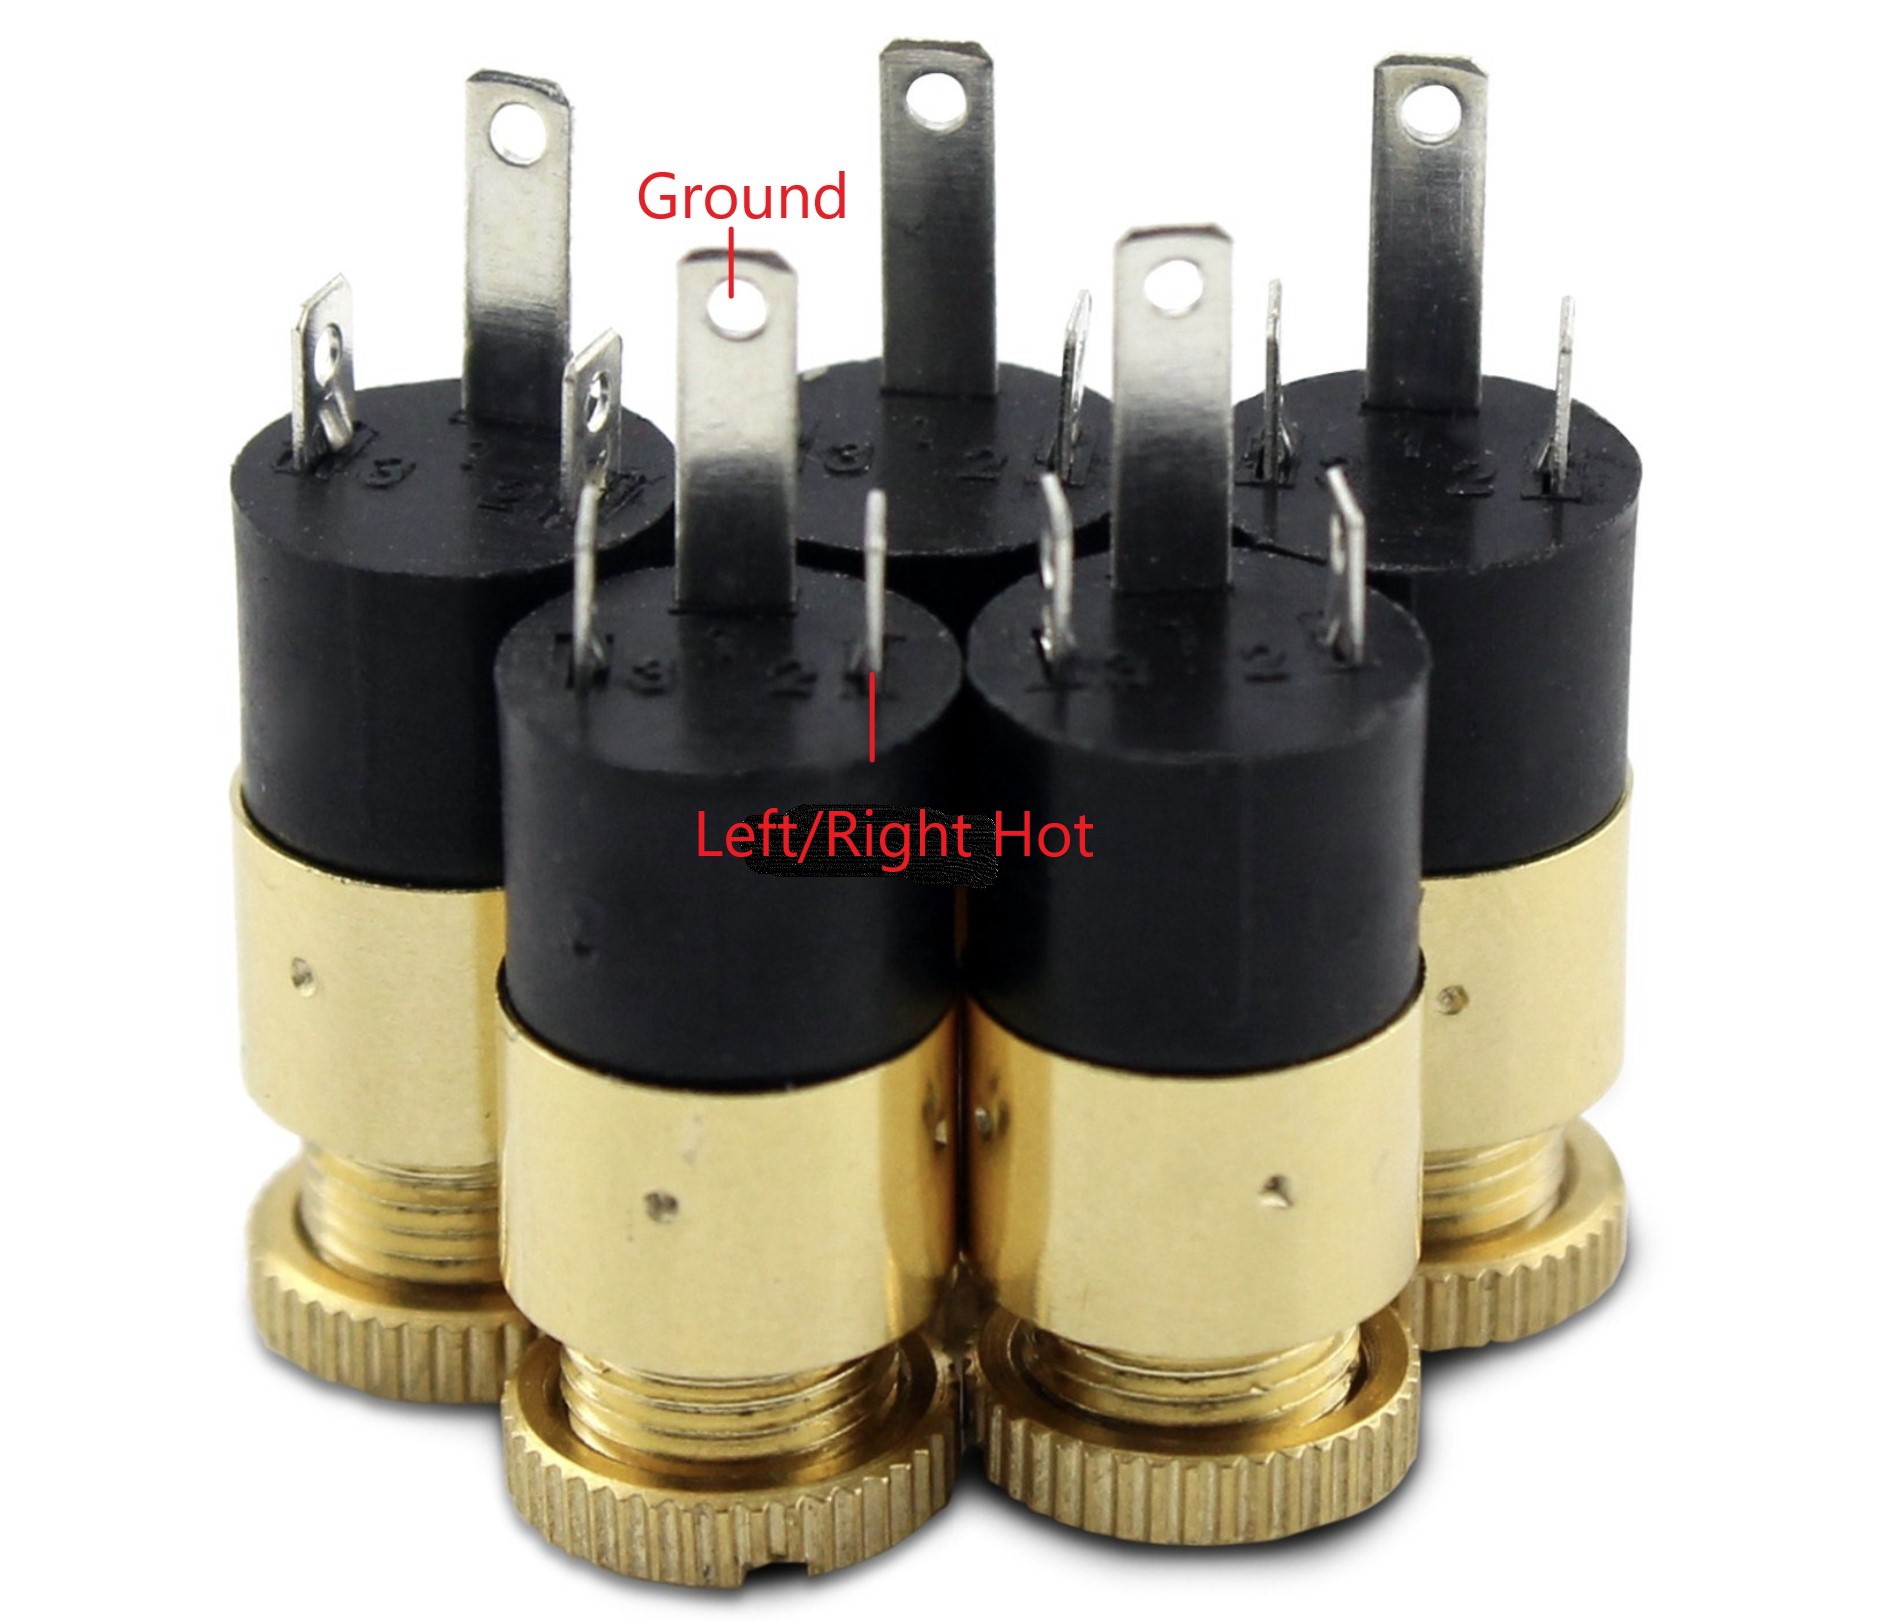
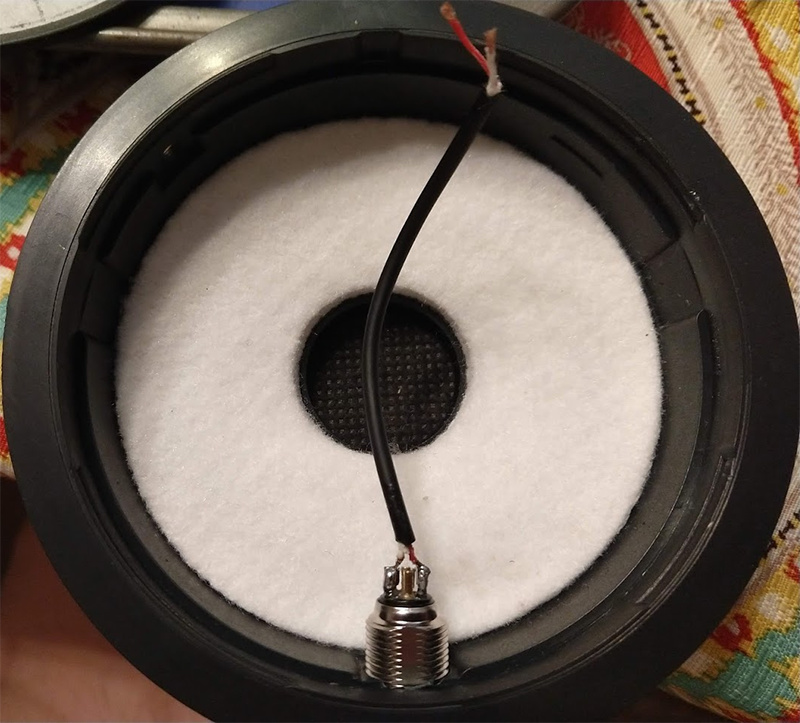
I’ve decided to do this mod myself, and have ordered 3.5mm sockets. However, I saw that you only used two of three connectors to connect them with the driver. Could you perhaps help me label the connectors i bought (which one is + and which one is -).
Here’s a picture:
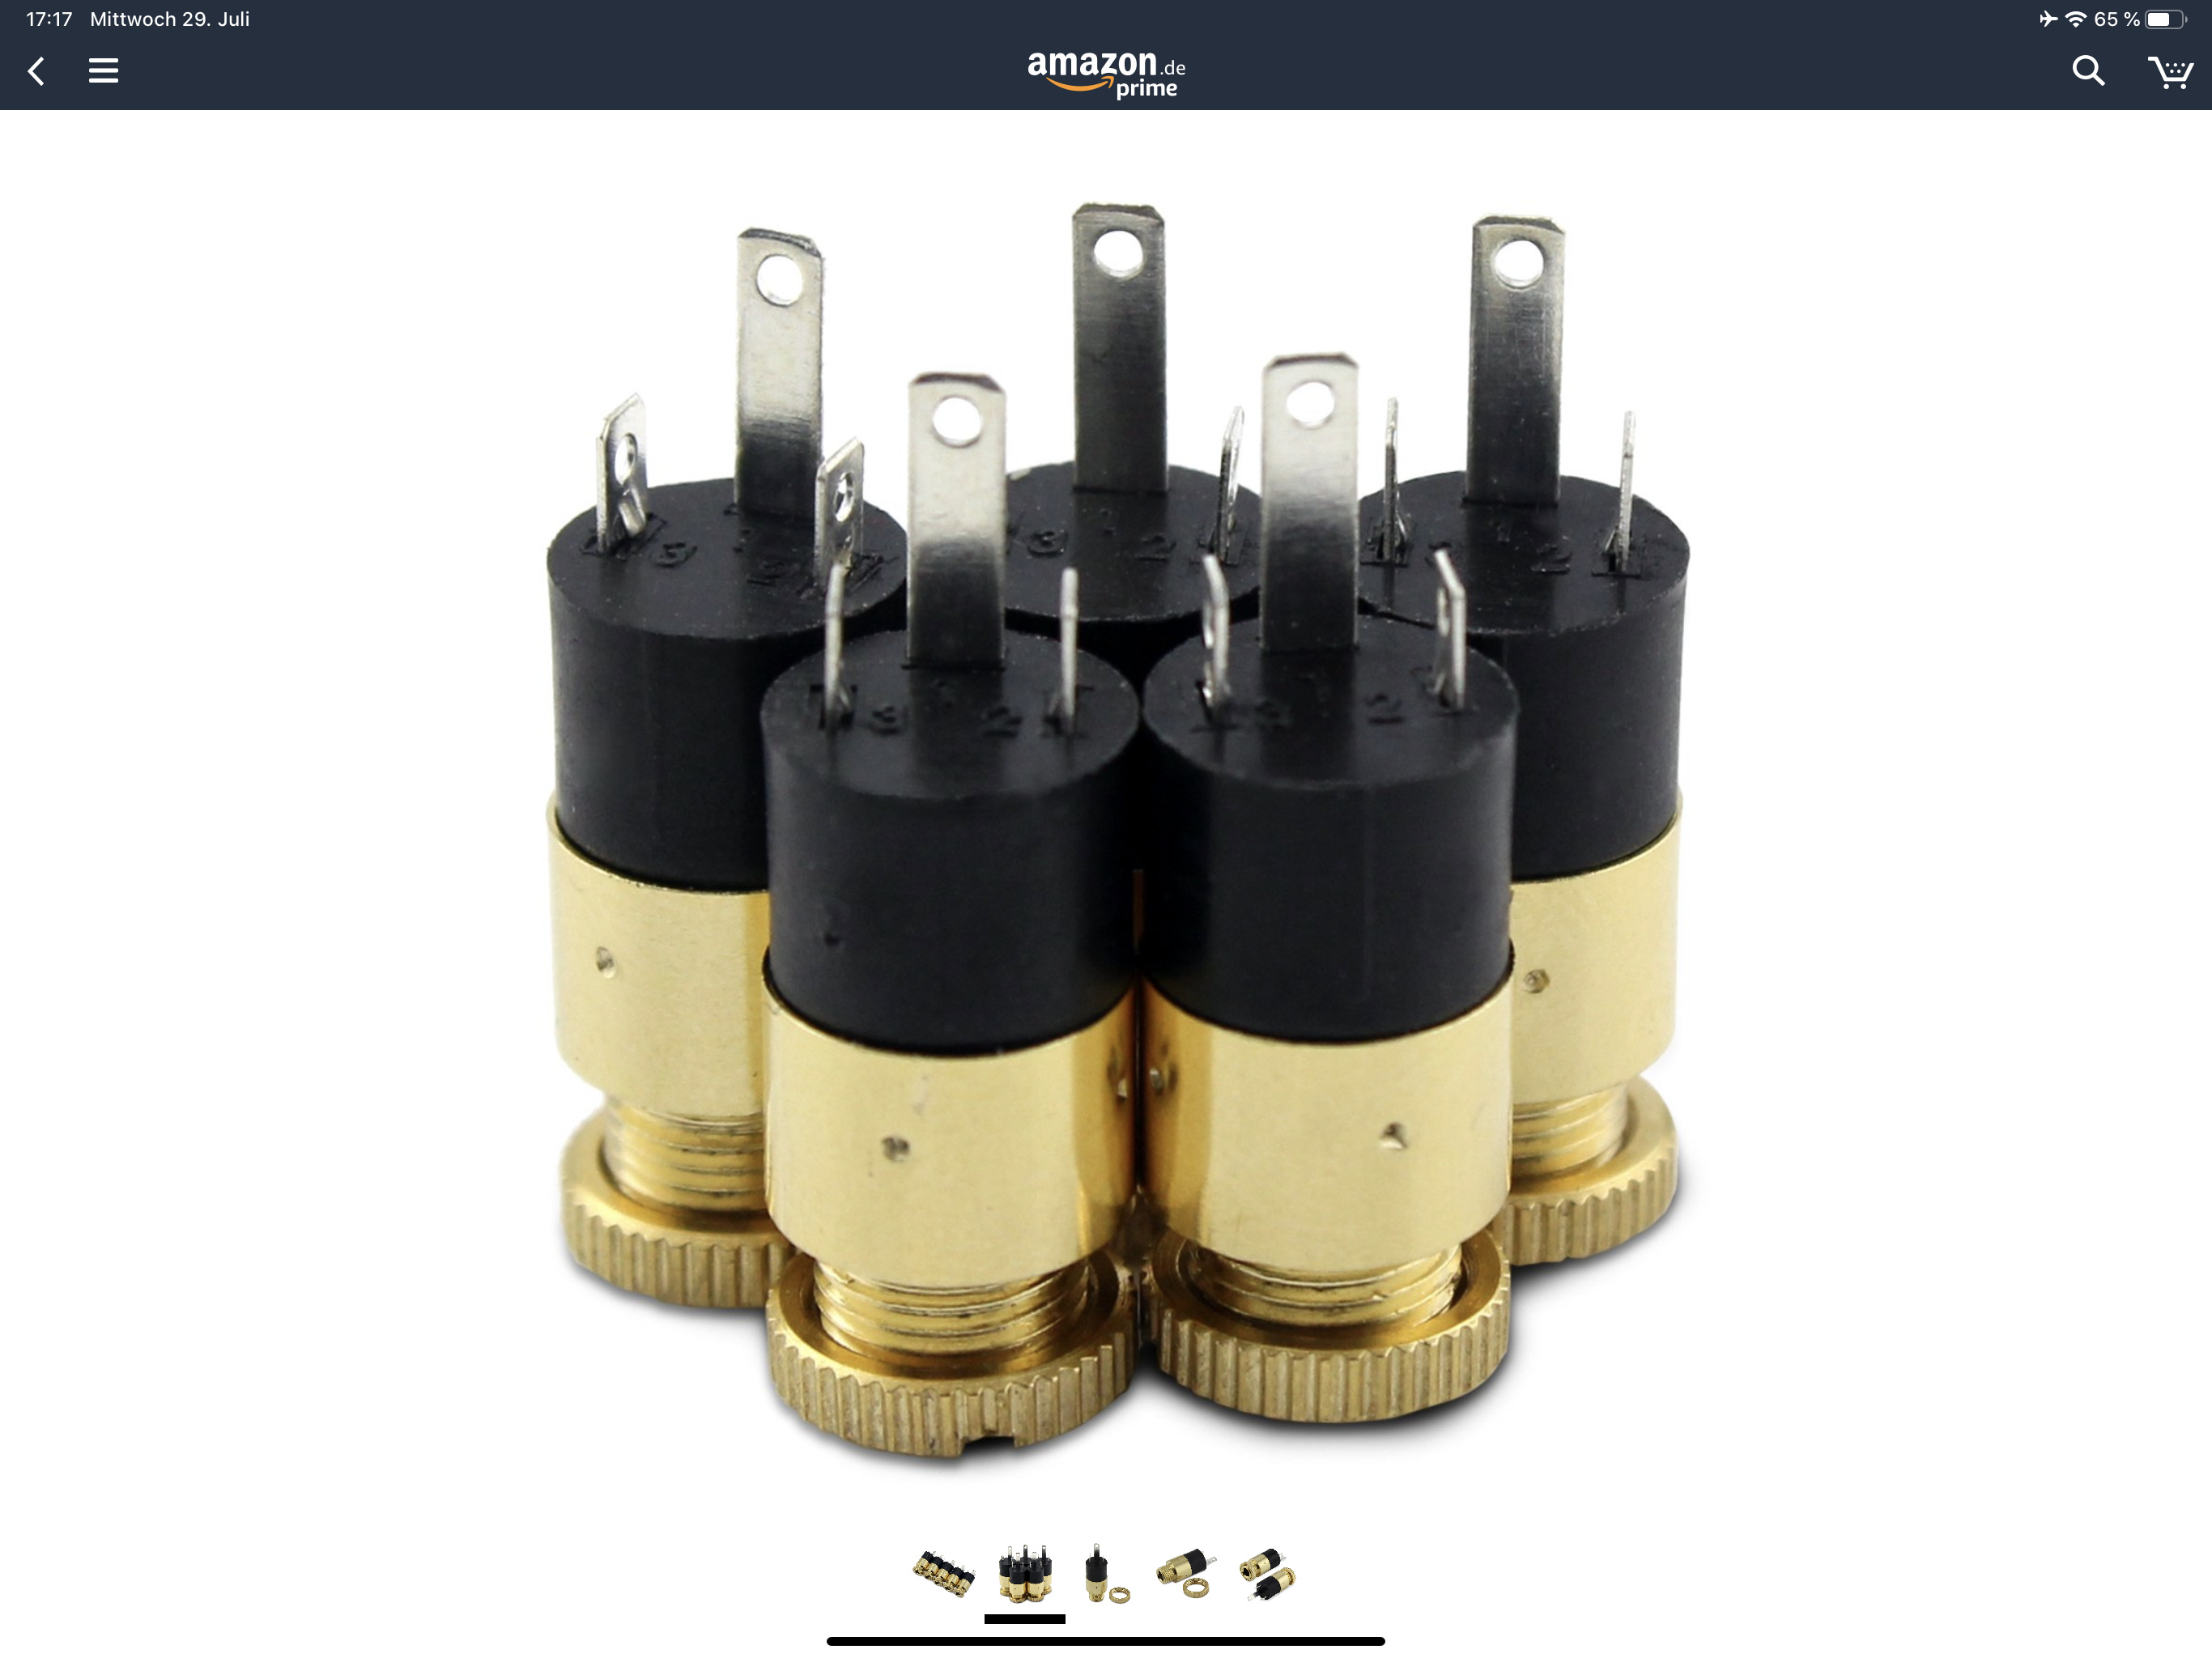
Typically the tip (T) is + and the shaft (S) is -. Headphones that use dual-entry TRS plugs into the cups don’t have the ring ® connected to anything.
EDIT: the automatic changing of an R in parentheses to a registered trademark symbol is irritating sometimes.
Easiest way would be to grab a multimeter and a 3.5mm cable to map what number on the back corresponds to what.
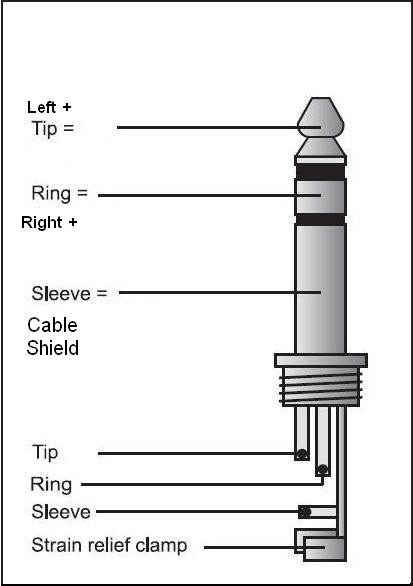
I would wire them up so Tip and Gnd are for the left driver, Ring and Ground are for the right. That way you don’t have to make adapters when using them with a non-custom cable (any 3.5mm splitter would work).