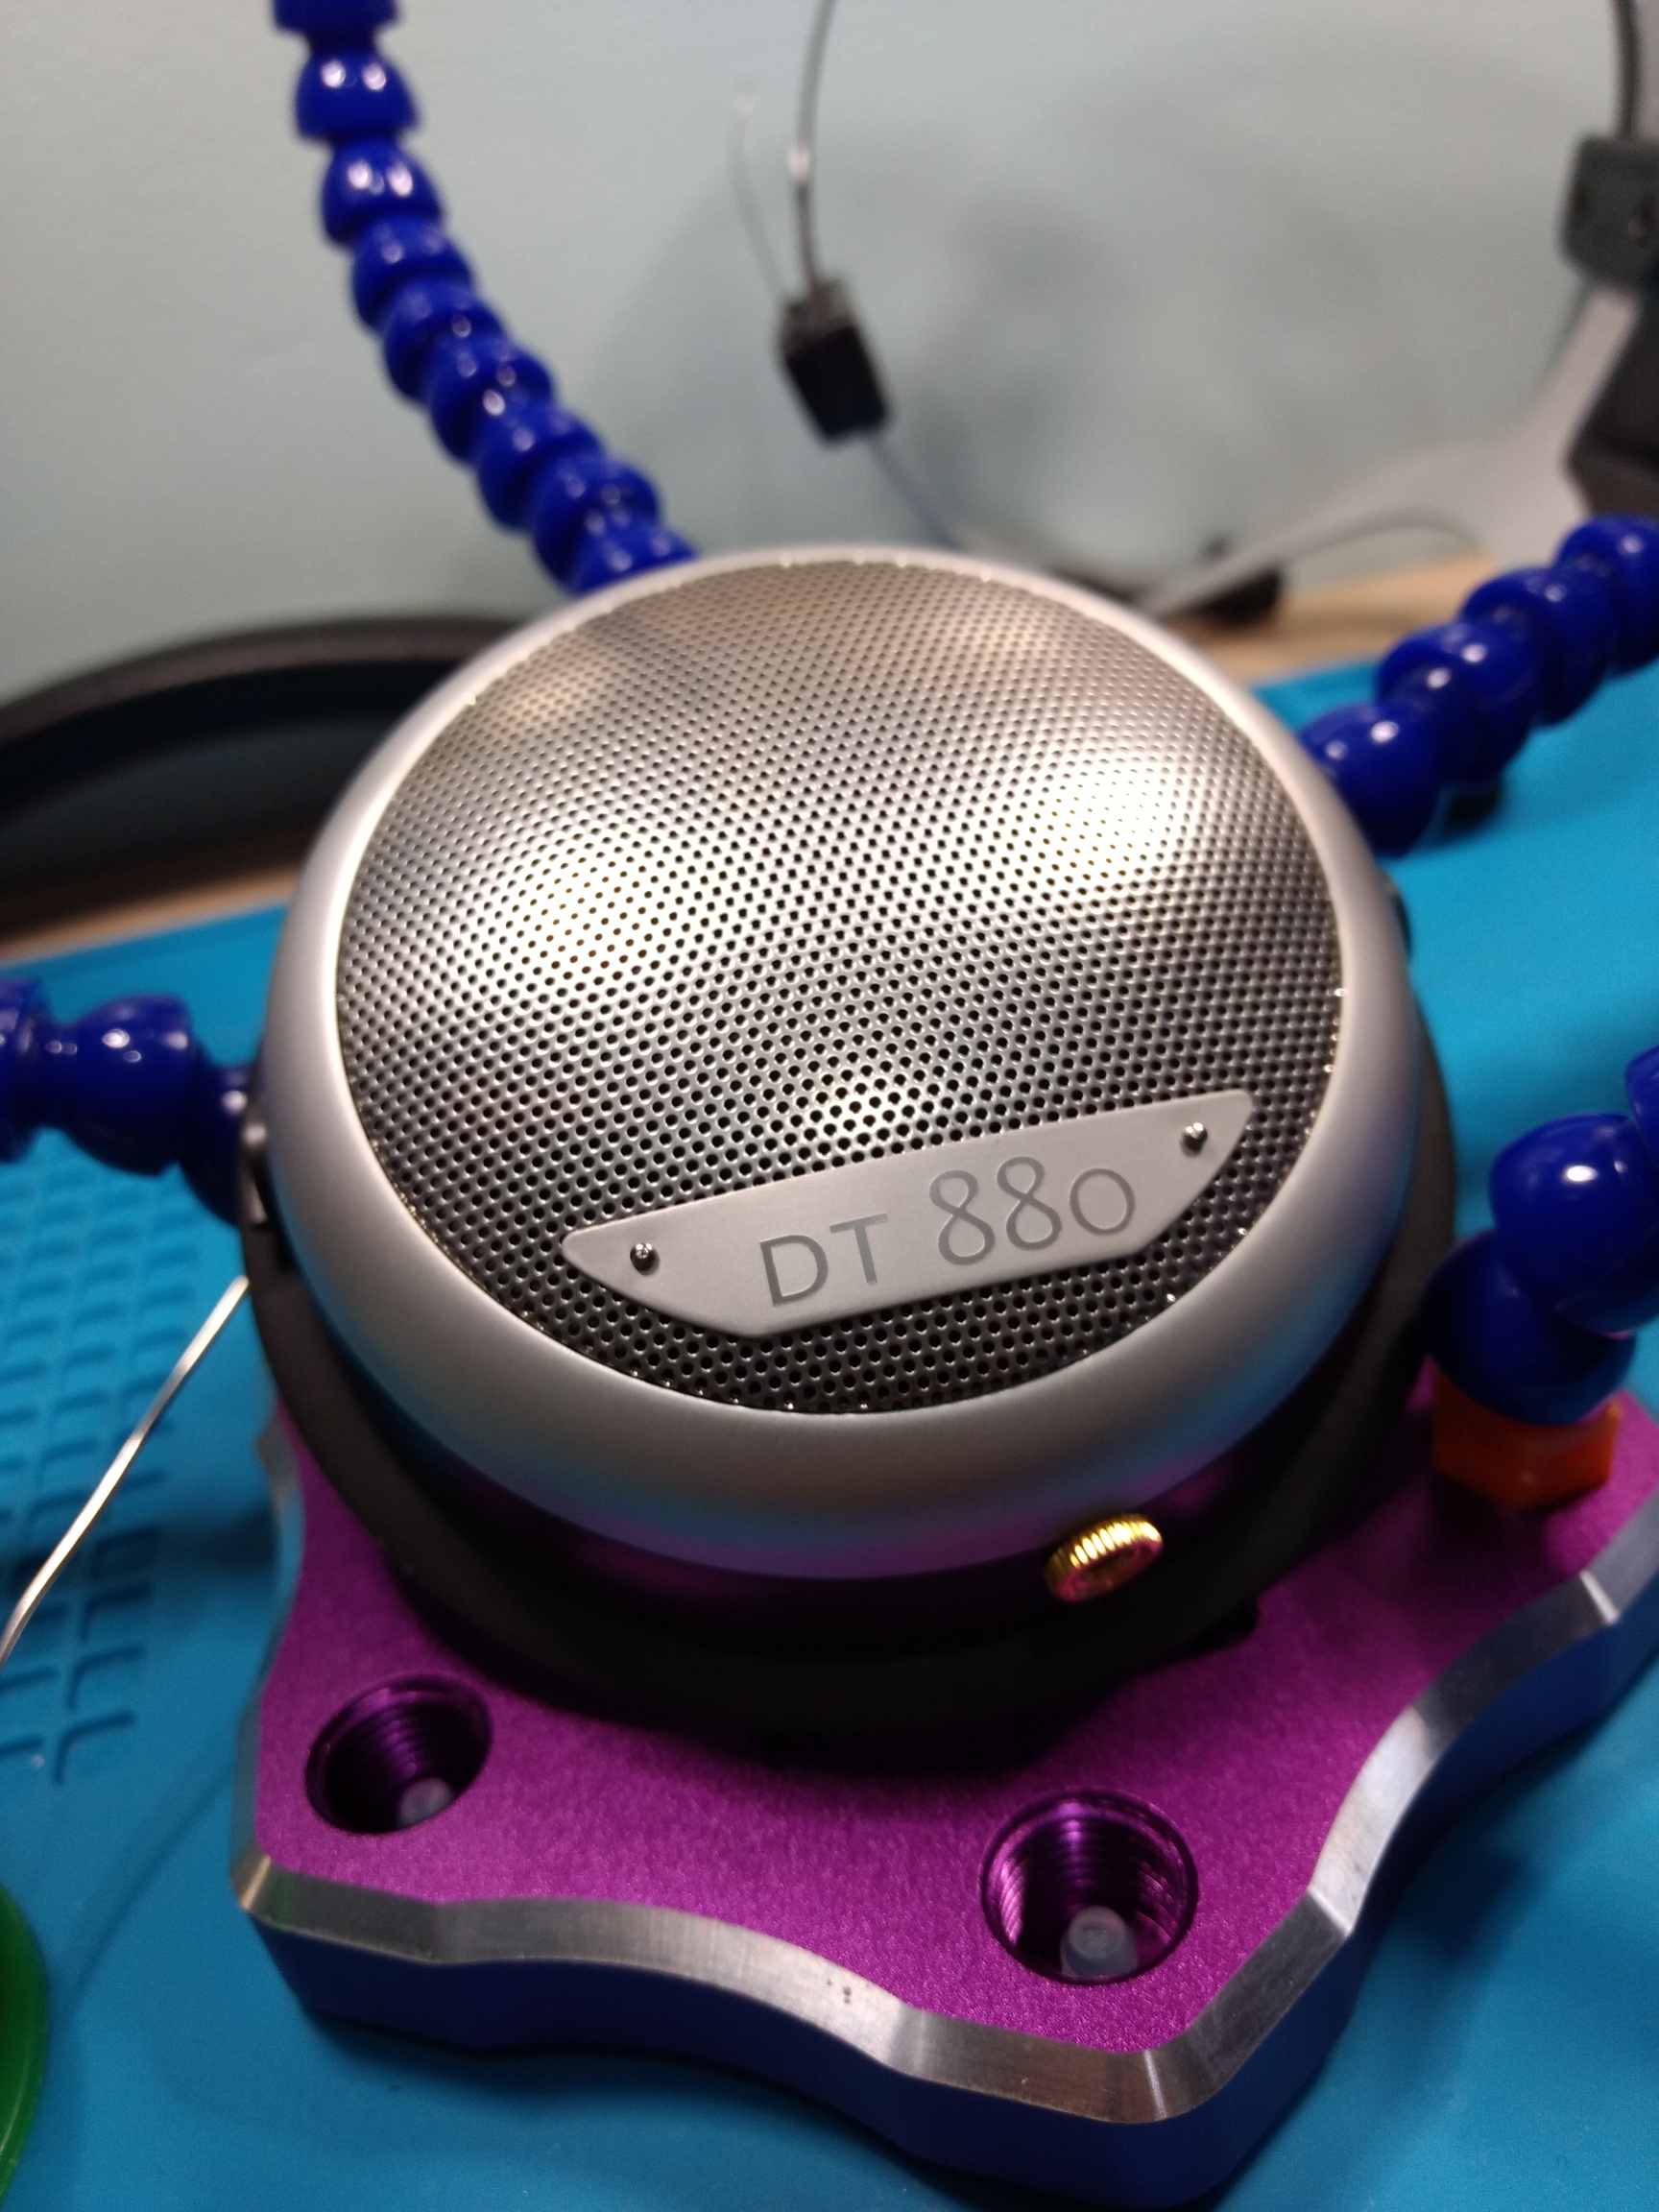
Unlike the Koss KPH30i mod that I did, there are many mod tutorials for the DT770, 880 and 990. I thought I’d do a step by step version of mine here. I used Demevelos’ method as a starting point, but because the 880’s are open and this is a balanced mod, some things are different, but essentially easier in many ways.

The 600ohm DT880 uses a single ended attached cable. The reason why anyone would want to mod it is because they would rather use the increased power from a balance output of their current amp, than having to buy a powerful single ended amp (like the Emotiva BasX A100) to power it. Converting any single ended headphone to a balance is relatively simple. You basically split the shared grounds from the single ended cable, to right ground and left ground.
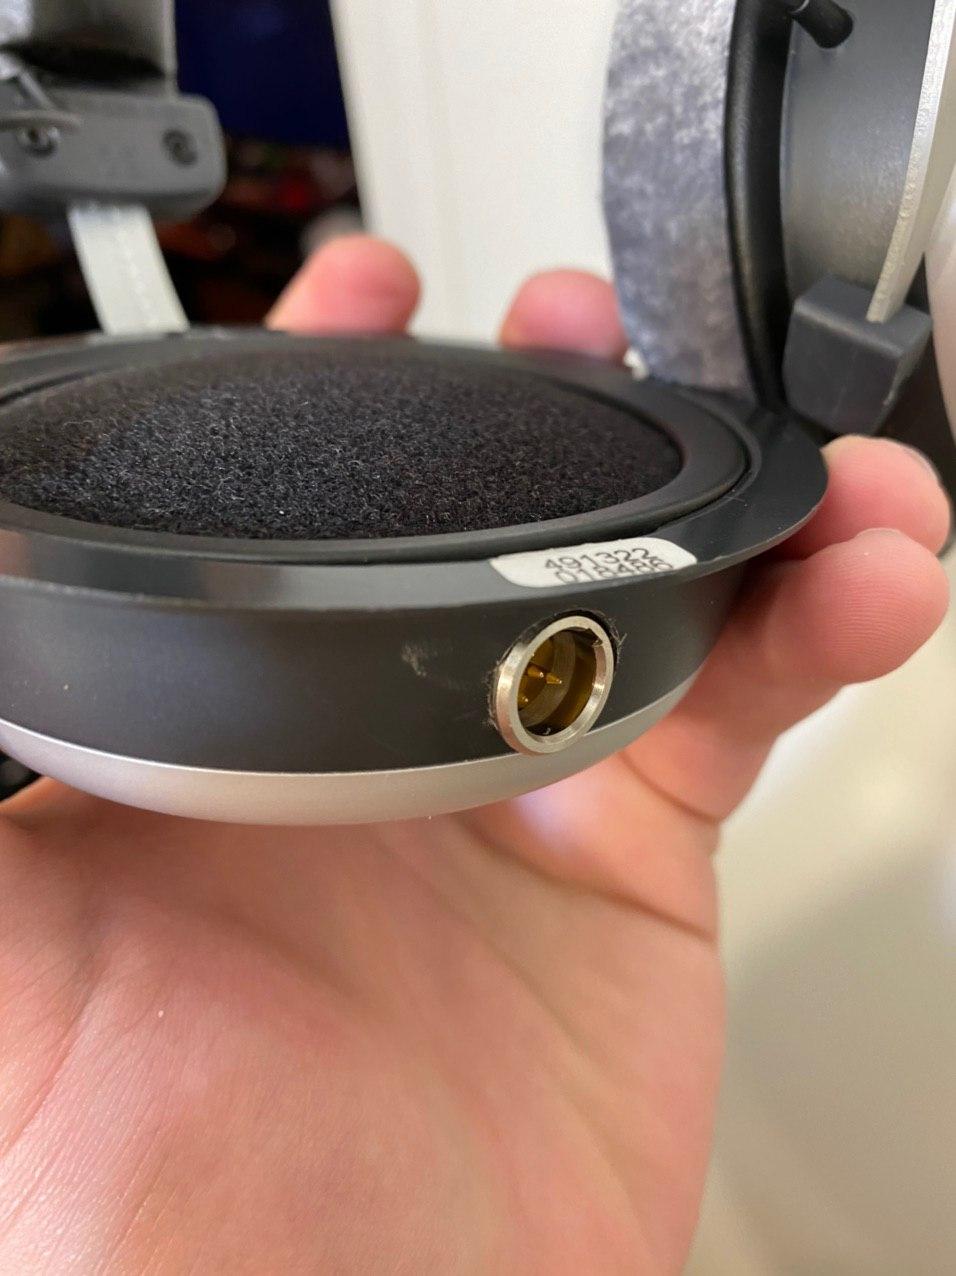
I’ve seen some people use mini-XLR connectors for their balanced mod because it means they mess around with one side, but I feel that you’re more prone to screwing up drilling the cup. My method is to insert 3.5mm jacks, one in each cup and use any of my dual 3.5mm balanced cables for it. I feel this is much more simple and dual 3.5mm cables are more attainable than 4-pin mini-XLR.
For this mod, these are the things I needed.
- T6 Torx bit
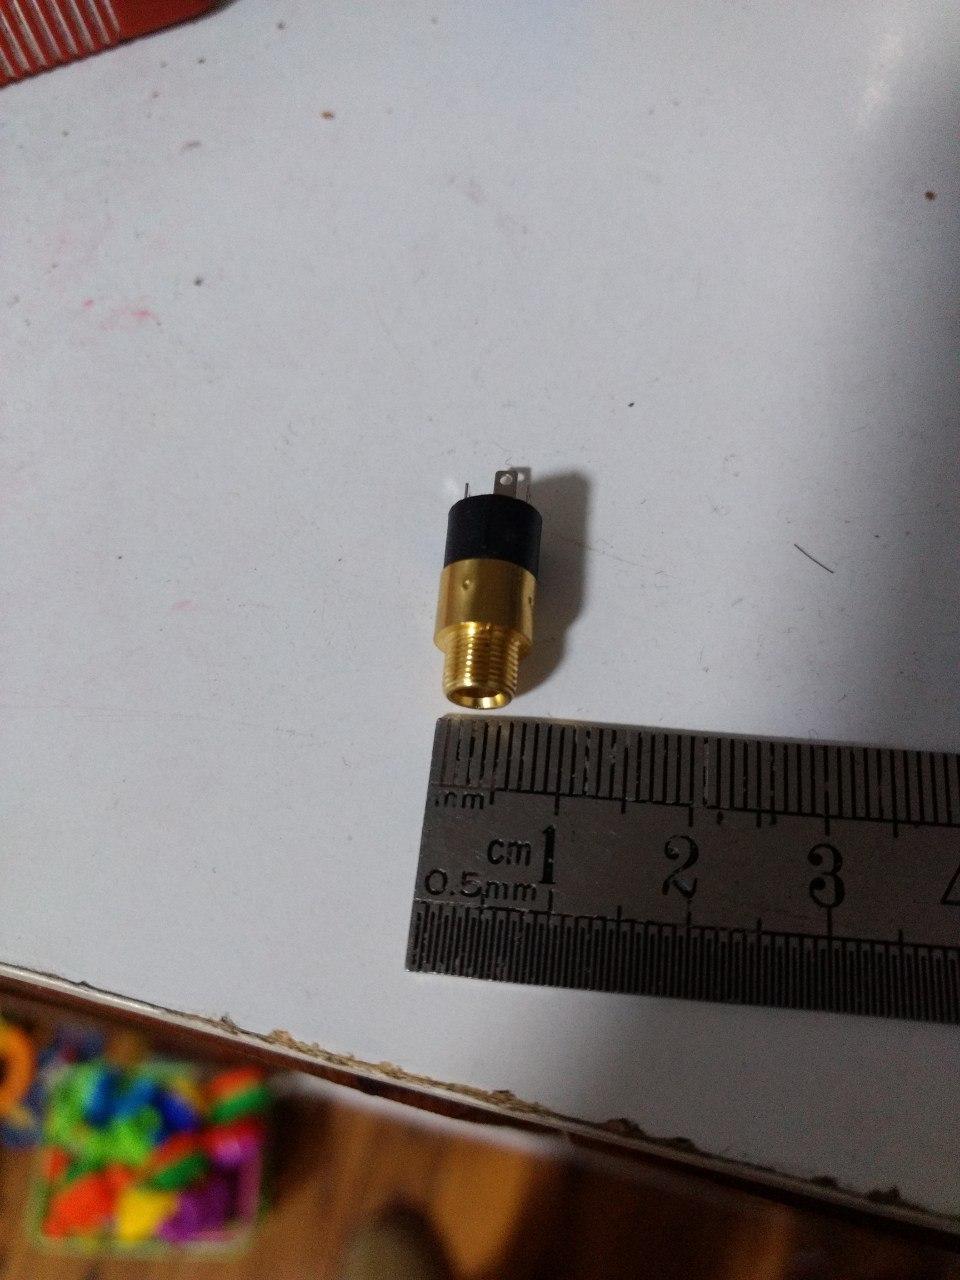
- PJ392 3.5mm female connector
- Sugru
- No 2 and 6 metal drill bit
- Soldering equipment
- Multimeter
Before starting. It would a good idea to test which pin you need to solder, by plugging the connector to a dual 3.5mm cable you intend to use, then testing for continuity. By default, the middle will always be ground, and the right side pin will be the hot, but it’s still good to confirm with a multimeter.
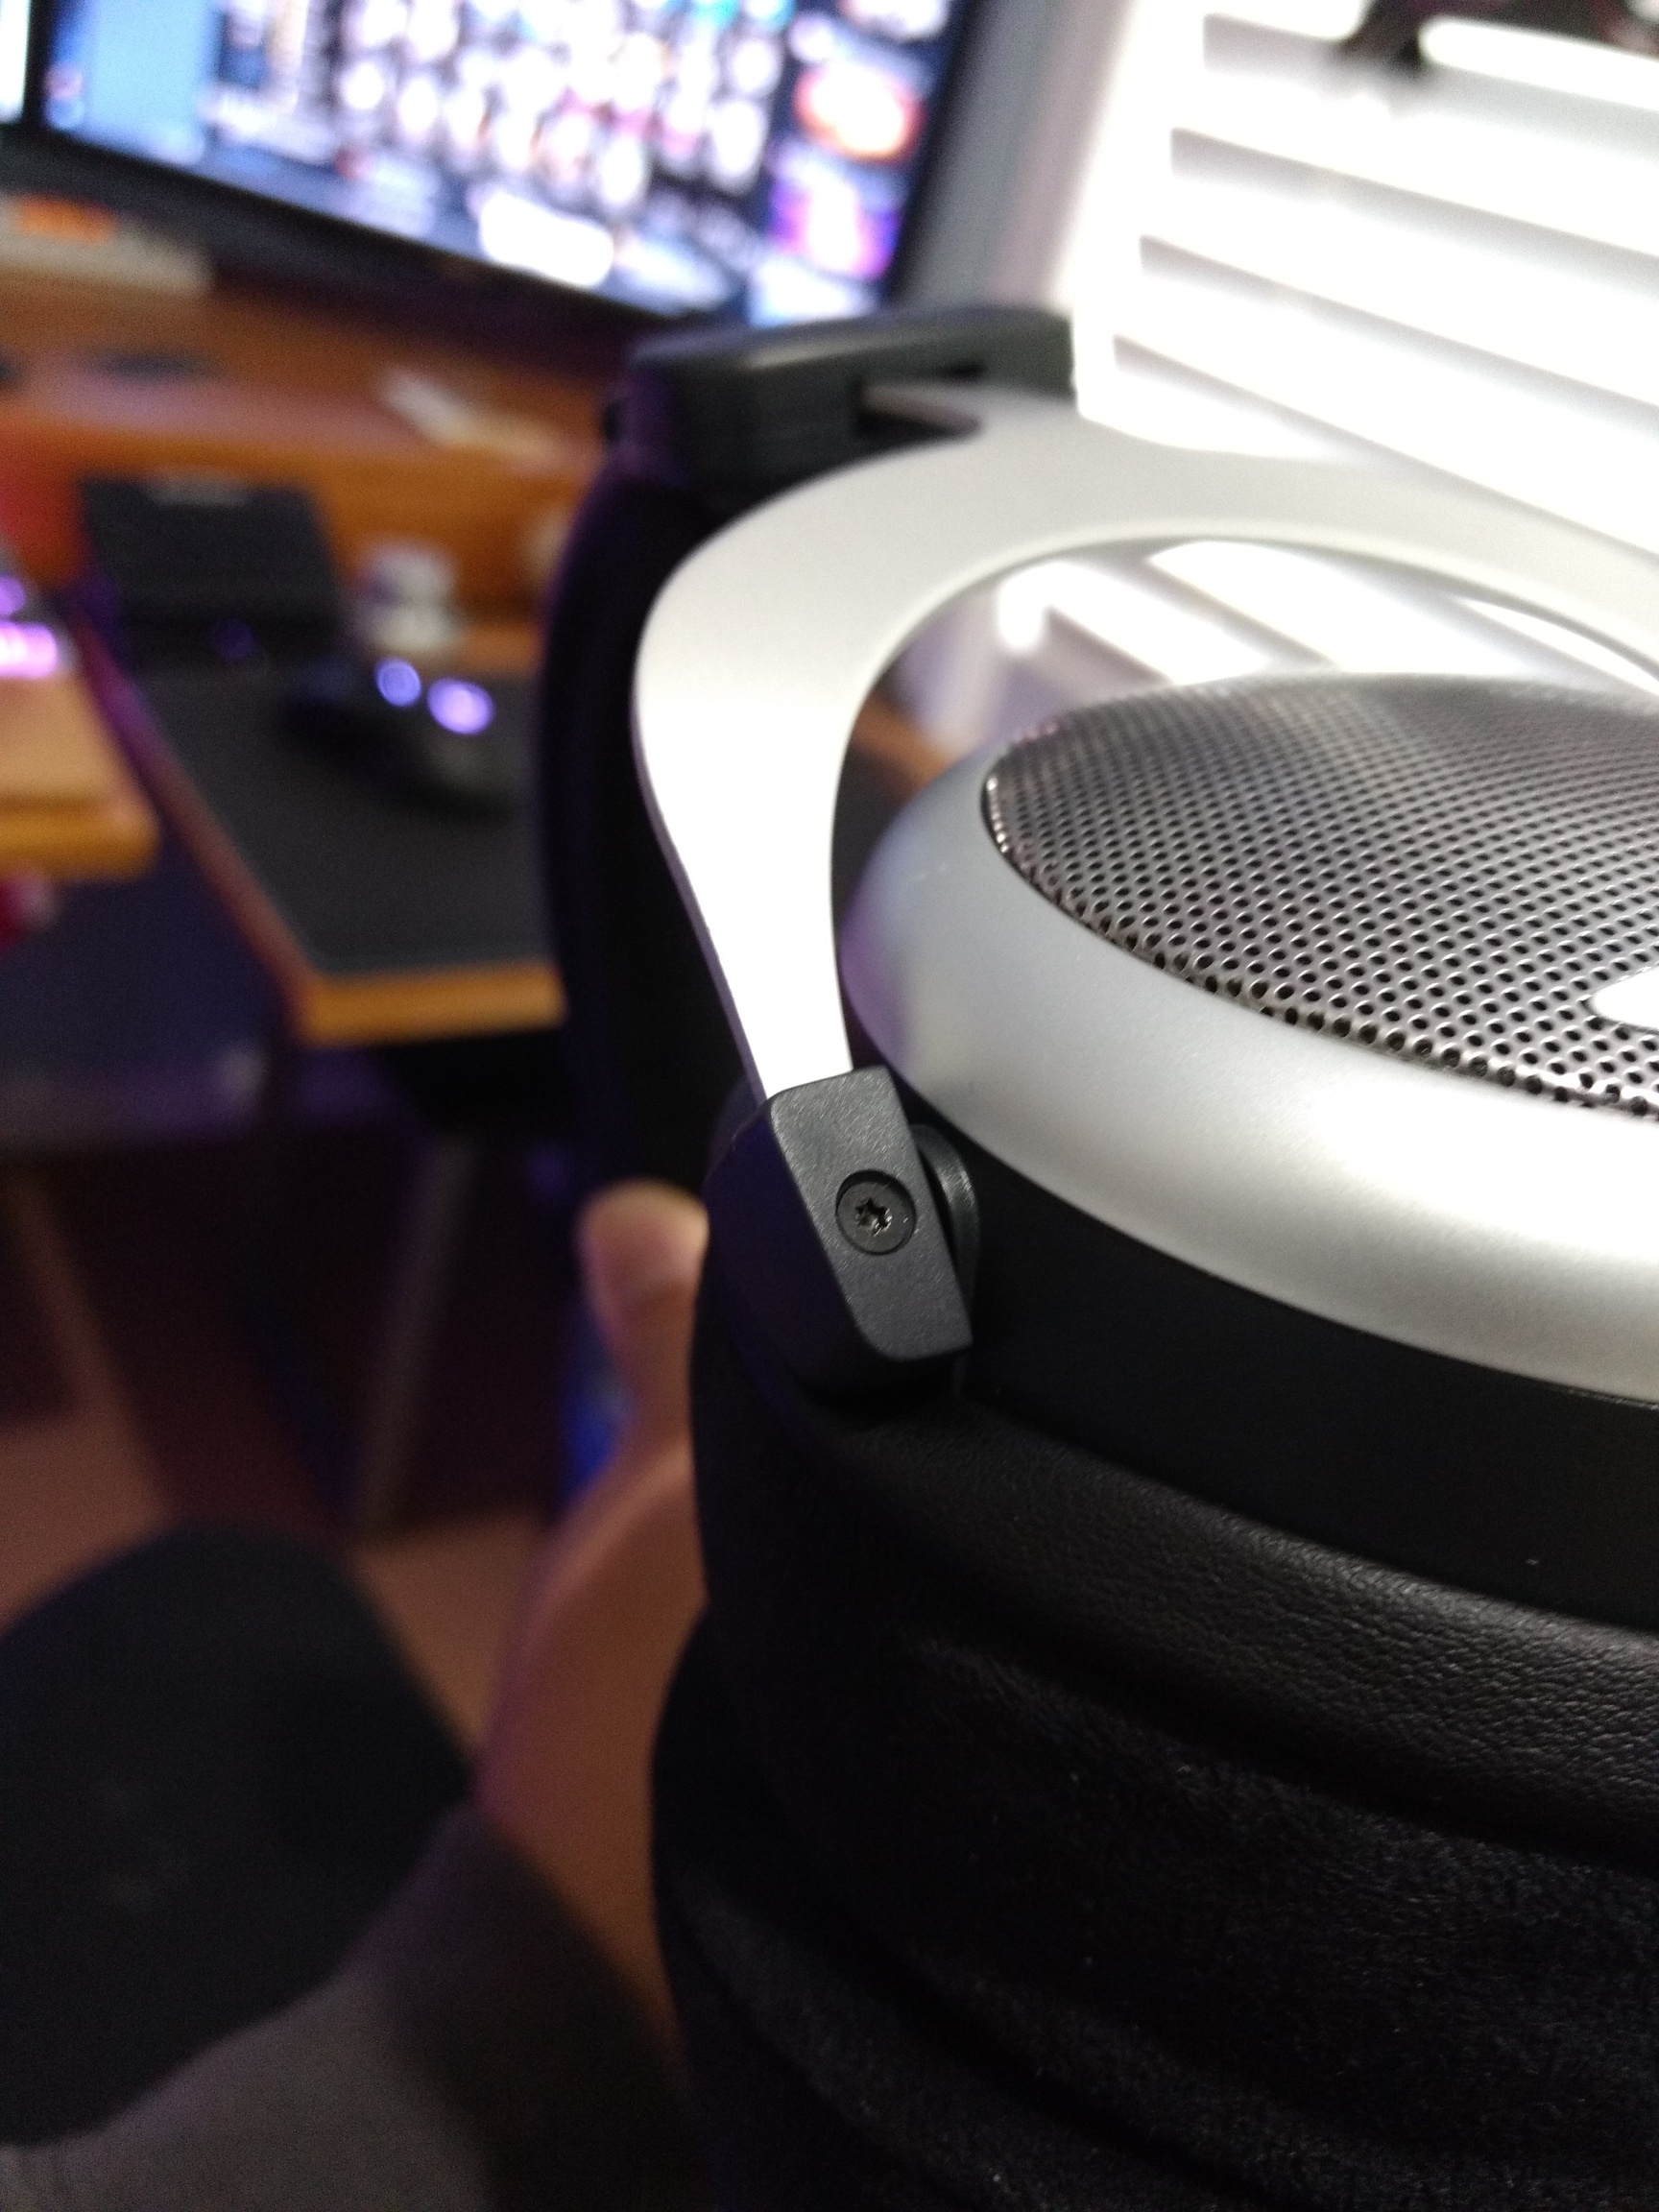
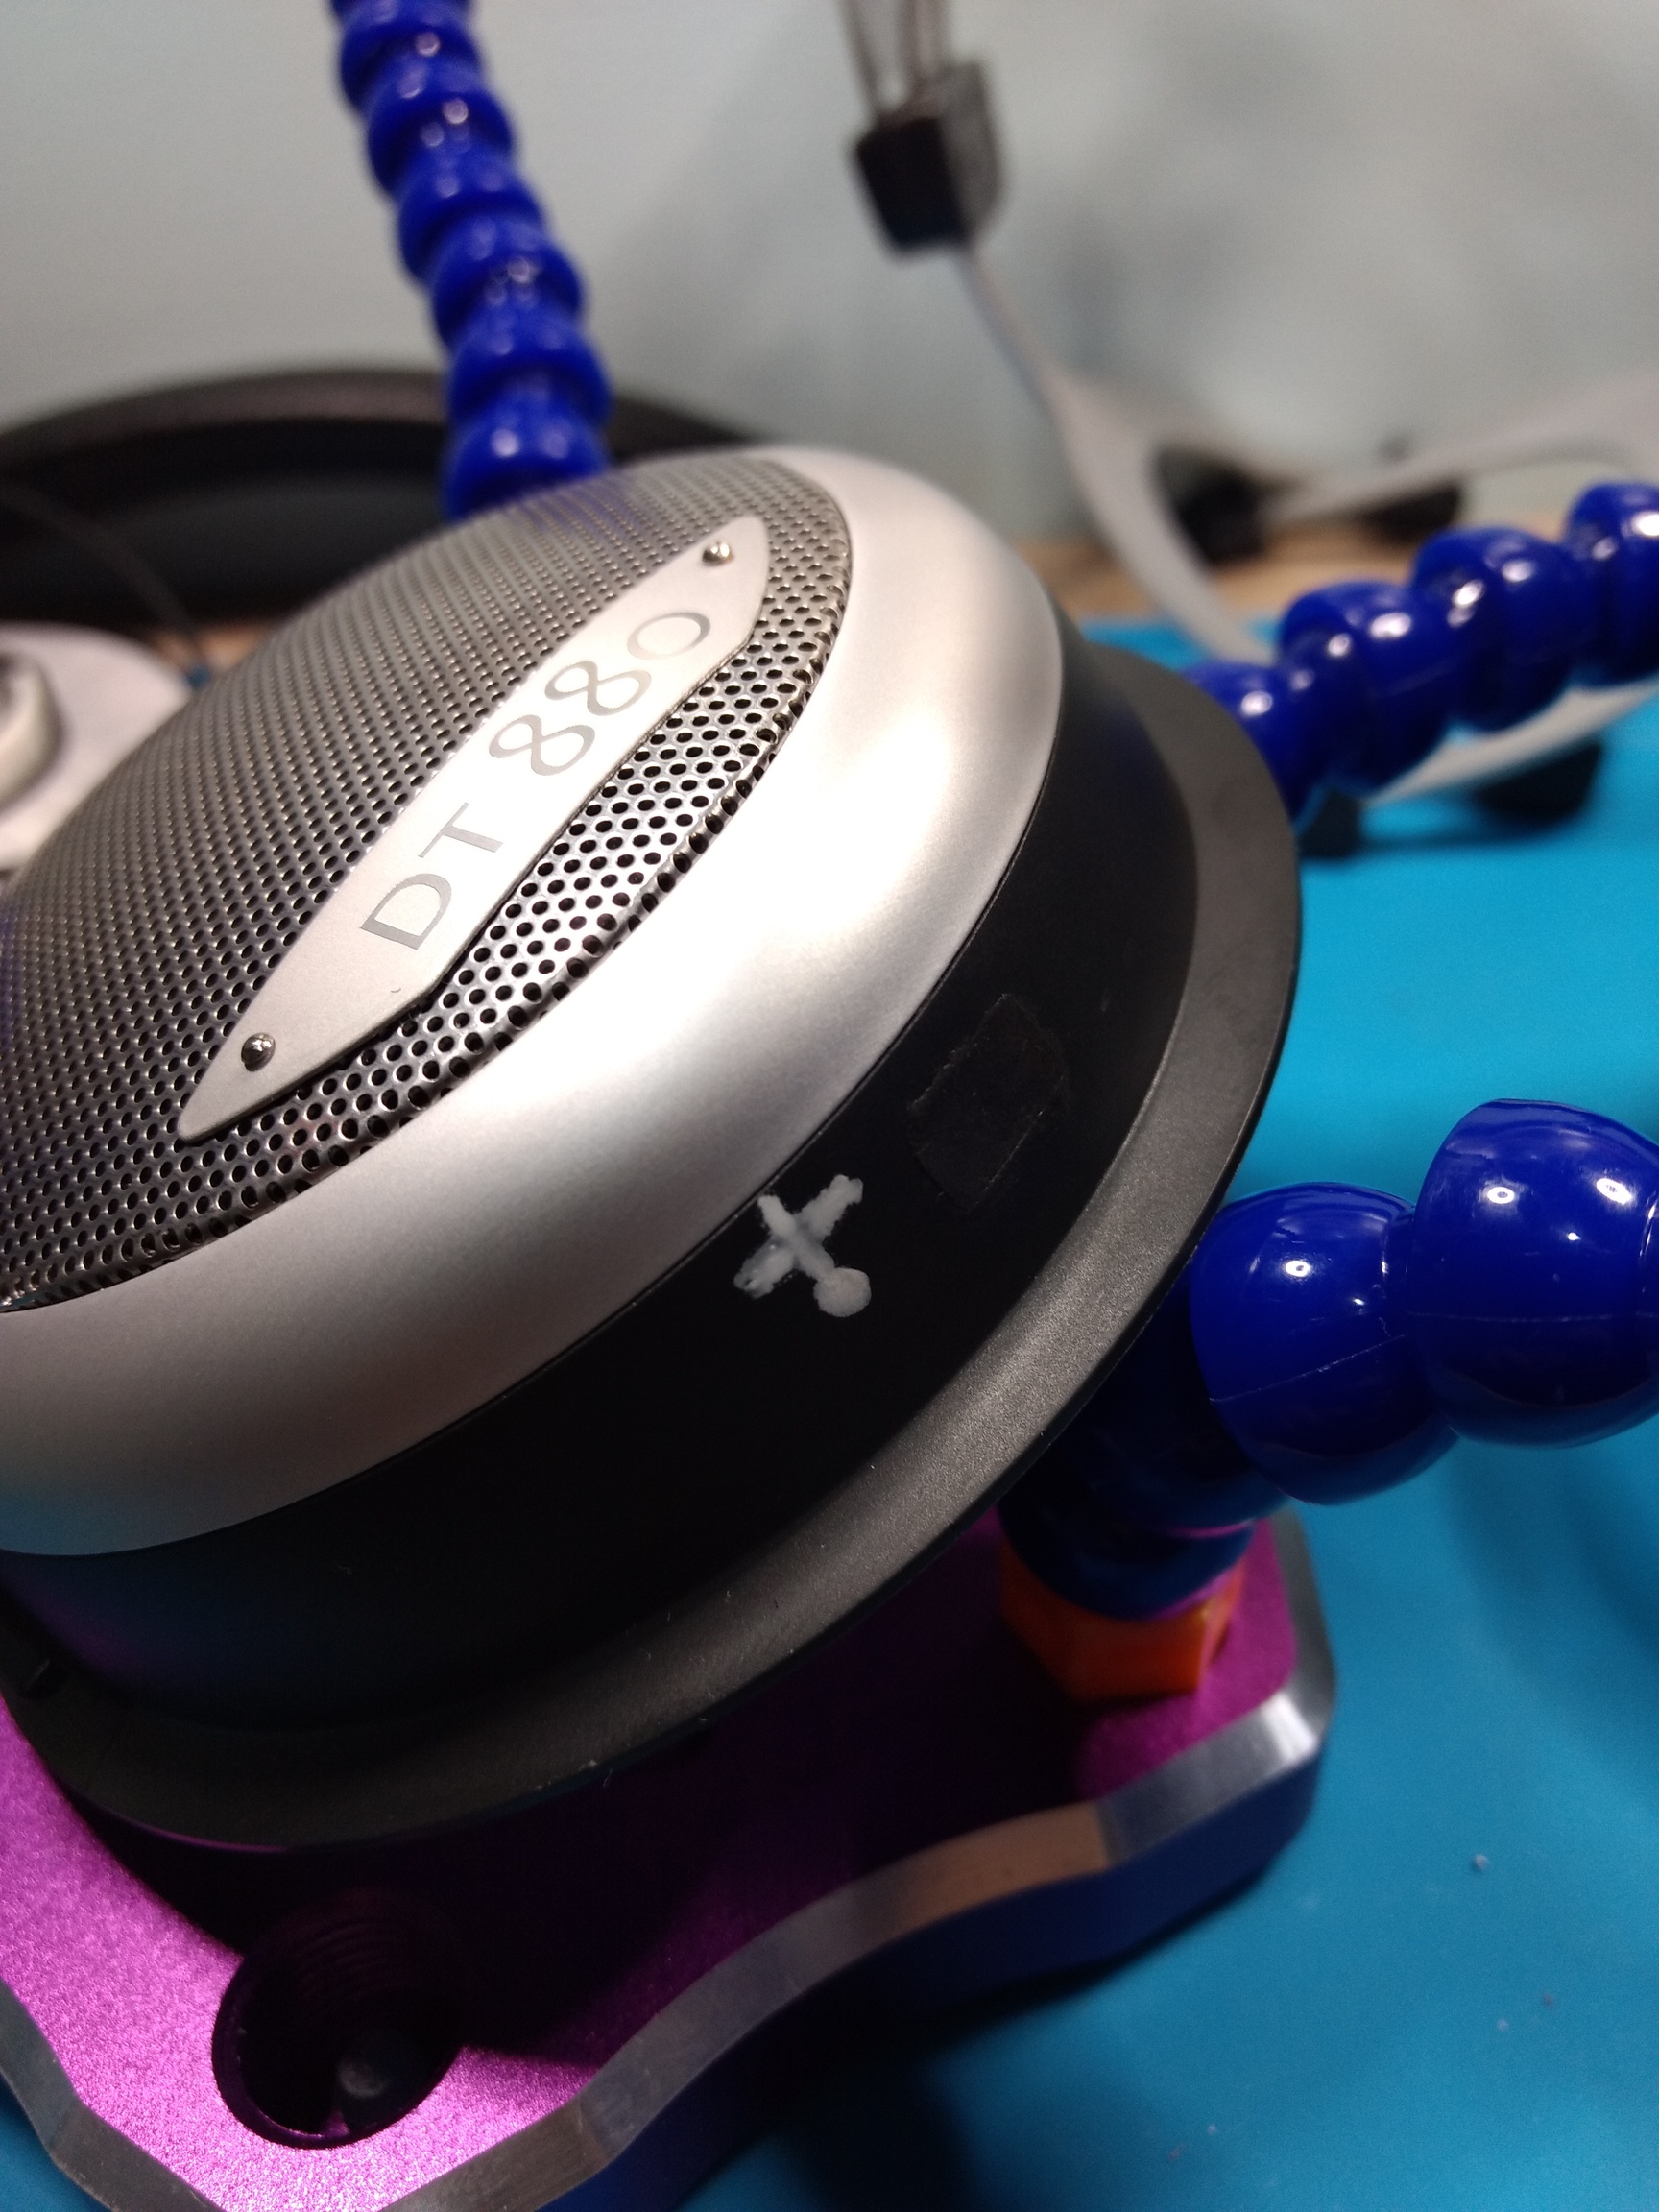
First, pull off the pads. If you’ve done pad swaps before, this is your standard affair. There are no special connectors. It just comes right off. Then you’re going to need to remove the headband padding. It’s like a ziplock bag, so you can use your fingernails to dig under and pull the padding apart. Once you’ve removed it, the wires connecting the 2 cups will be exposed. Next, using a T6 torx bit screwdriver, you unscrew both sides of the cup, then you can gently remove the metal yoke. The plastic housing that holds the yoke to the cup can and will come off once its loose, so don’t worry when that happens. When done it’ll look like this.
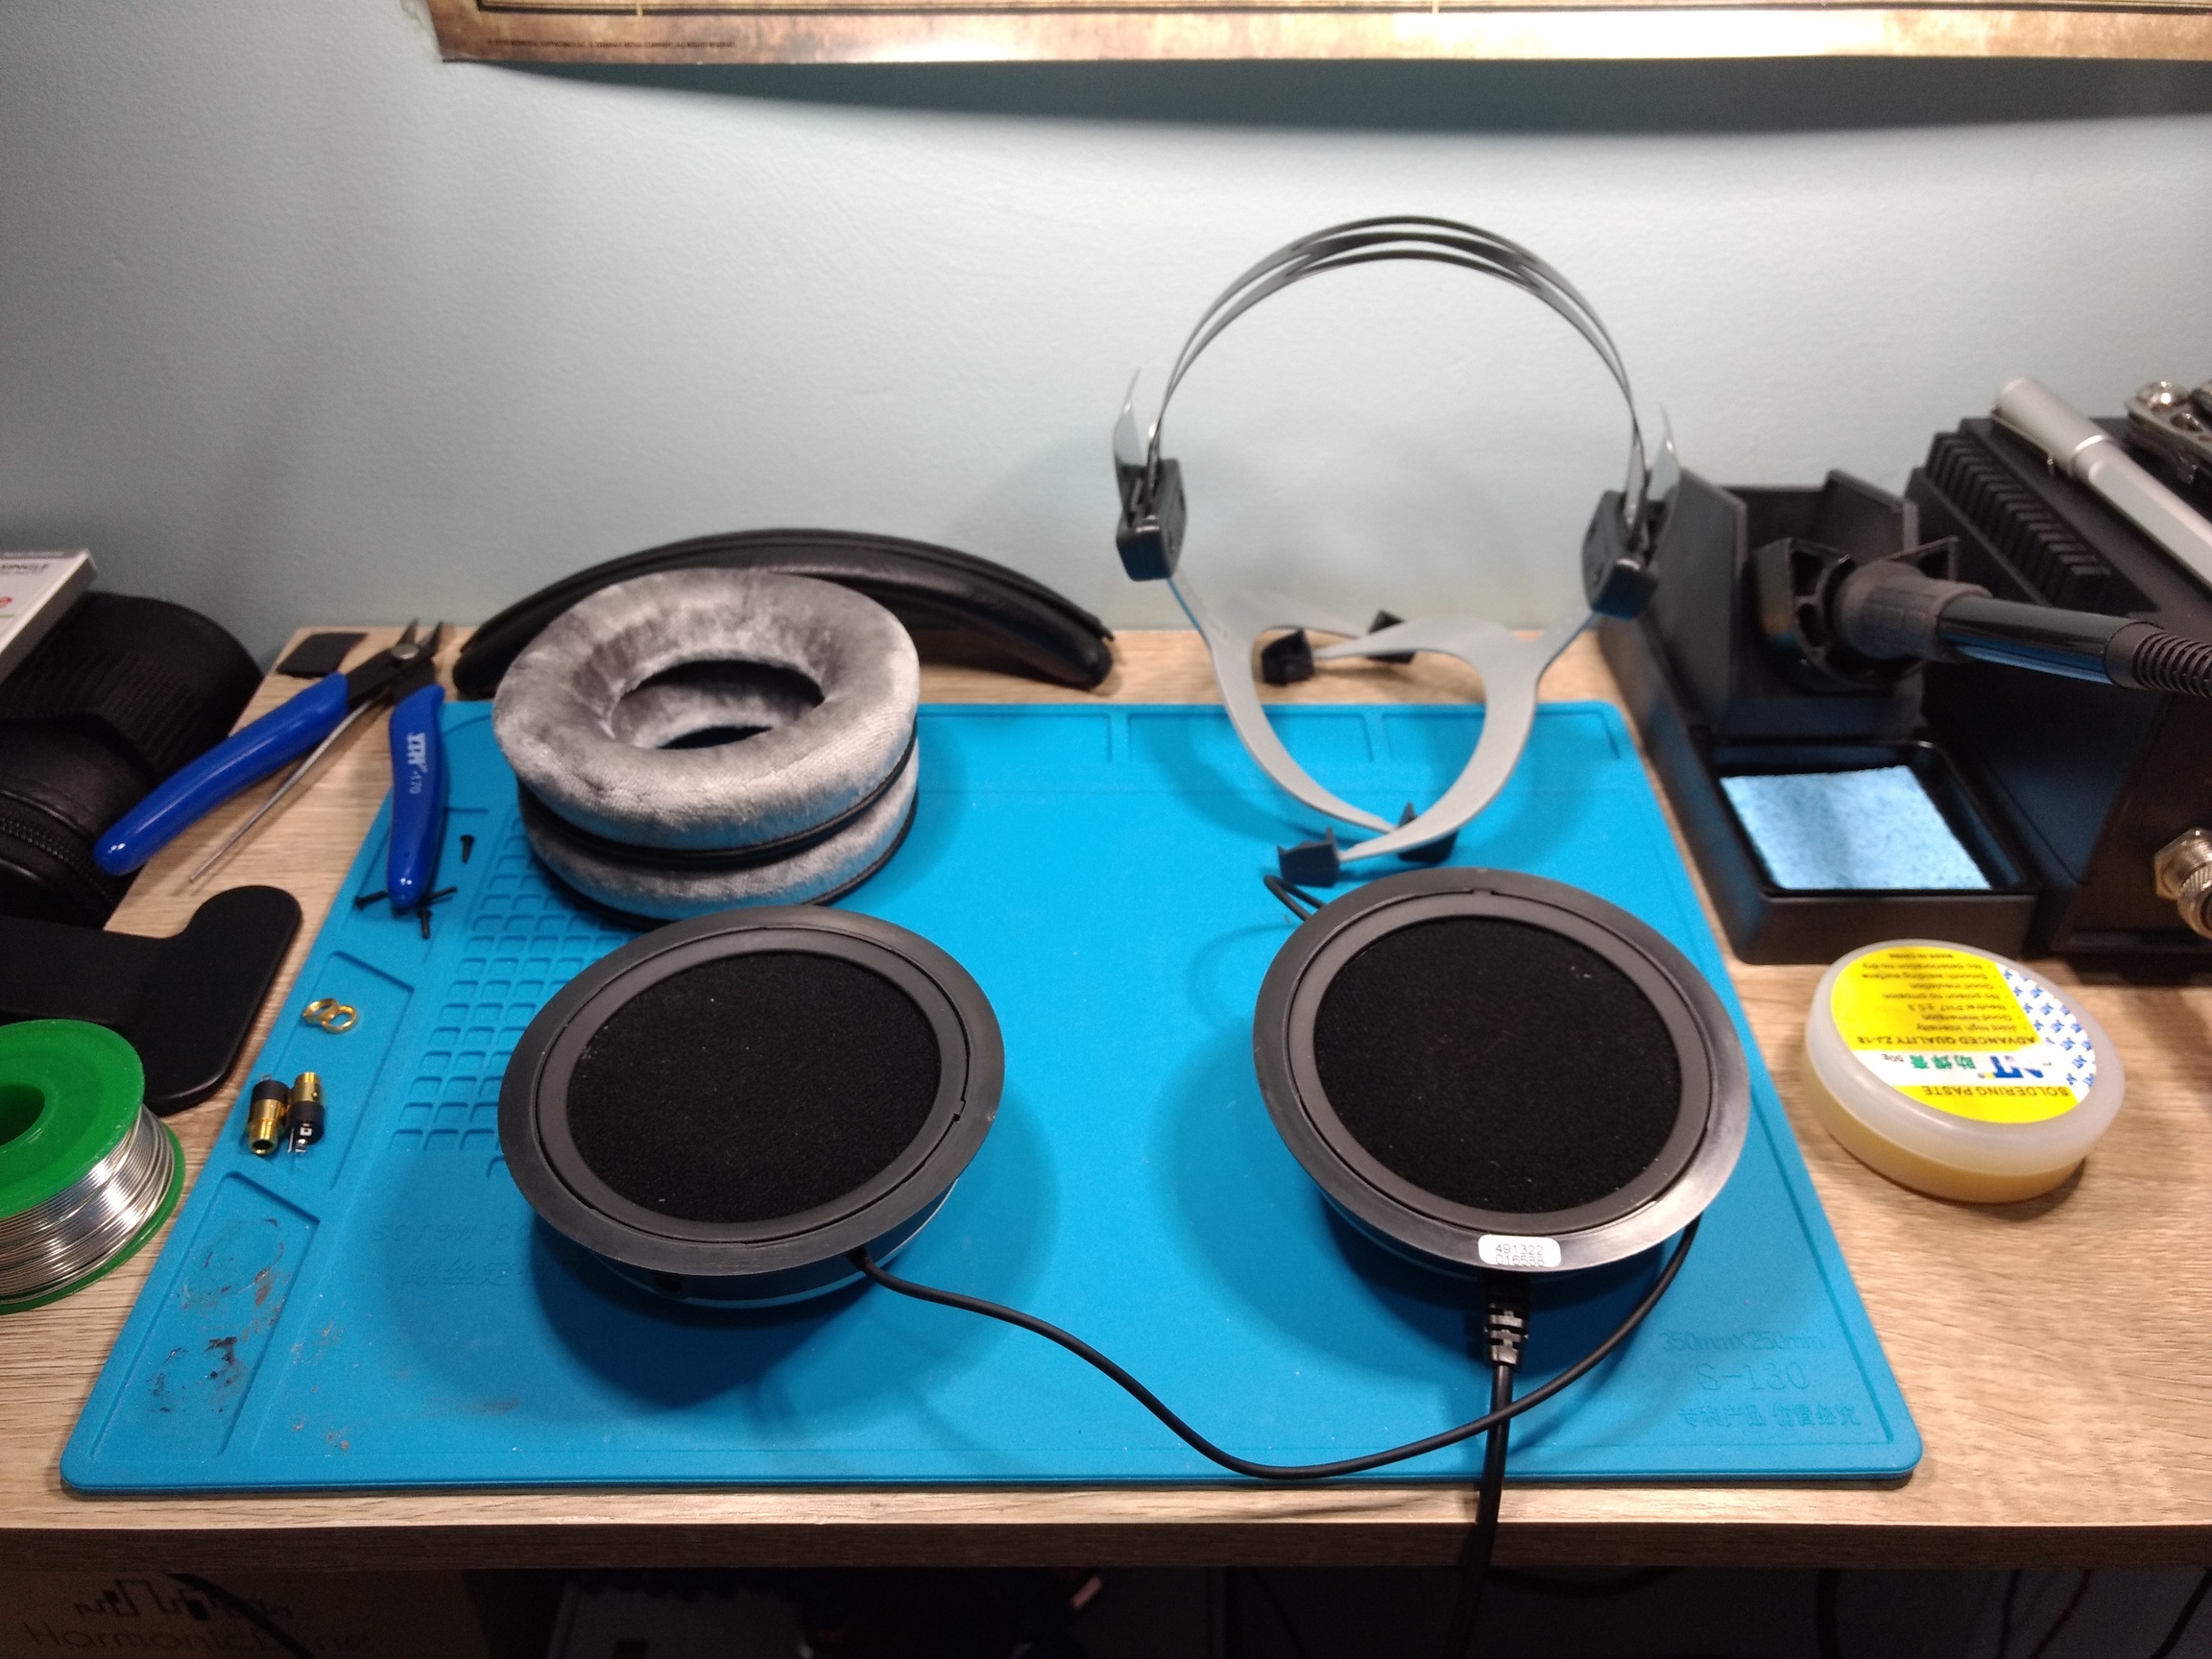
Starting with the right cup, next is to pry the plastic ring that holds the driver down. I found this part tricky because I didn’t want to damage the ring or the housing, but because they were made from soft plastic, there till be somg scratching anyway as you use a thin flathead bit to get under and pry the ring off. Demevalos’ tutorial outlines this nicely.
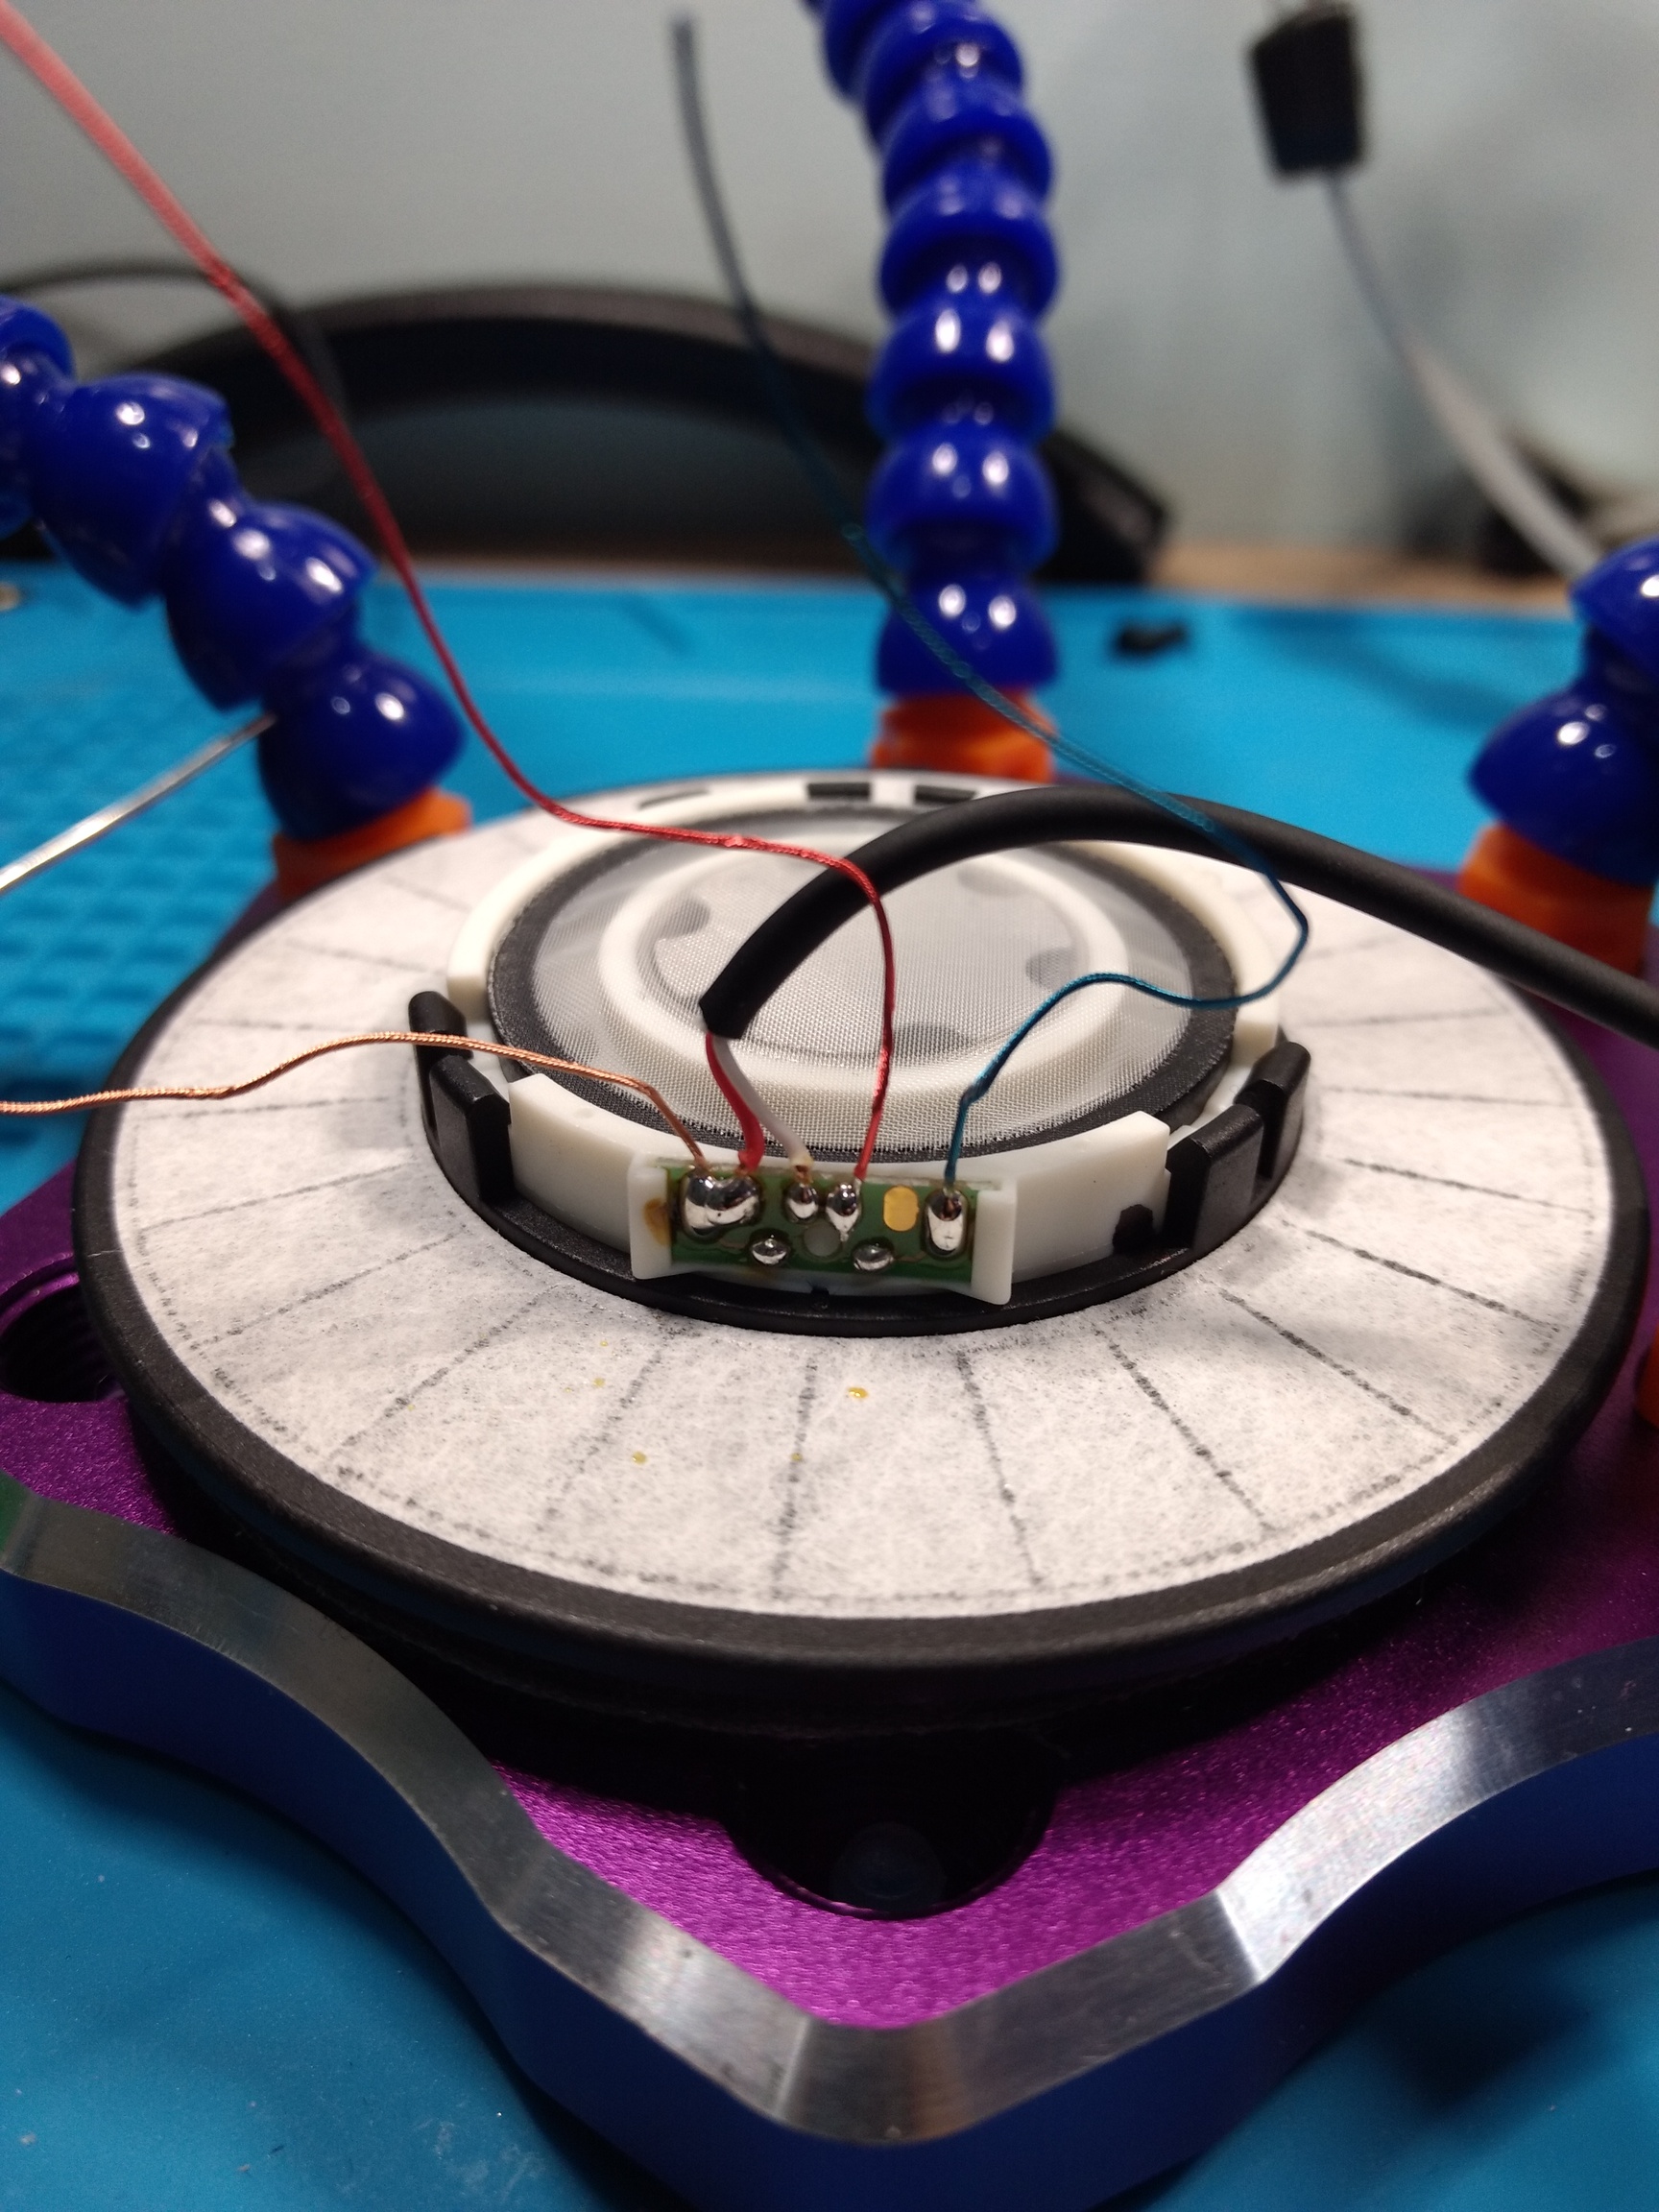
Once you’re done, you’ll be able to remove the driven, exposing the wires like so.
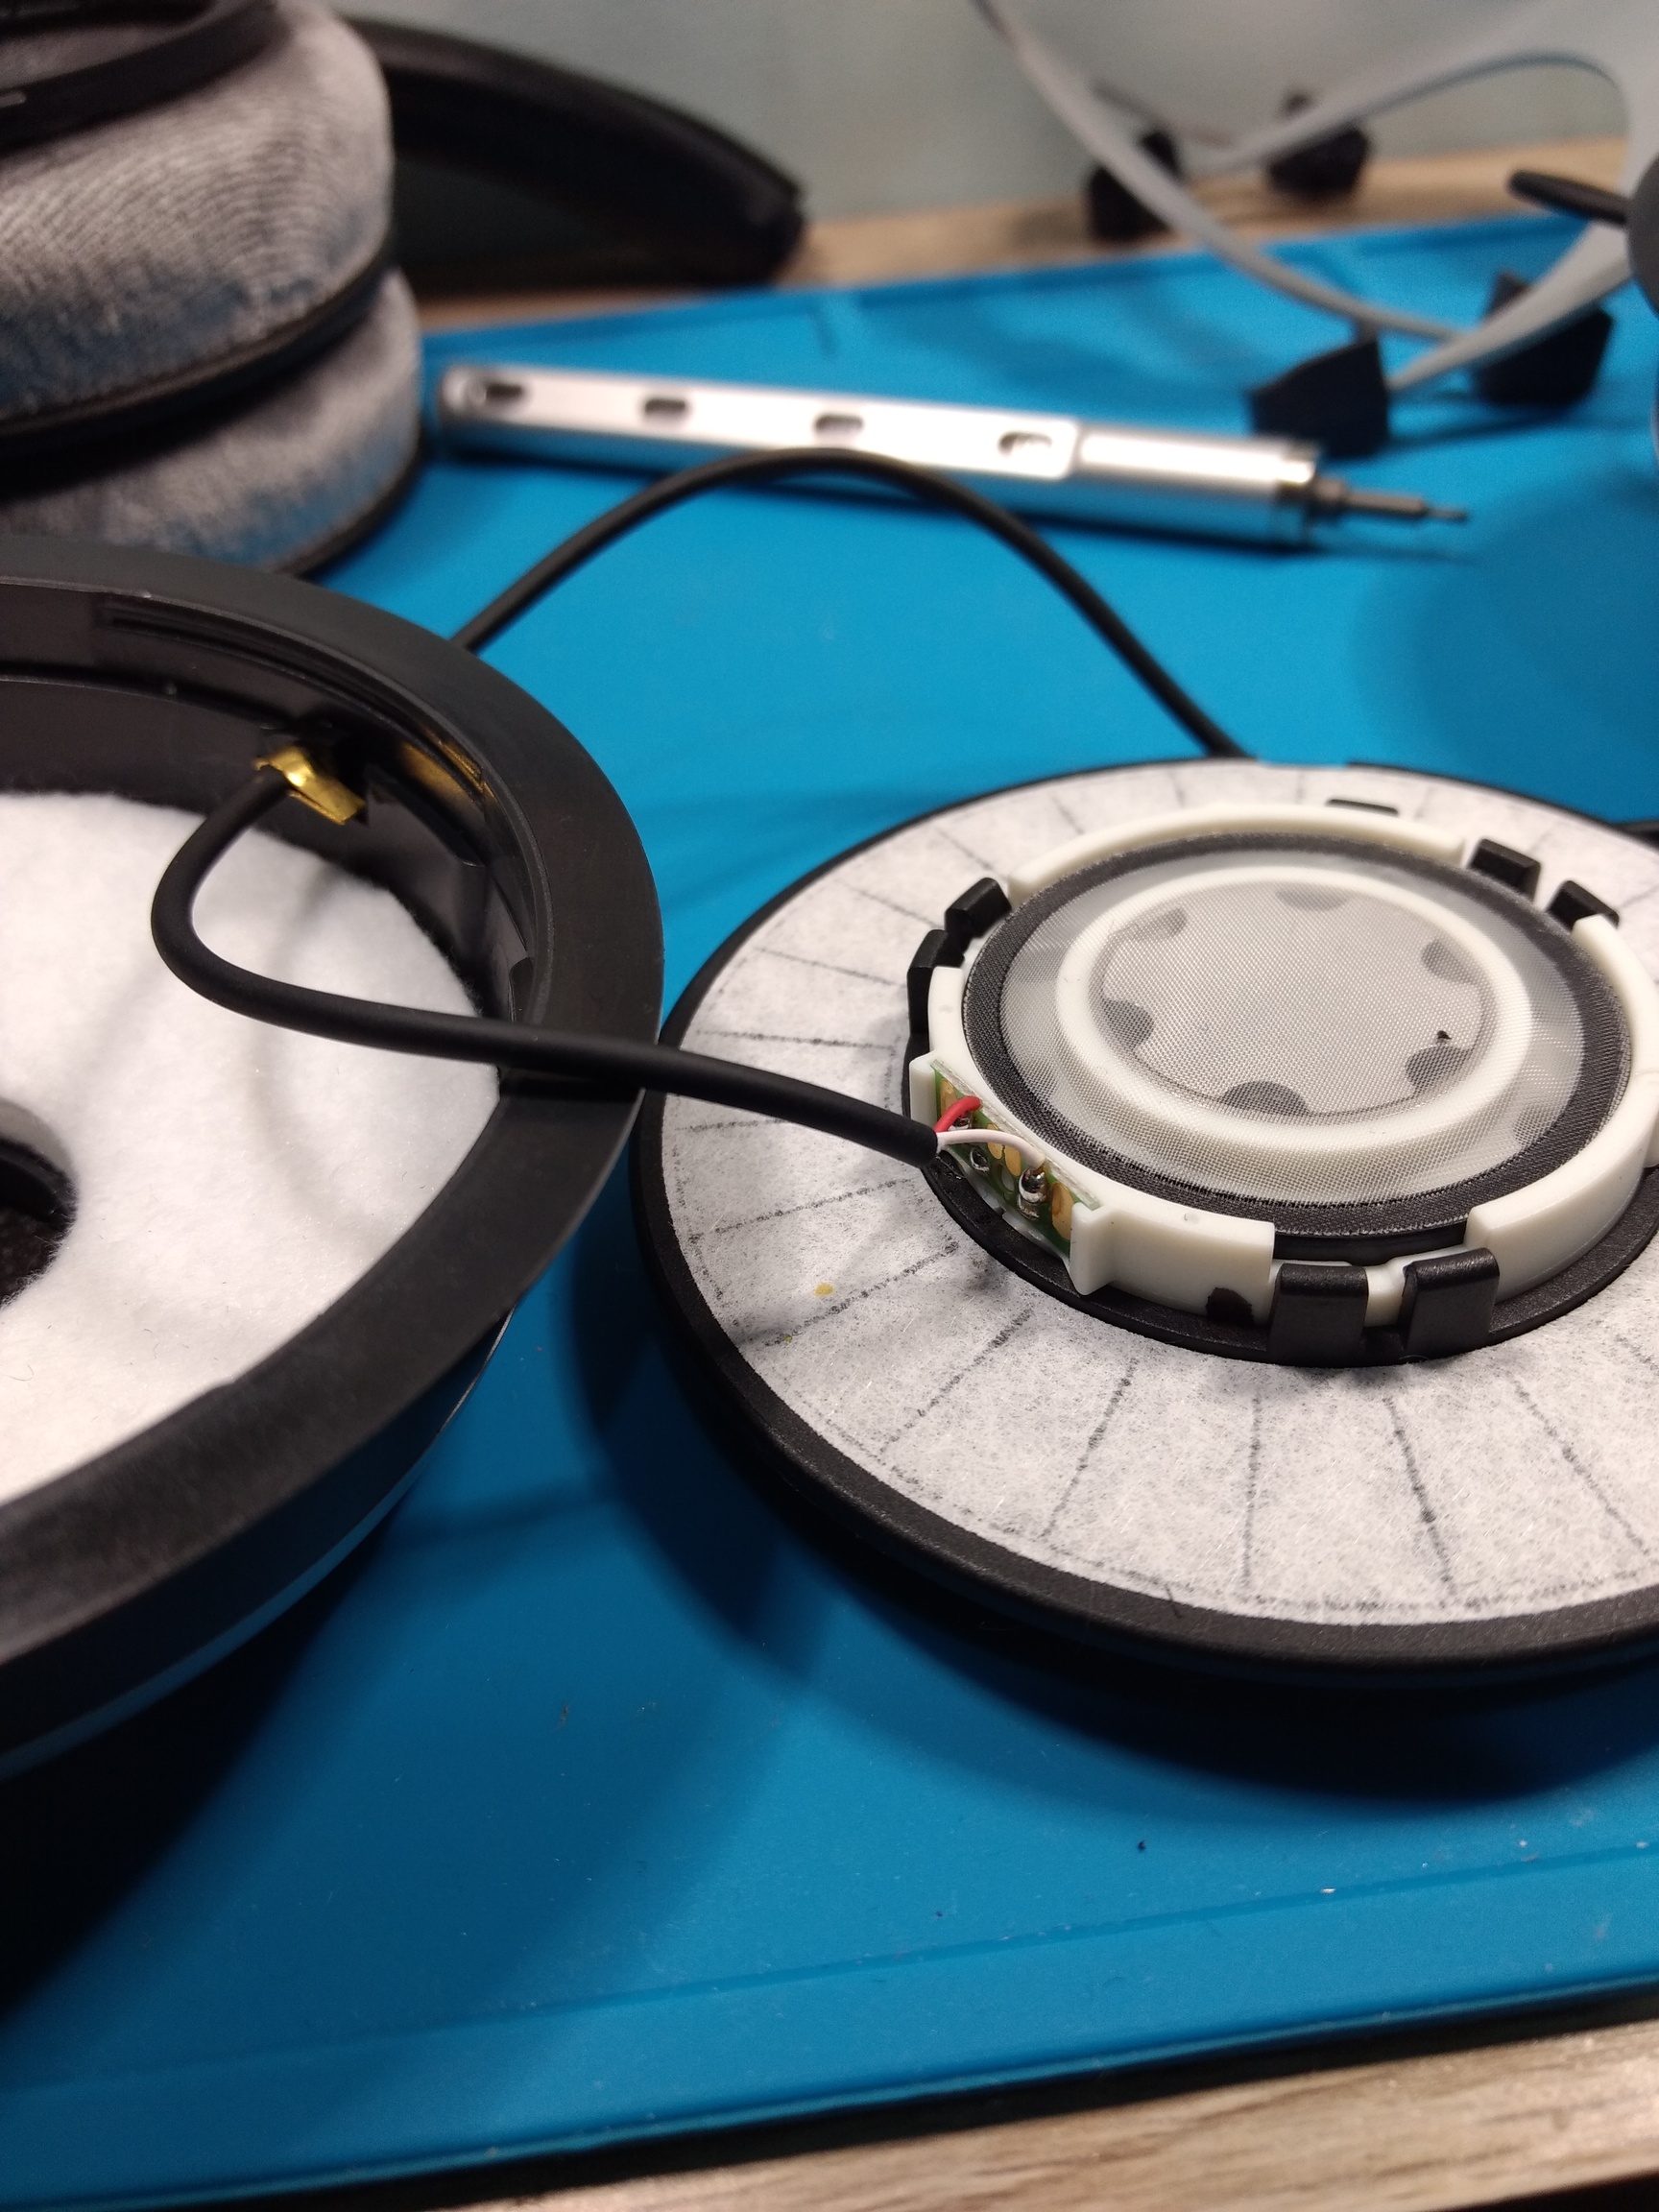
Cut off the wire on both ends of the metal tab. The metal tab clamps the internal wires preventing them from moving. Cutting it off it allows you unsheath the cable as well as separating the driver and cable from the housing.
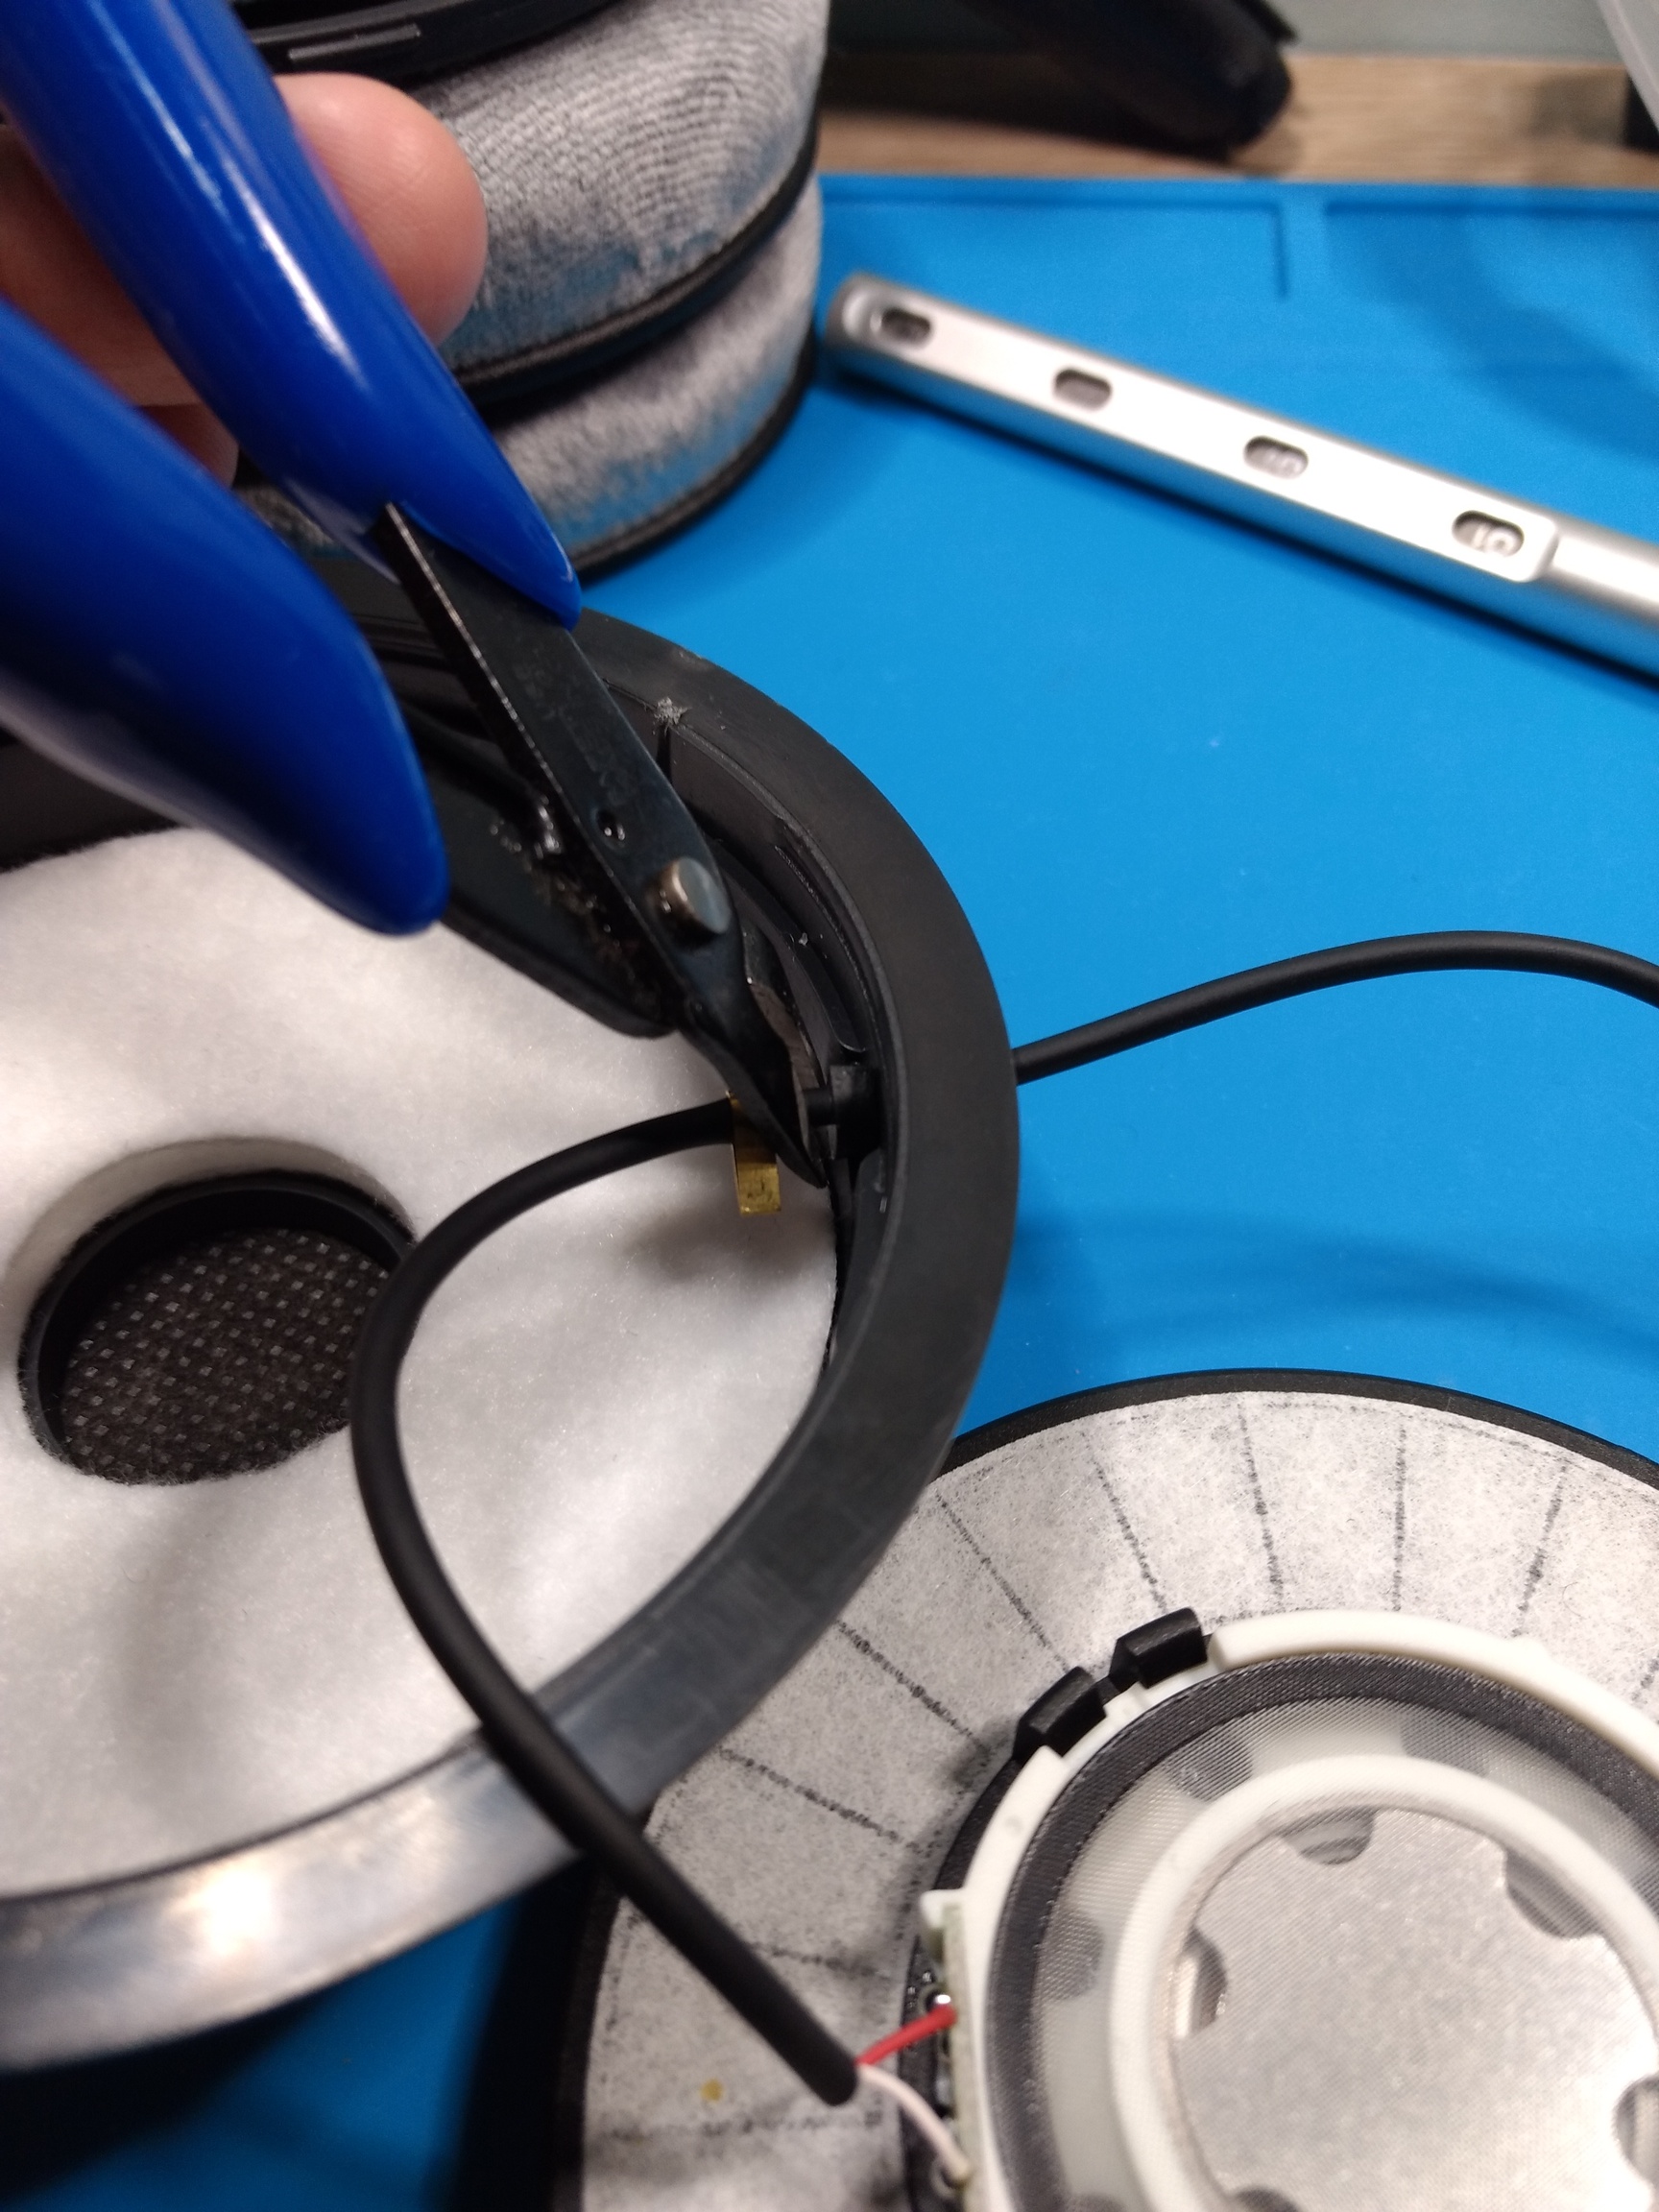
There will be a rubber seal left behind once you remove the cable. Pull this out too.
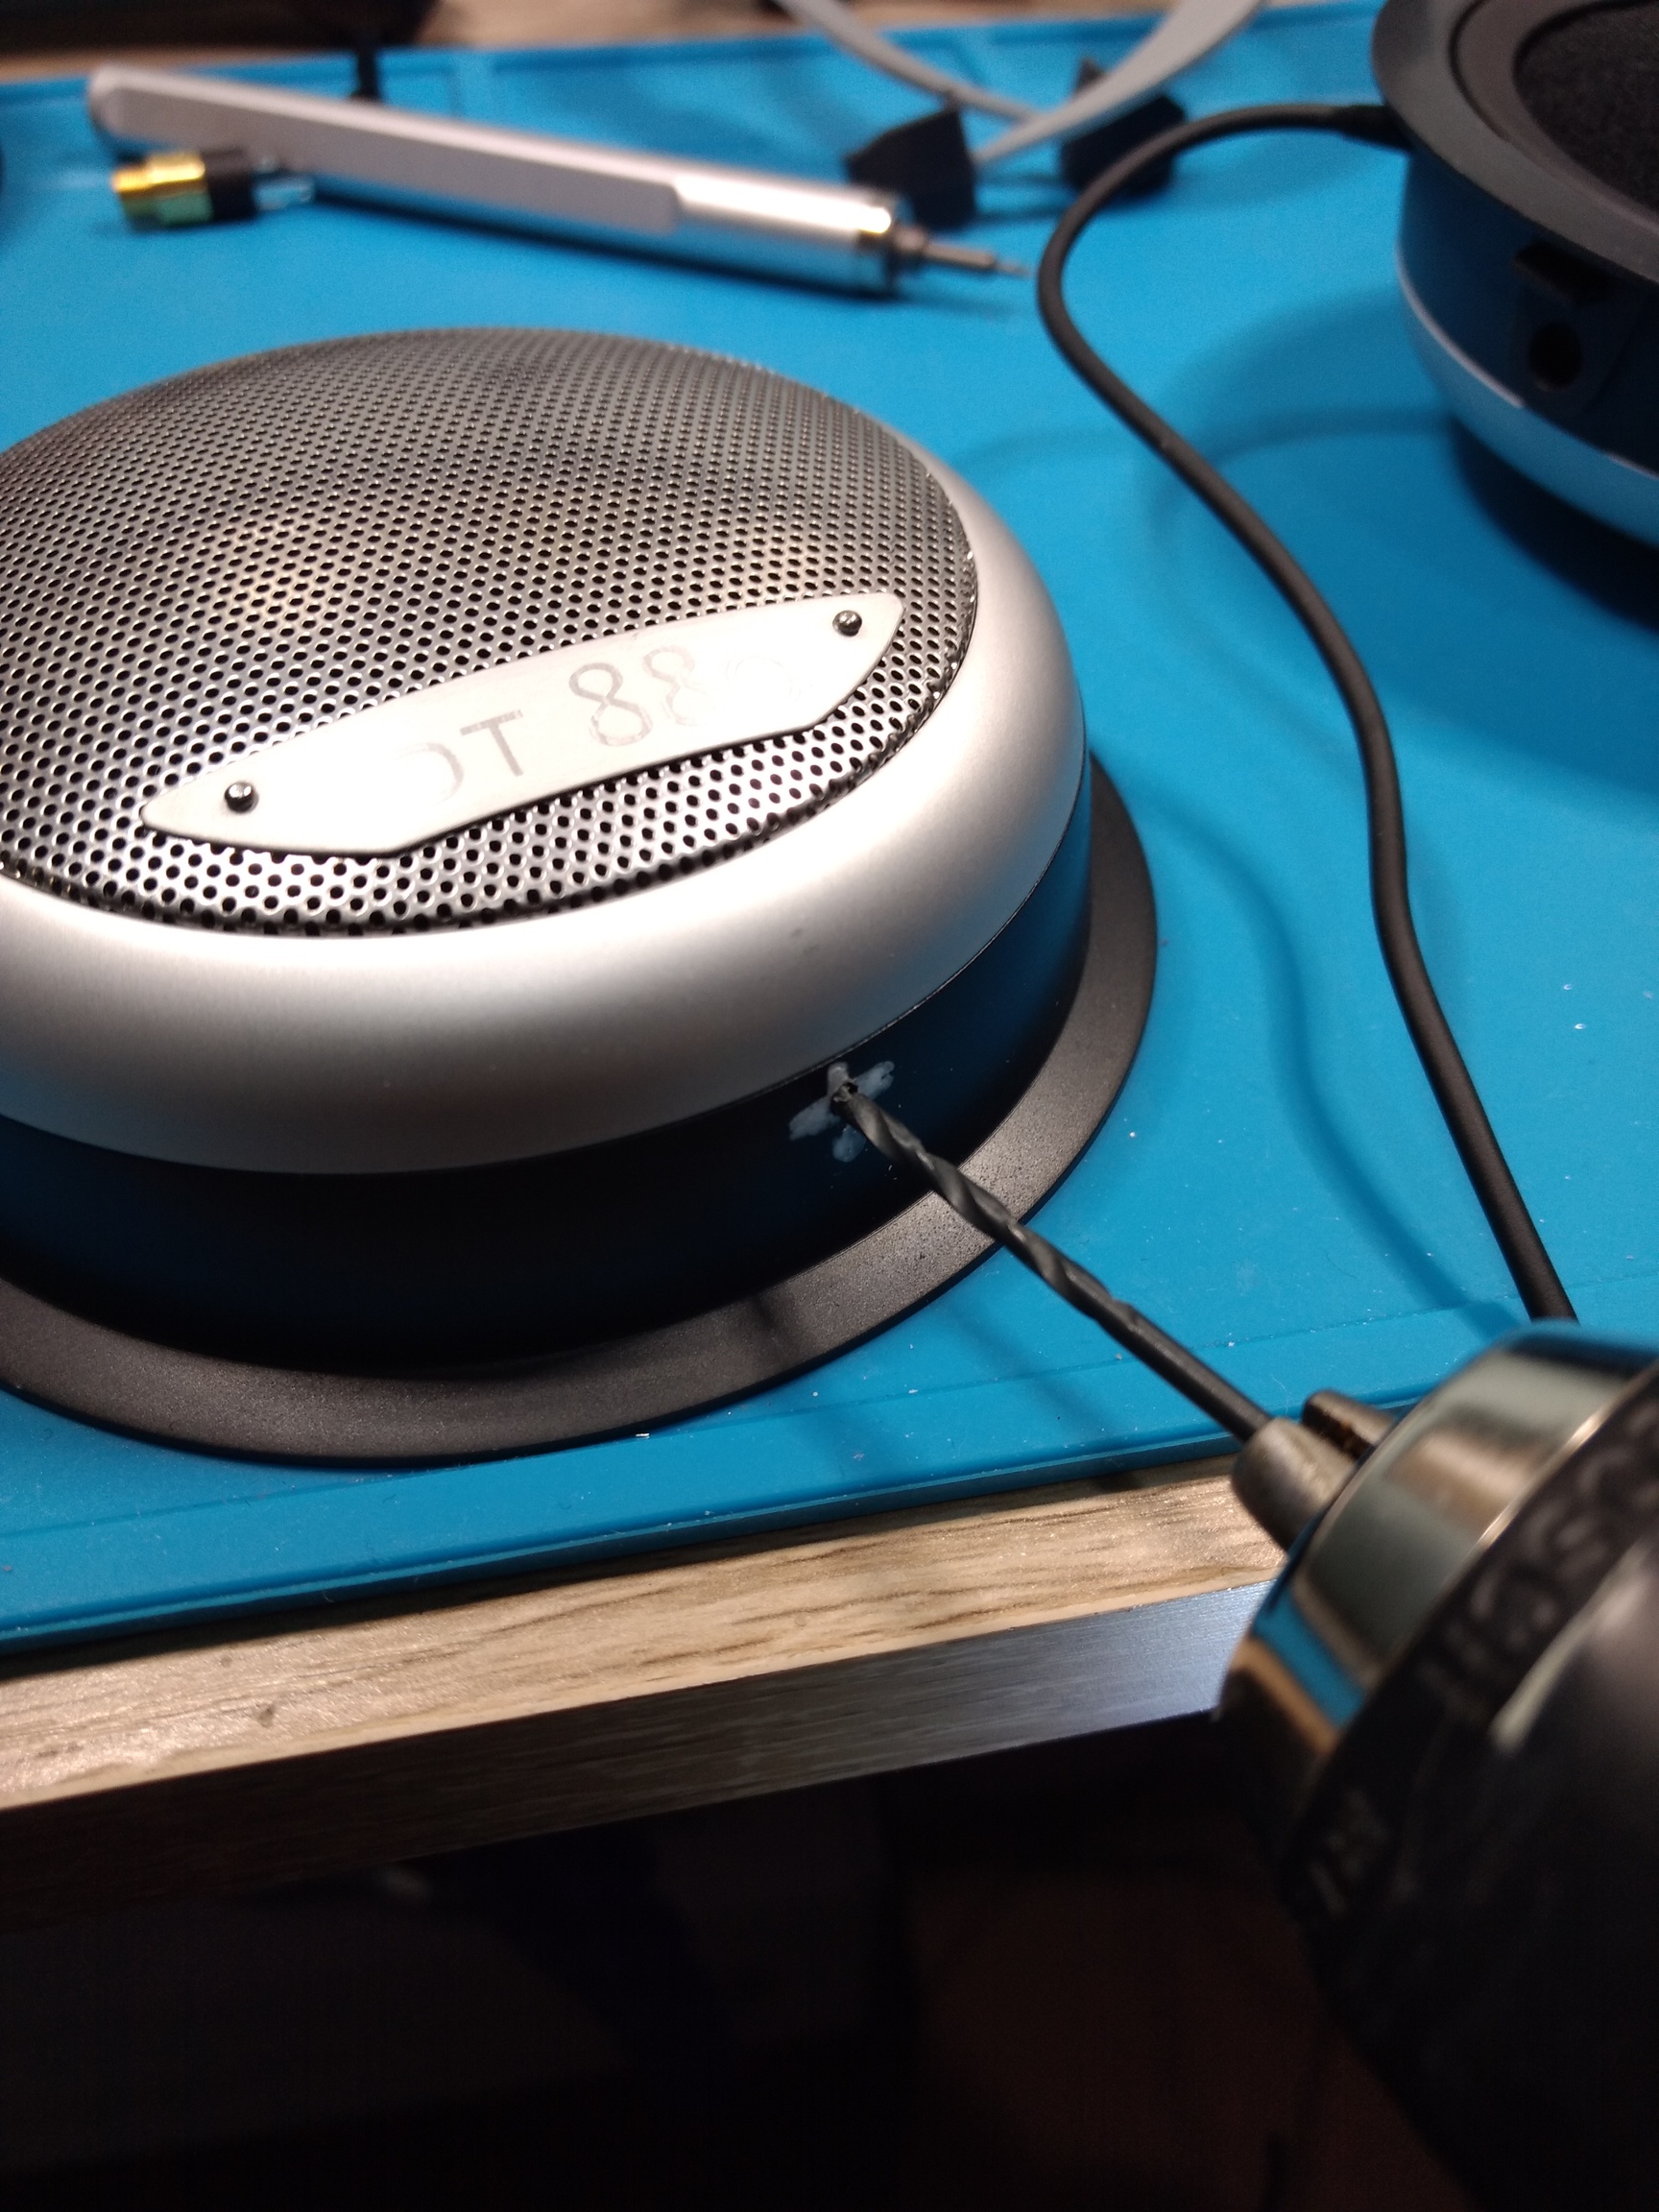
Setting the driver aside, mark where you want to drill a hole. I suggest doing this before you remove the cups from the headband so you can roughly align both holes right. I opted to do mine at a slight angle rather than at the very bottom of the housing for 2 reasons.
- I drill a new hole as opposed messing around with the rectangle hole left behind once you remove the outgoing cable. Yes you don’t have to drill a new hole, but it means that the connector has less surface area to hole onto.
- Having the cable at an angle gives some leeway for wires to drape over your shoulders.
I used a no. 2 drill bit to slowly make a pilot hole, before going with a no. 6 bit which fit the threaded size of the connector. The thread isn’t meant to screw into the housing so it’s alright for the hole to accommodate it.
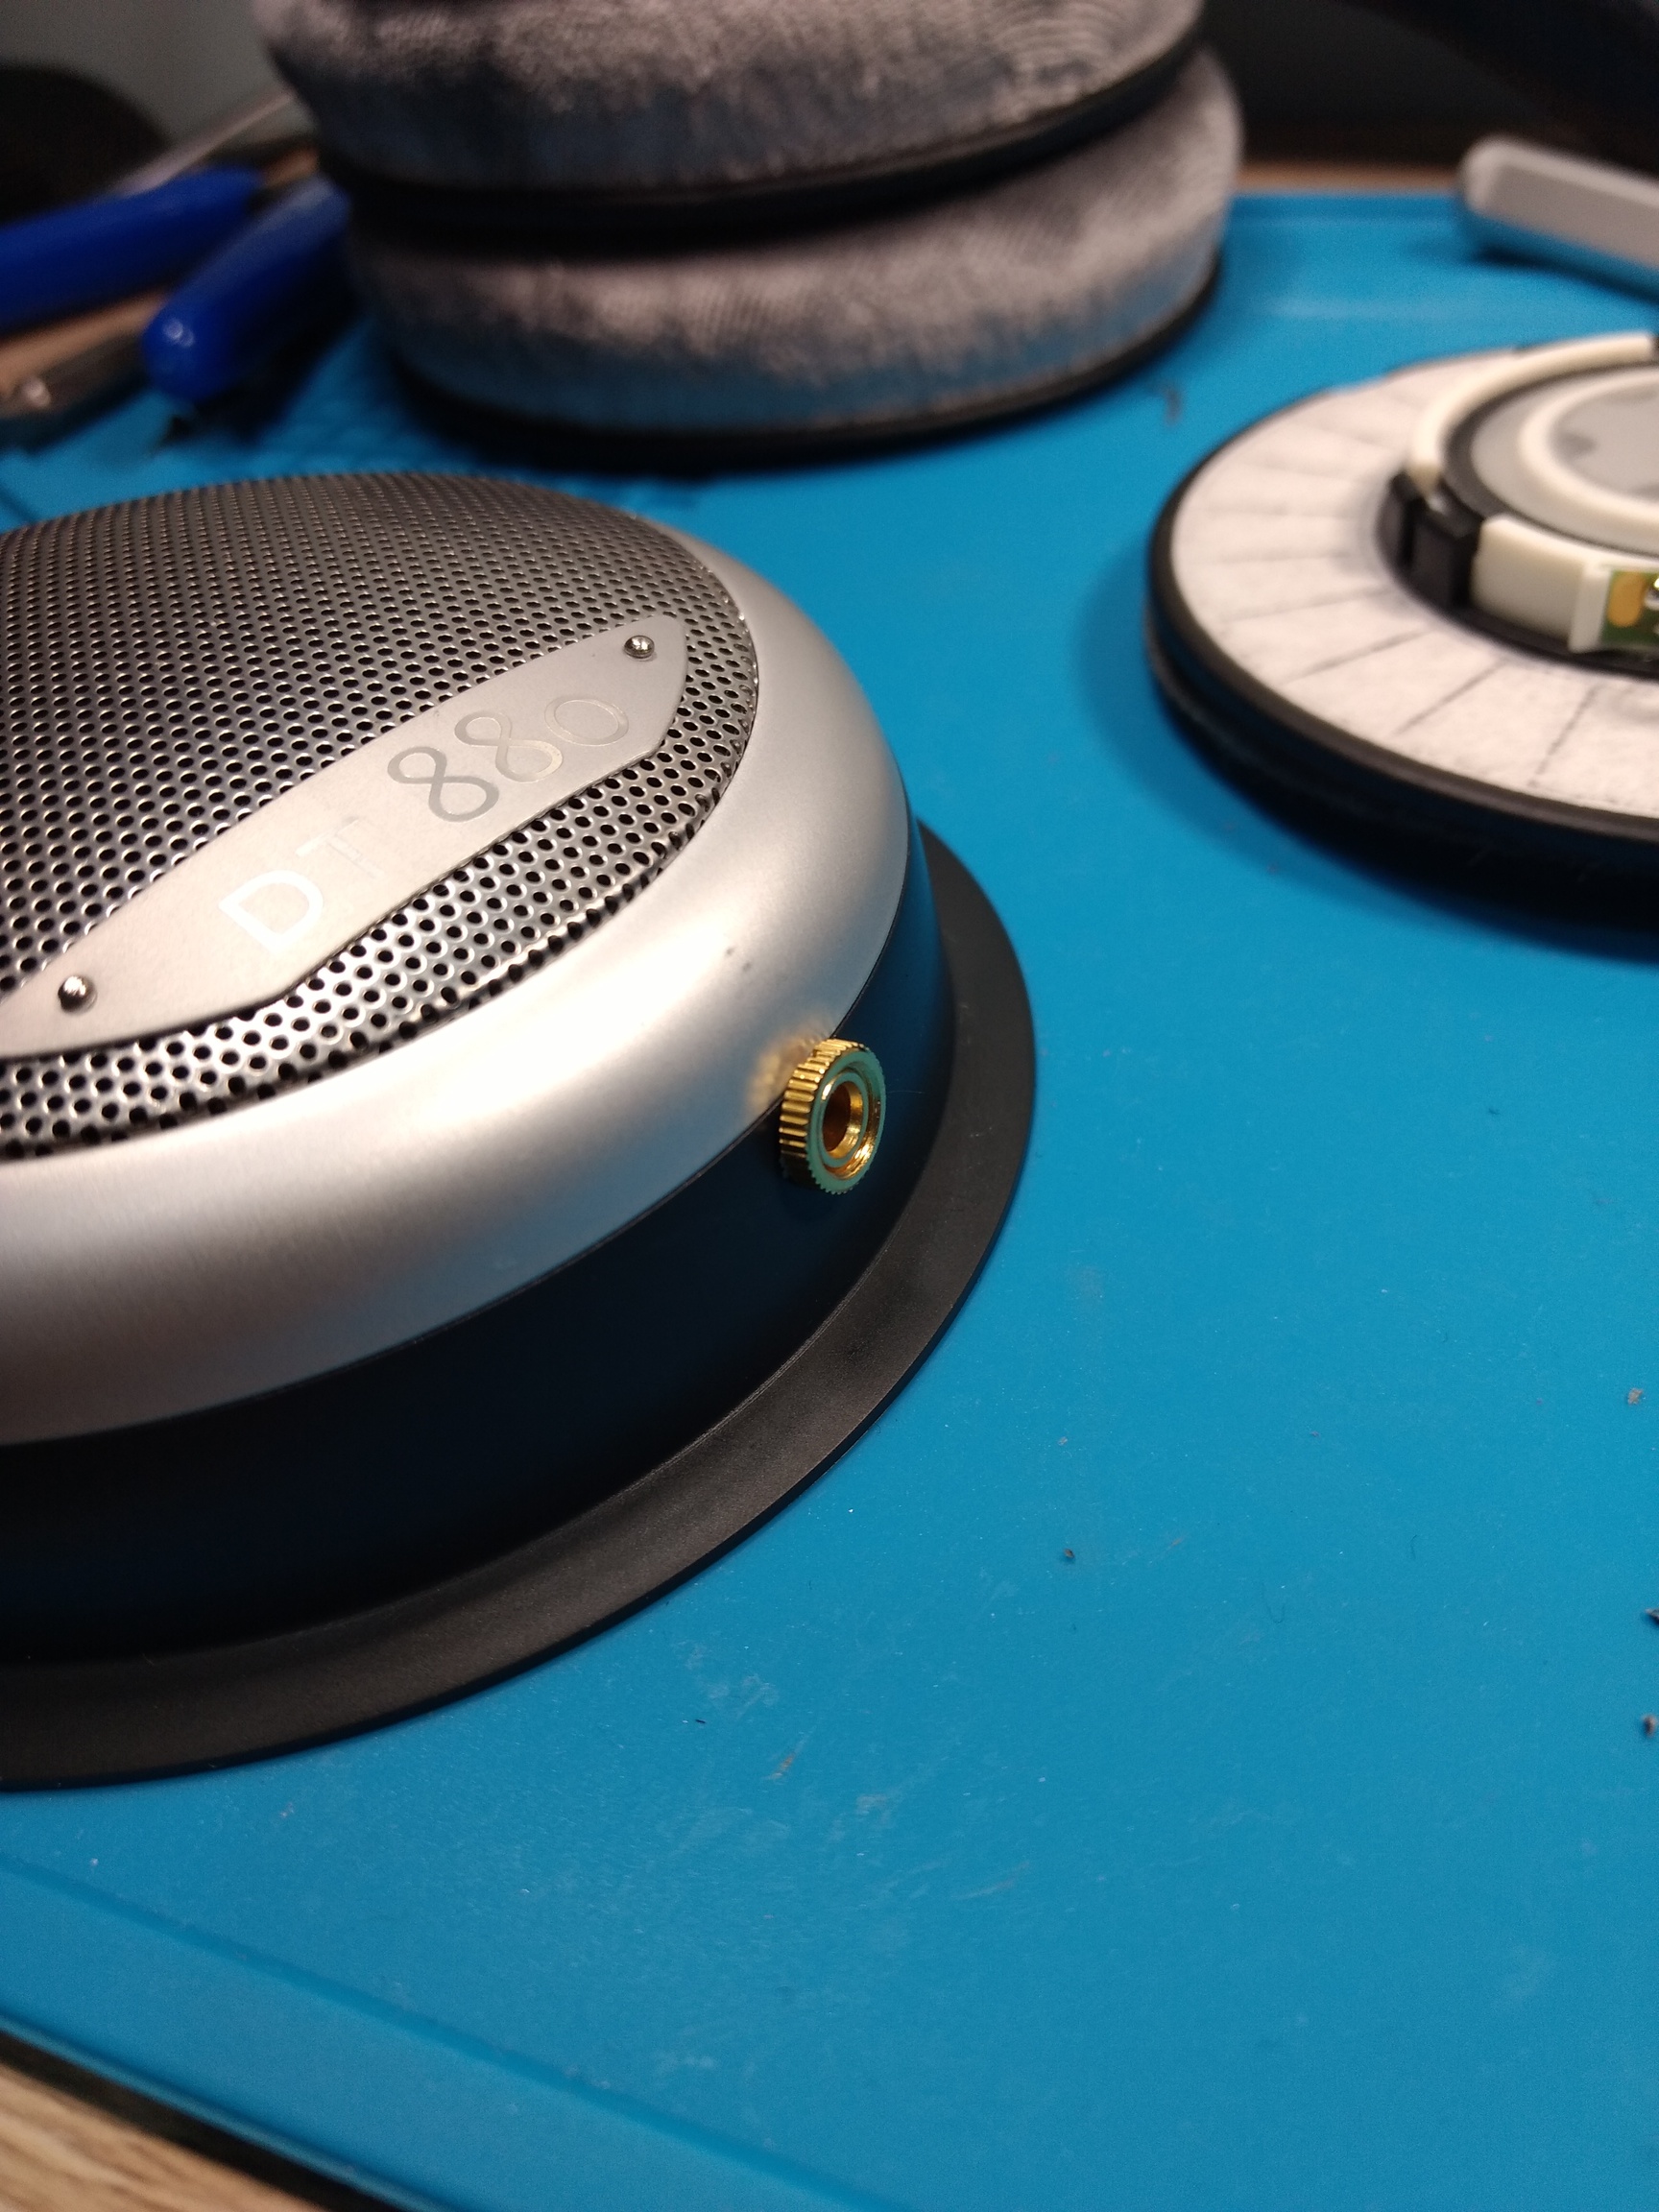

As you can see even with a small 3.5mm connector, it would just rest above the back padding that’s within the DT880 housing. Demevalos modded a closed back DT770 which doesn’t have this padding, so he could use a larger 3.5mm plug. This is also why I wouldn’t go with a mini-XLR method because they are also big connectors.
With this out of the way, now it’s time to get to the soldering.
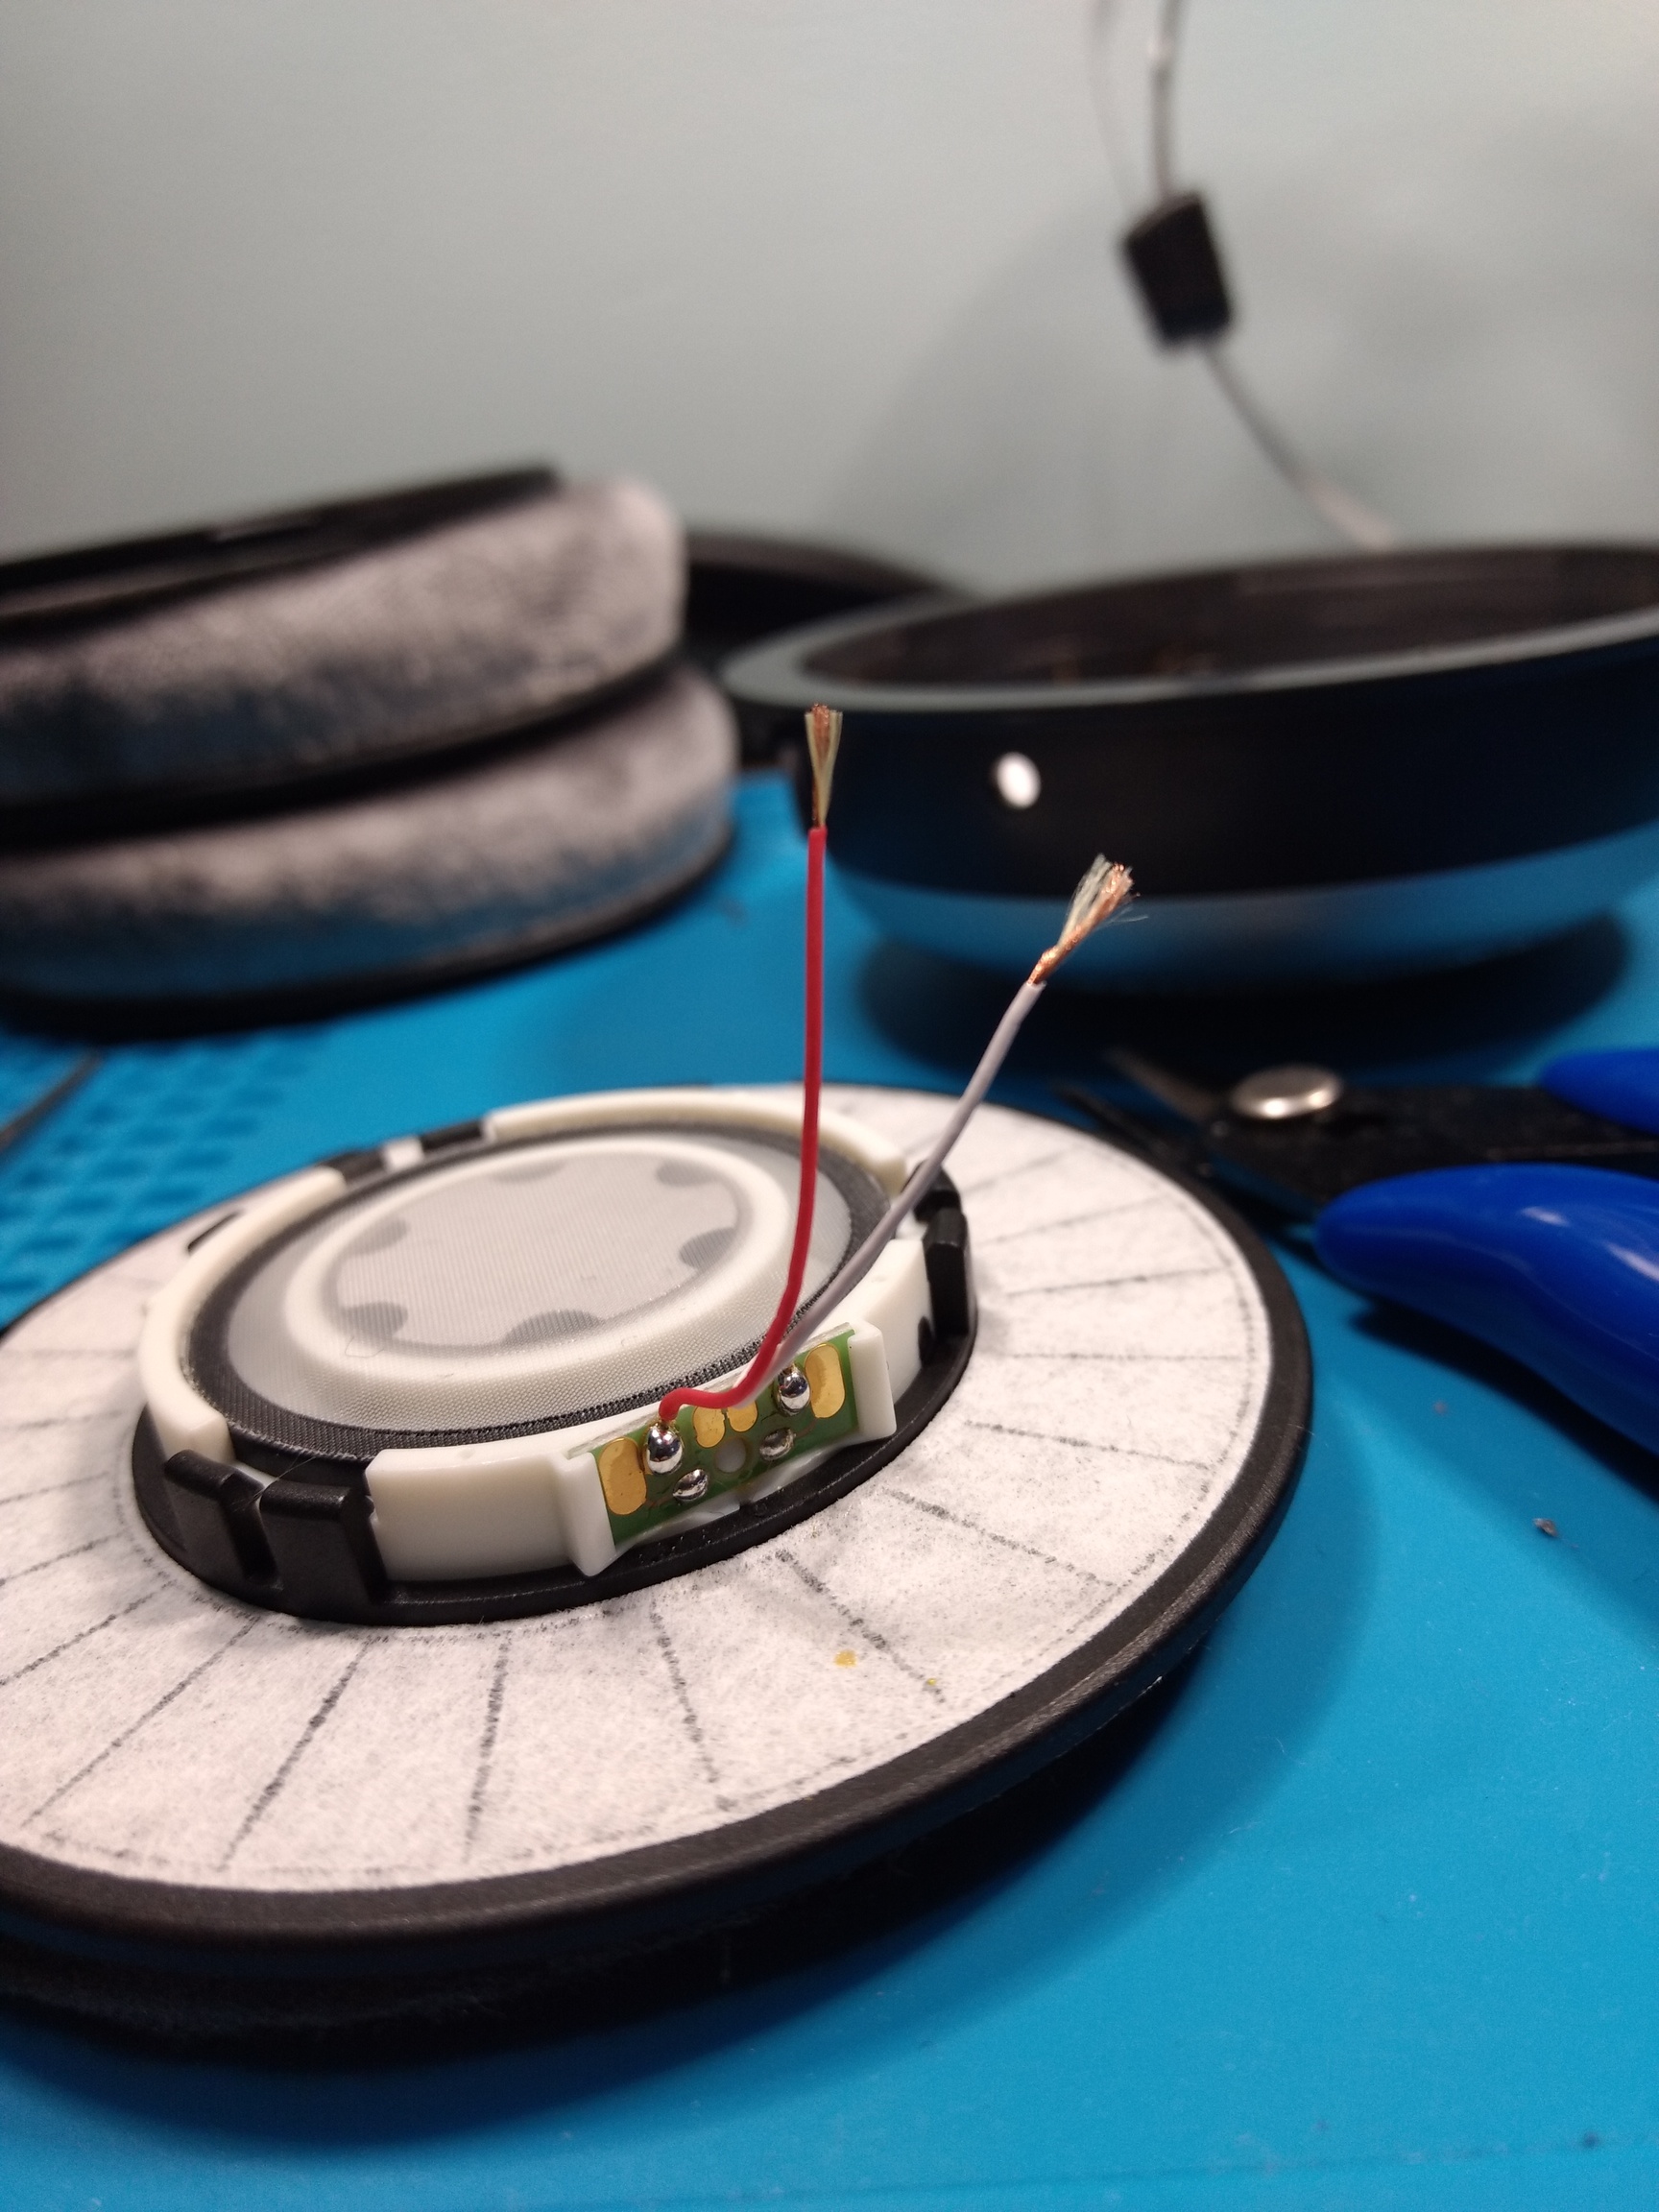
Cut the wires to a length you feel comfortable. They are thin, so I stripped the them by using wire cutters, carefully nipping the sides then pulling the sheath off. Separate the fibres from the copper, then tin it. If you’re already familiar with soldering, this should be easy.
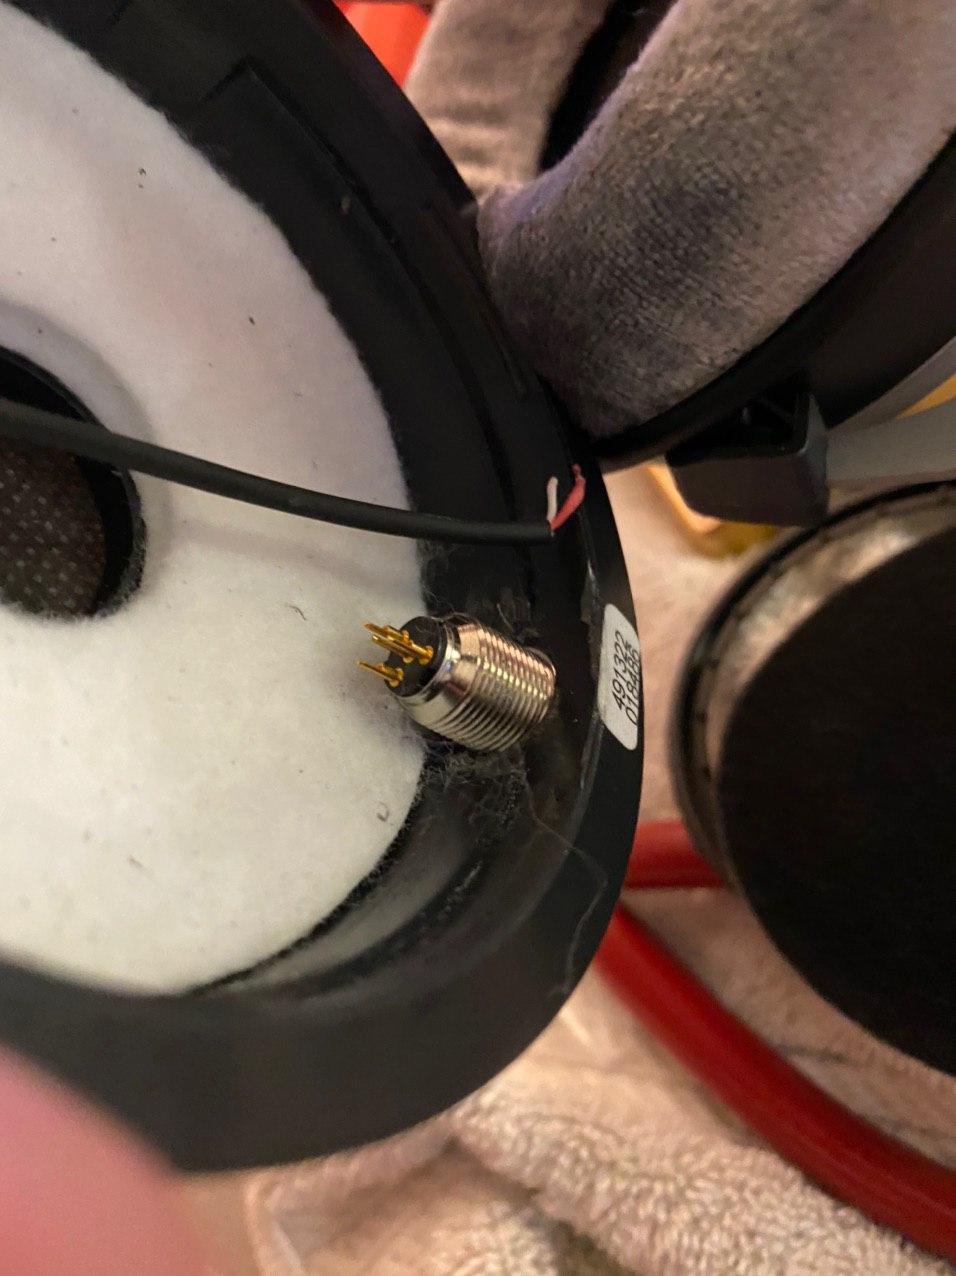
Take note: On the right side cup, red is ground and white is hot. I have no idea why Beyerdynamics decided to go with that, but it’s gotta be some German reason.
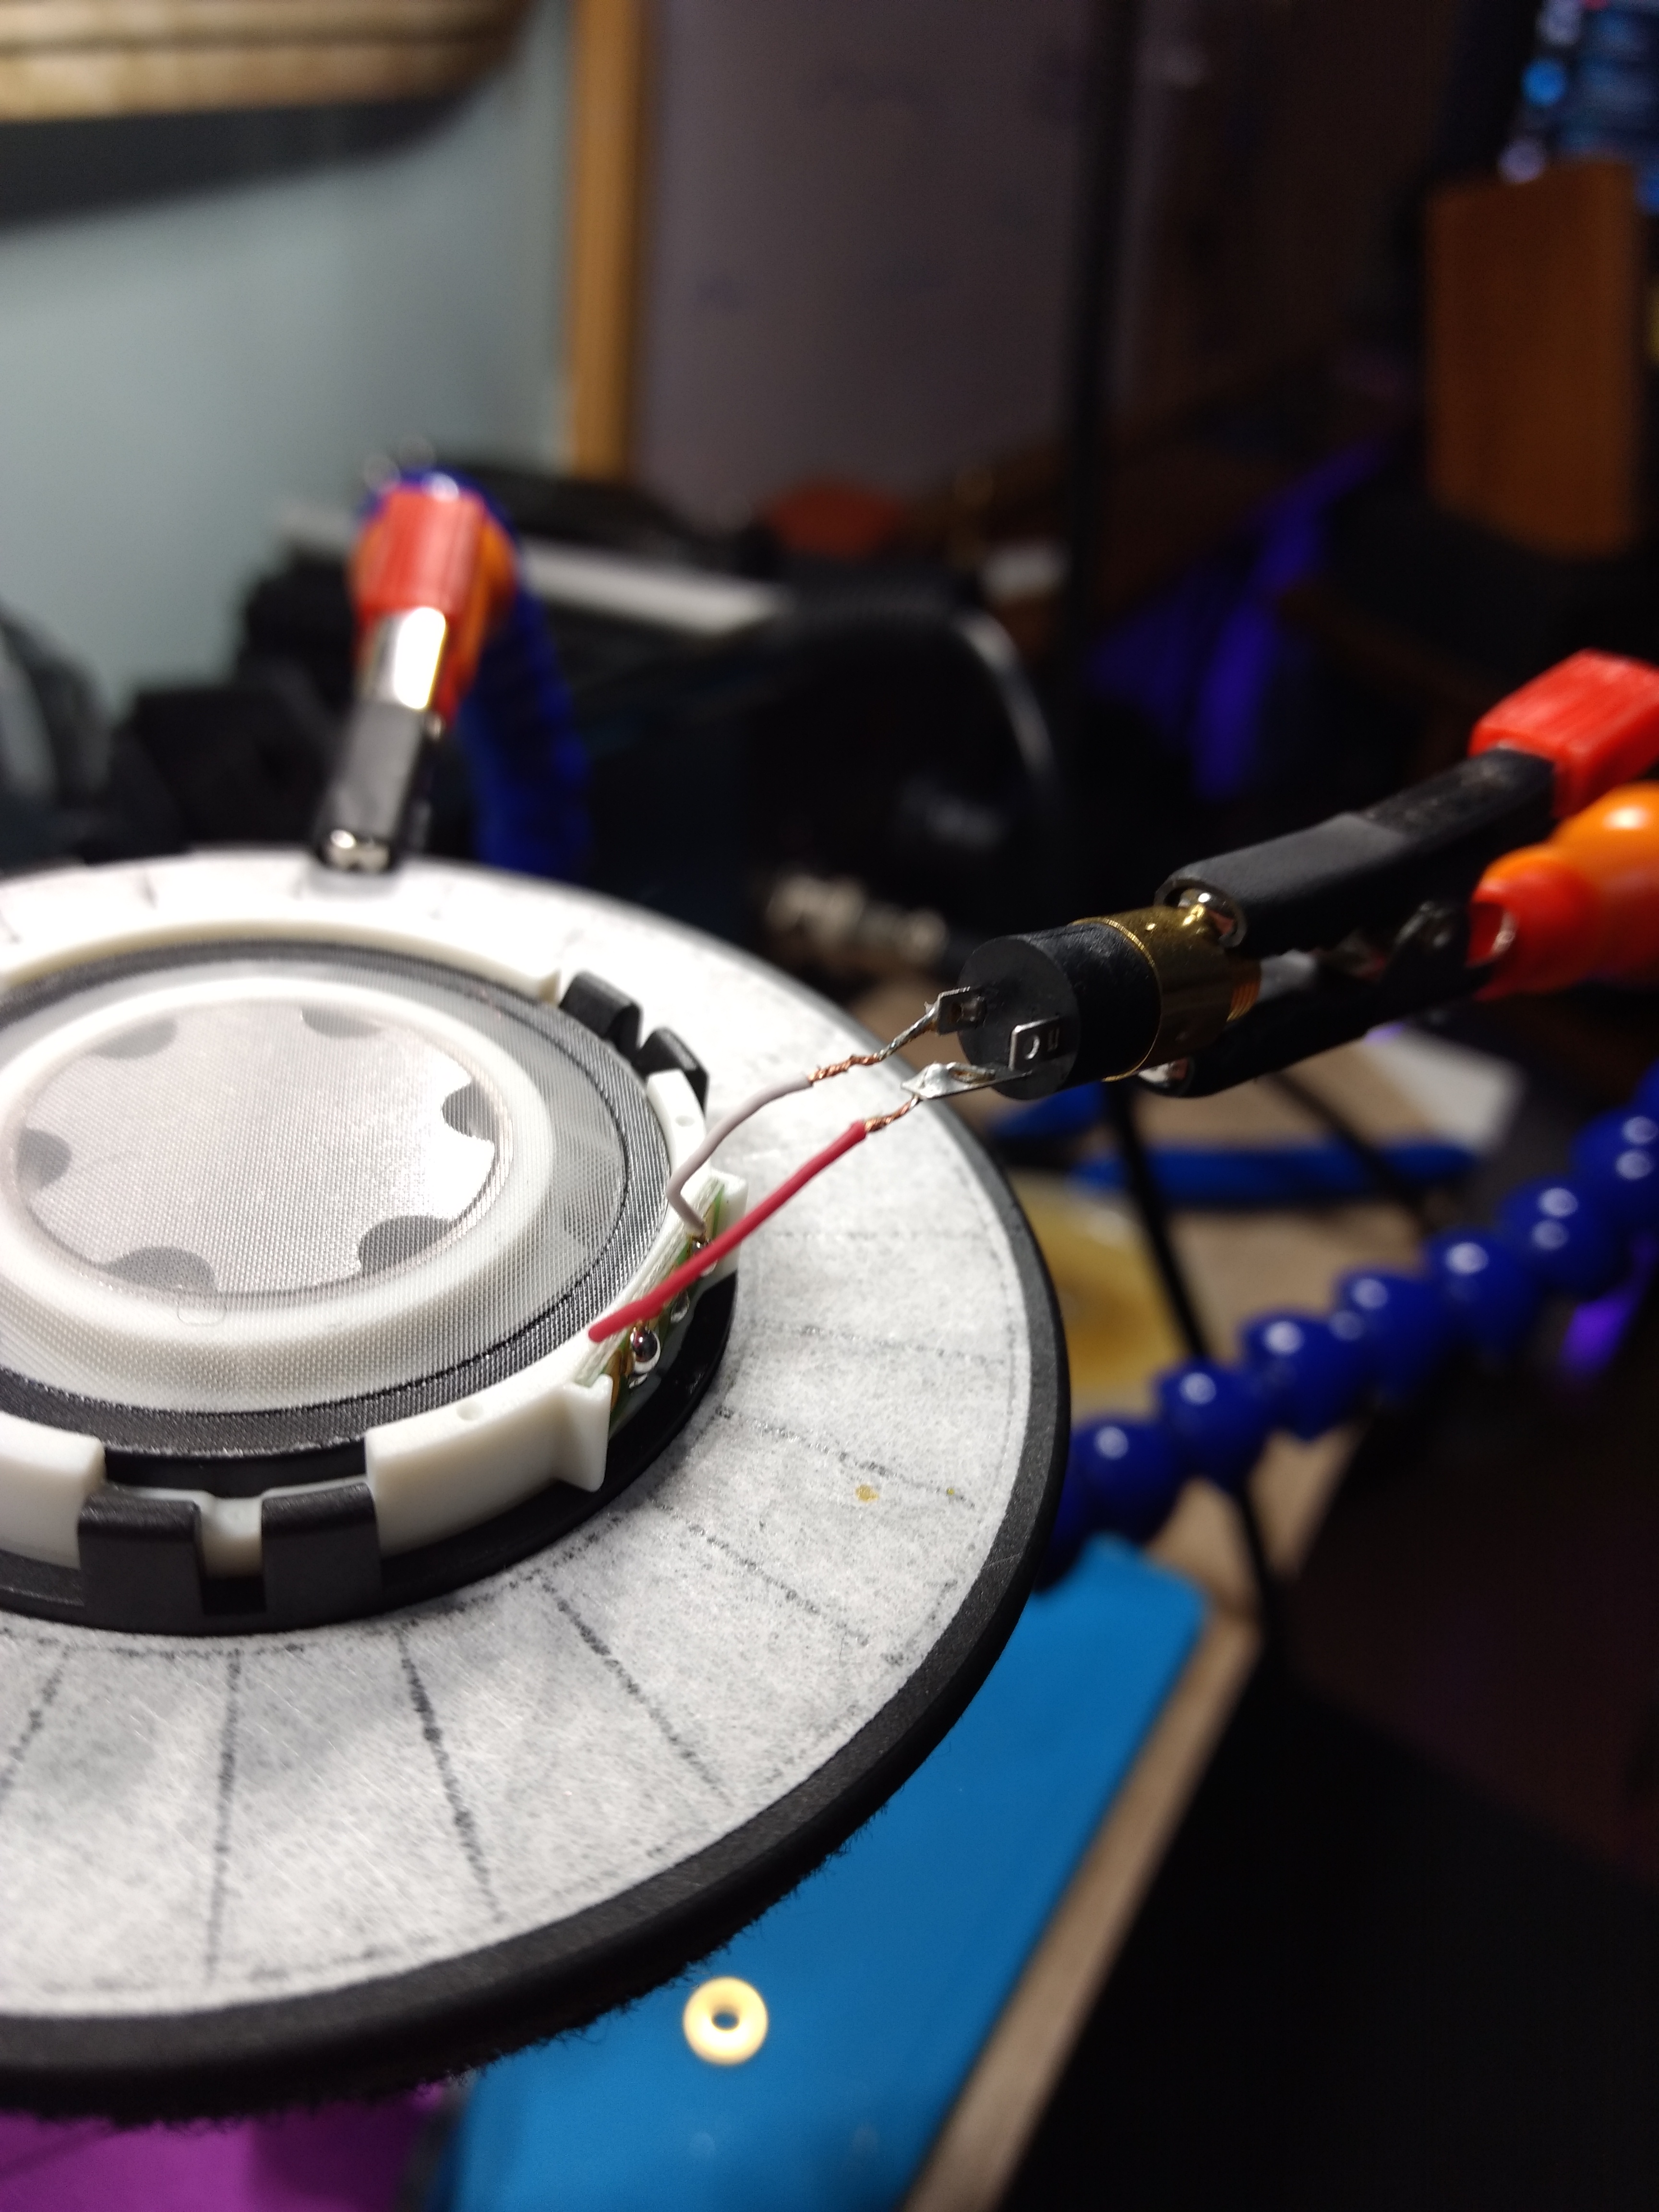
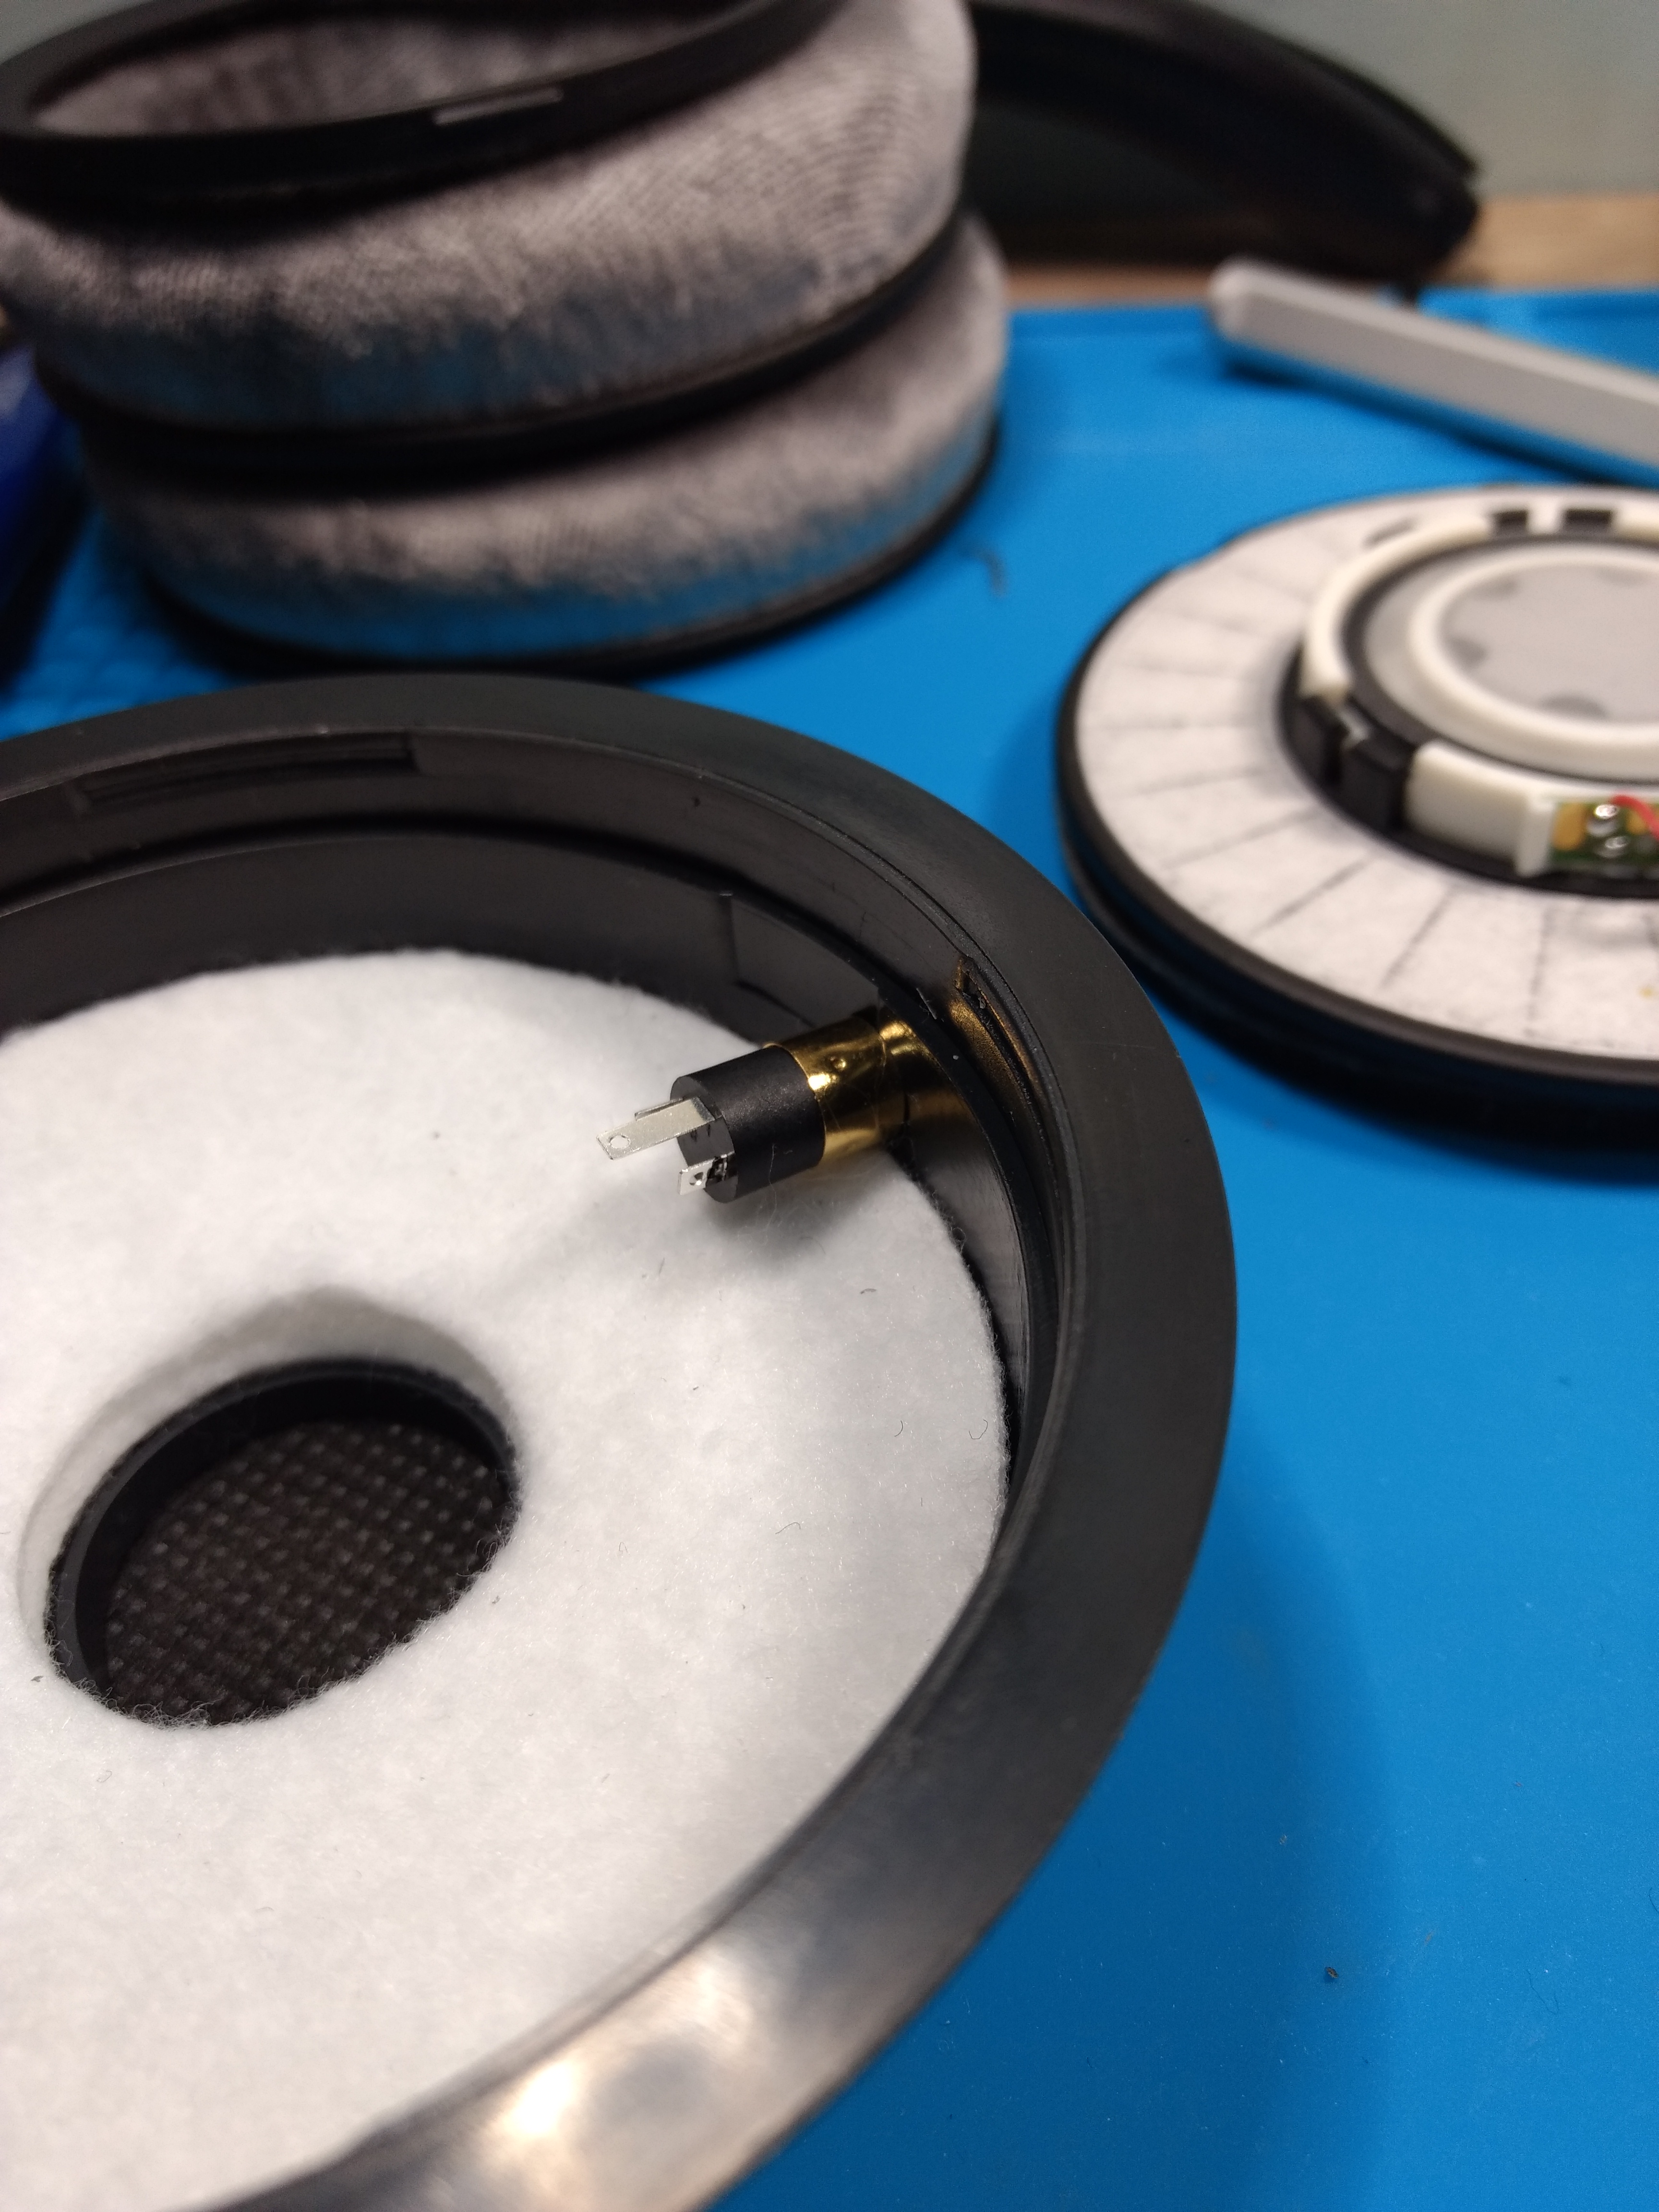
Now all you have to do is pop the connector into the hole and screw it in with the nut, then place the driver in, making sure you align the tab of the driver to the tab grove of the housing. Pop the ring back on top (don’t forget the padding) and you have finished the right side.
Repeating the steps for the left side, you have 2 additional wires. I’m sorry I forgot to take photos of these, but it is similar to the right side. Except you also have the outgoing cable at the bottom.
Cut the top wire as stated earlier. With the bottom outgoing cable, cut the cable on the outside of the housing. This ensures you have a good length of wires when you put them out. You can then gently pull the copper, red and blue wires from the outgoing sheath.
There will be a metal tab holding the rectangular strain relief in place. Remove it by sliding it out, then the entire strain relief can be pulled out through the hole.
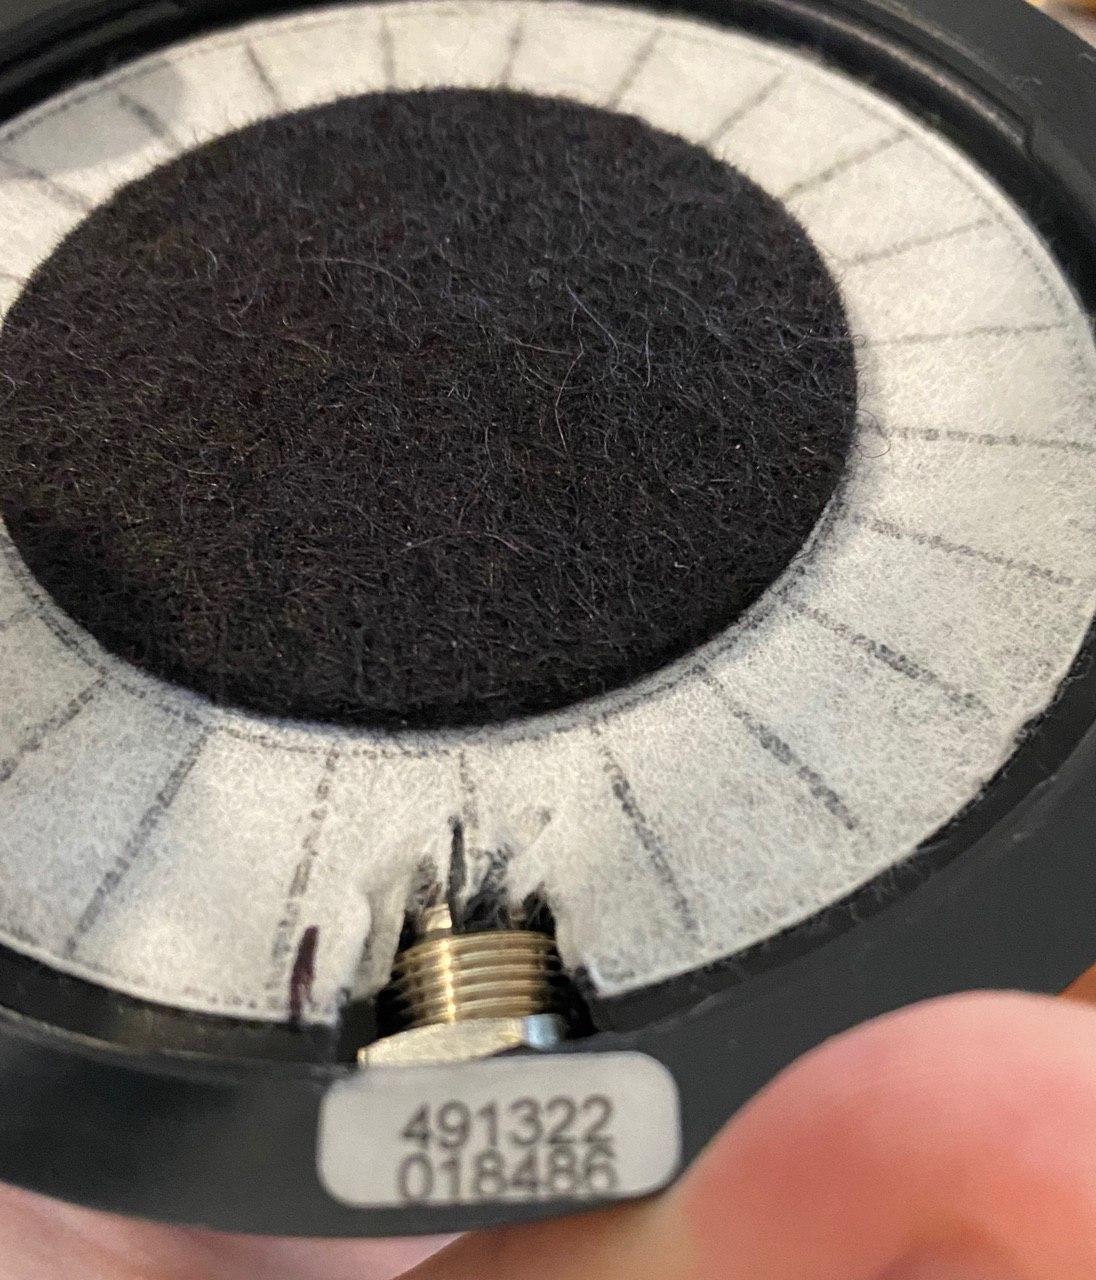
When that’s done, the headphone housing should look like this (sans my drill markings).
This is why I got Sugru. If you haven’t used it before, Sugru is a putty that dries into a hard rubber-like solid. It comes in many colours, but for this I got black so I can seal the rectangle hole and the other 2 holes on top of the housing where the connecting cables were. You won’t need much, which seems like a bit of a waste with the amount of Sugru that comes in one package, but I don’t know a more effective way of making it look neat.
Once you’re done sealing and smoothing out the holes. You can leave it be for 45 minutes while you solder the drivers. This is what the drivers should look like.
For simplicity, I’ve drawn up what you’re going to be doing with the wires.

Essentially the middle 3 wires are the formerly right side wires and the outgoing right hot wire. Because they aren’t needed anymore, you can go ahead and cut them off. Demevalos recommends desoldering. While this is neater, there are instances where an inexperienced person can accidentally burn the fragile driver. I consider myself inexperienced, so I cut the wires off.
Solder the labeled wires to the correct connector ends like you did with the right cup.
By now, the Sugru should have solidified somewhat, but take care to handle it regardless. Carefully drill a hole like you did on the right cup. Drop the drivers in, screw the connectors, then you can reassemble everything.
When reassembling the cups to the headband, put the plastic bits on the headphone housing first, then slide the yokes in place. Once it’s on, the plastic bits won’t come off and you can screw them in at your leisure.

And that’s it. By separating the shared grounds, you’ve made your DT880’s balanced. The same thing can be applied to other variants (770, 990), but with the 600ohm, rest assured you can even use a THX 789 to power your DT880’s with ease. It’s so much easier than I thought it would be and I don’t have to use any glue, unlike the PortaPros and KPH30i.
I hope this helps you in some ways. My thanks to @Camride and @skedra for laying the groundwork and taking the wiring guessing game out of it. Also credit to Demevalos for how to take the DT880 apart.
Cheers and good luck.

")
