Opening up the sendy Aiva's and Mods
Okay so im back from opening up the Aiva’s, I can definitively say its easy to open up everyone SO LET THE MODS BEGIN
Taking out the driver
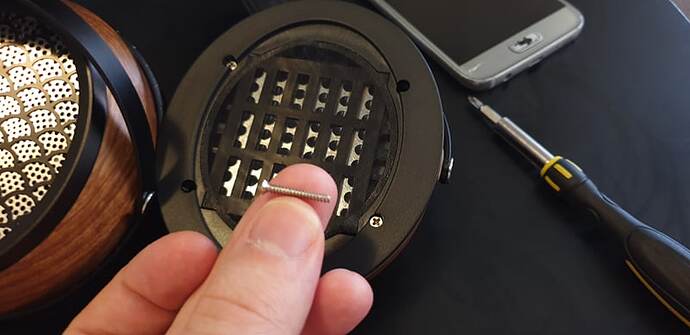
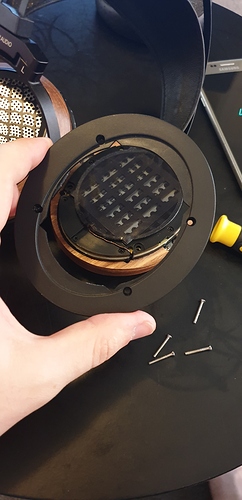
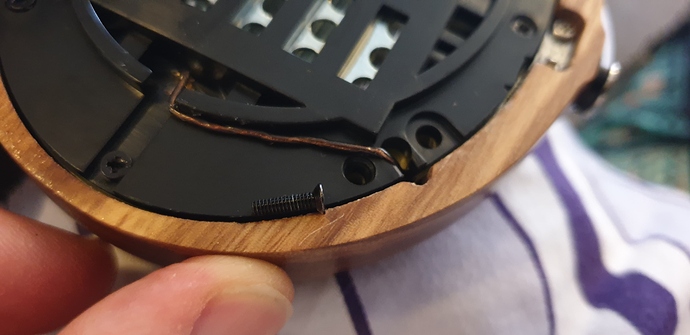
Lets start with taking off the first set of four screws
These long screws aren’t actually screwed in 100% from factory all of the way if you do it won’t leave enough gap to put on pads, so in terms of getting more space between the rear of the driver to breathe that could be done.
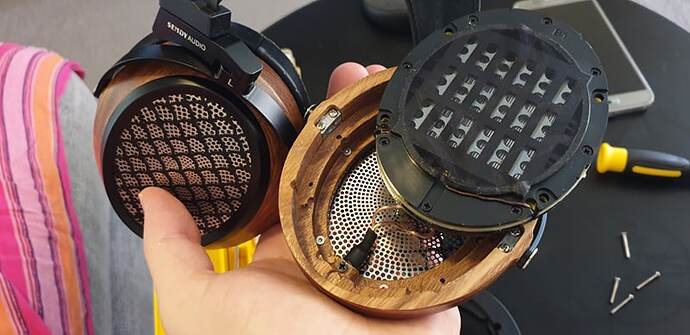
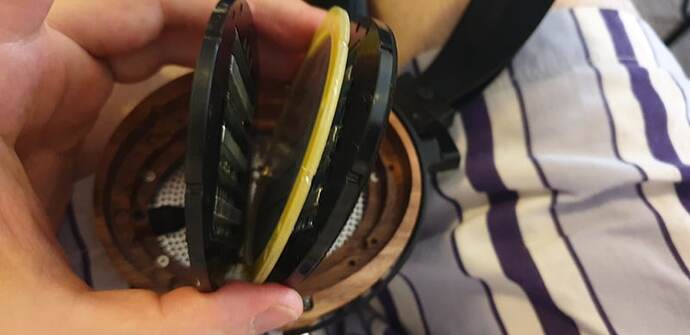
taking out the driver is so easy, after those first four screws the whole driver just pops out as a planar sandwich all held together with philips head screws as to be expected from the double sided planar.
Mods - Fazor
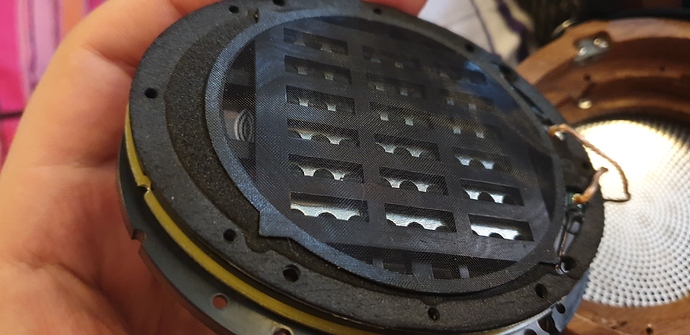
the sandwich is SO tight that no fazor could be put any closer to the driver than just on top like you see when you take off your pads so the fazor mod has to be done by taking off the stuck on screen mesh (it re-adhears really easily so dont fret about taking it off)
Dampening
Heres the rear of the driver where all the dampening is done and its a soft felt. I feel that more dampening could be done here if you wanted to (I personally love it so far but im excited to see what the community comes up with)
There are so many mods alone just from popping out the driver from the wood. more dampening on the front undampened plastic around the driver, and maybe more on the back of the driver. Fuzzor on the front and back taking off the mesh… now heres where I took it too far and I should have stopped.. but I wanted to know more…
Driver Disassembly
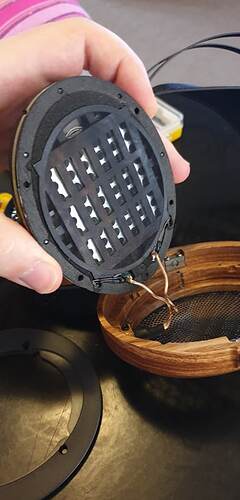
I.. Began taking out the screws on the driver (The forbidden planar sandwich), all the black ones are driver screws all silver screws are just holding the driver to the wood.
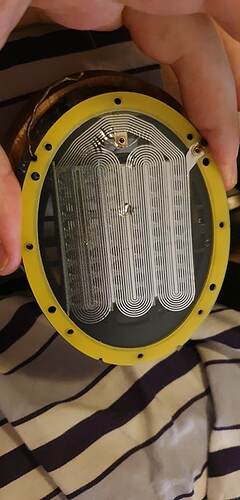
Now to actually get off the front magnet array you need to remove the soldered cable to the post on the driver.. I accidentally ripped off the wire from the post so now we all get a good look at the voice coil.
I dented mine right in the middle. Good news it didn’t affect the sound thank god, these aren’t cheap and my favourite headphones but now I’ve got tape holding it down on the post barely all put back together. So dont take apart the driver it was a TOTAL mess trying to get it back on. But if you want to take it apart, desolder the wire on front post, the second you get the last screw off the driver it will basically eject the magnet away from from the voice coil which is great immediately pull the driver away and set it aside. The voicecoil is surprisingly strong and flexible membrane
After you’re done your driver modifications then set the rear magnet and voice coil in the wood then VERY carefully angle the driver down to align the bottom screw hole then the left and right screws (no diagonal screws yet) then the top now you’ve set the driver in place continue to do the rest. REALLY sinch is down tighten those screws as to get the magnet down to the voice coil.
Reassembly
Then put back on the top pad mounting platescrew down the wood each with care and leave enough room for the pads to go back on and DONE you’ve modded your Aiva’s.
My Aivas are now back to together with black tape holding down the wire to the post so I’ll be ordering a soldering kit to put that together but if you dont take it apart its so easy to mod im suprised no one has yet (and i 1000% dont recommend taking apart the driver its pandoras box)
I’d love to hear from everyone how their mods affected the sound. I’ll be doing a fazor mod to both sides once ive resoldered the wire to the post.
