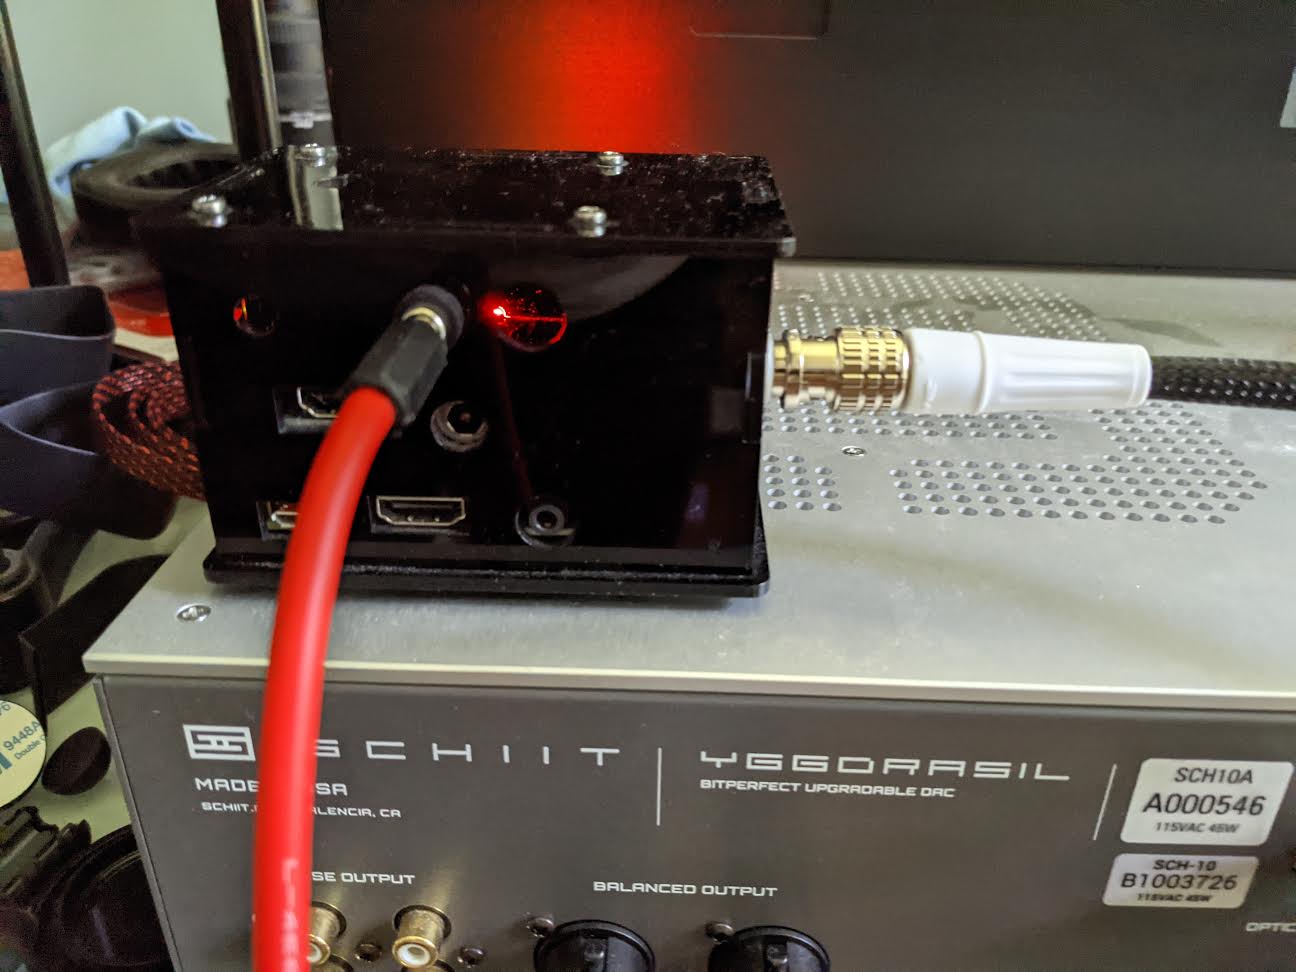
Most of the sonic benefits from the Pi2AES will come from it being a network bridge where you can get off of USB. A DDC on the other hand may be a better solution if your plan is to get music out of a PC via USB. BTW since you mention having the BF2. The Unisom USB is pretty good, but it’s still bettered by the BNC or AES output from the Pi2AES into my Yggdrasil.
I stumbled upon your review of Chord M Scaler vs HQPlayer recently, and I have been learning a lot from your other reviews on other DACs / audio equipment so far!
A few questions for you…
Would you be sharing your steps in building the Pi2AES (hardware & software) some time soon?
Regarding the RPi4, did you find USB 2.0 or 3.0 to be better (noise, jitter) when feeding a DAC? If the DAC matters, I’m interested in how it works with my Chord Mojo from Moode right now, as for future DACs I plan on exploring the I2S route.
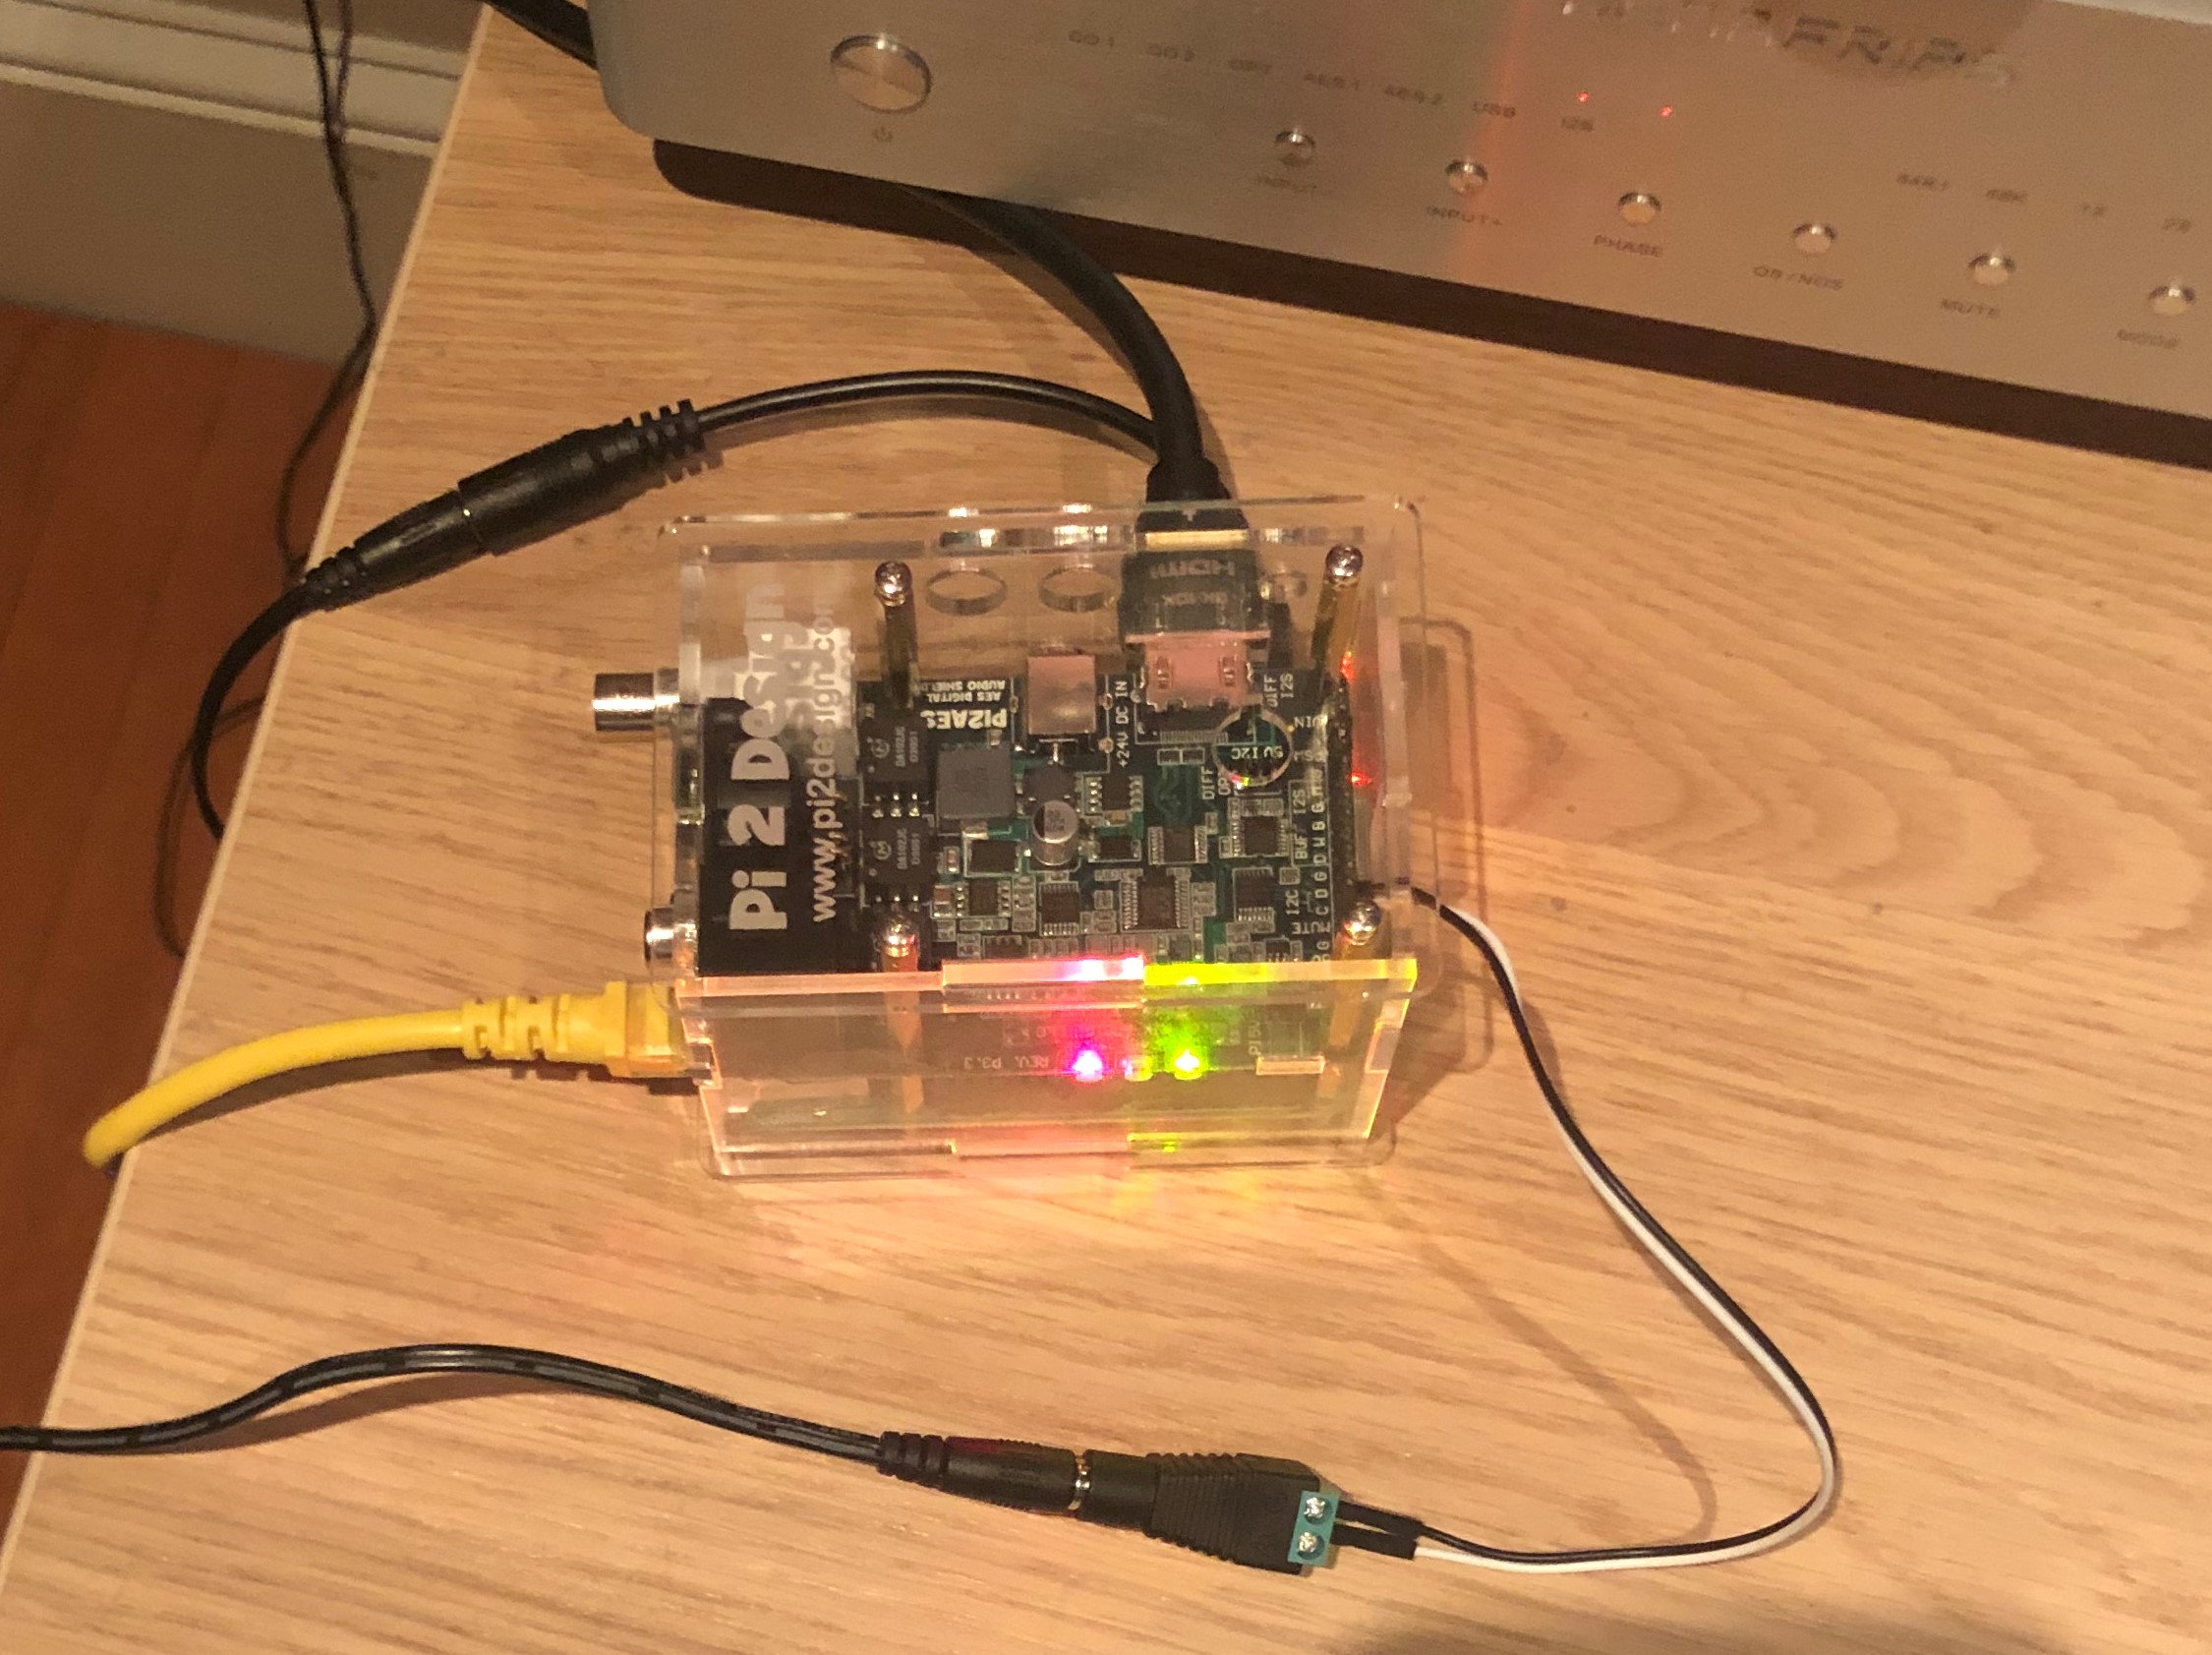
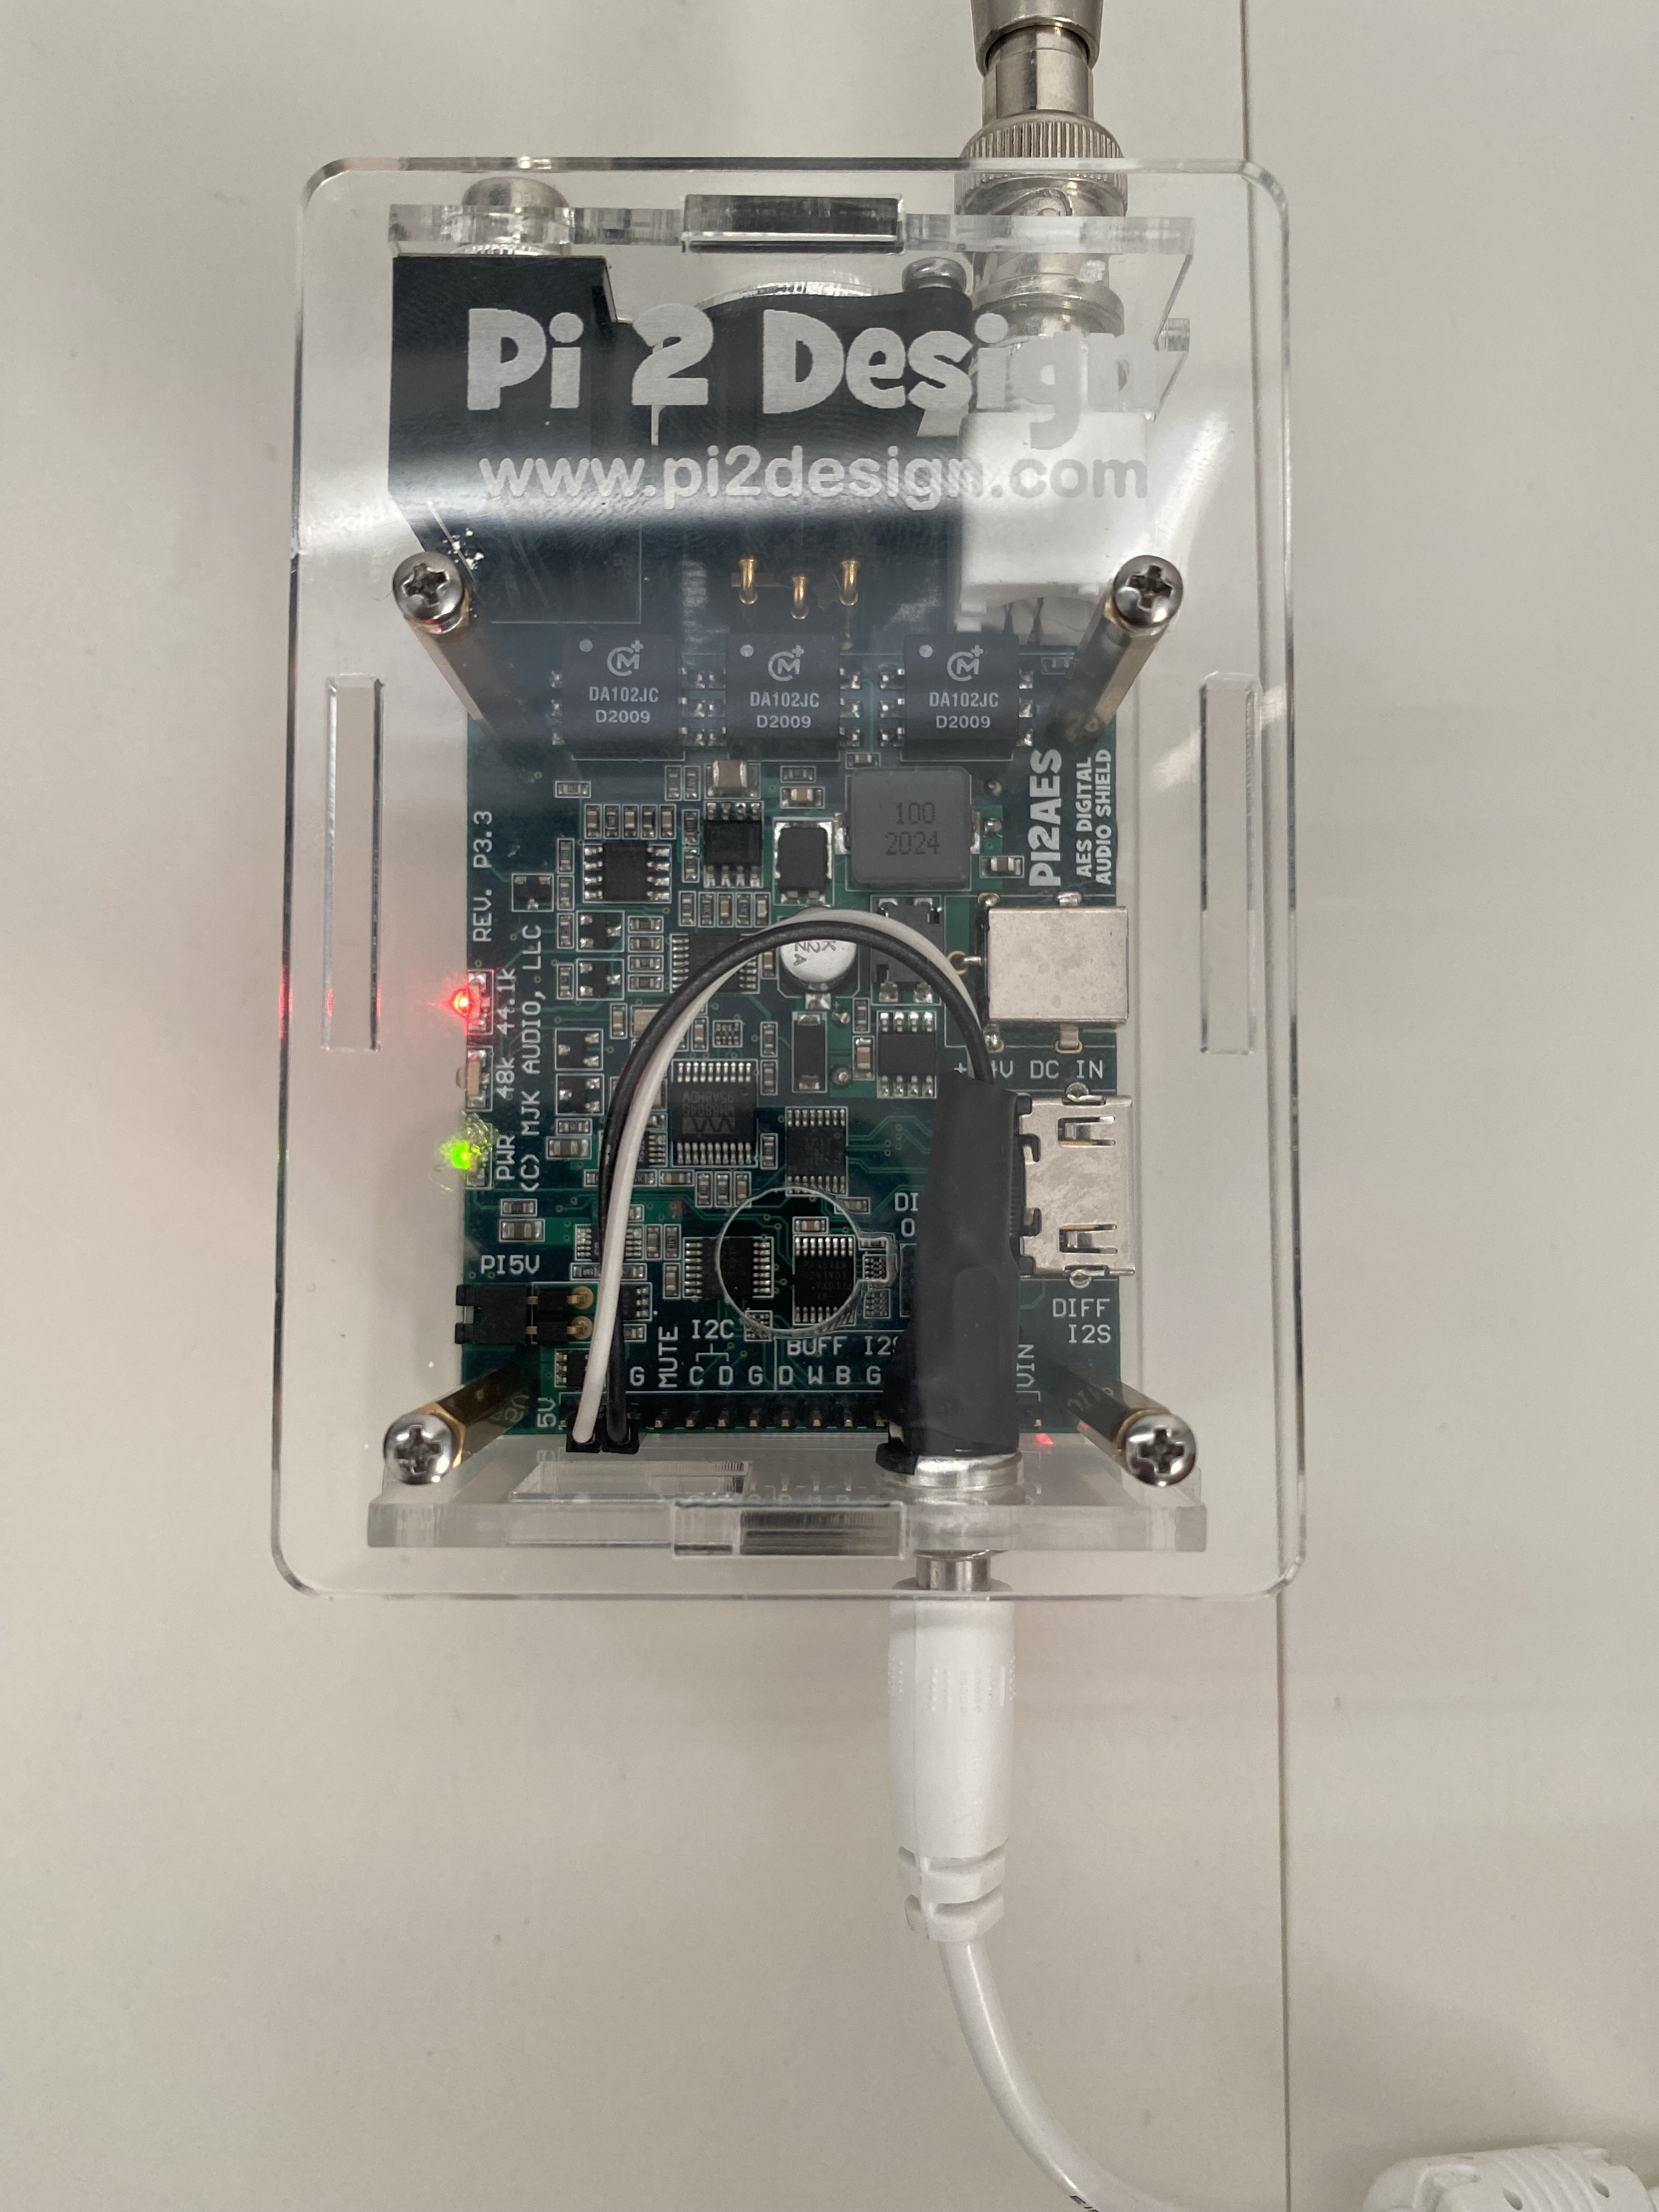
Take a look at this picture, it’s pretty much all you have to do. I glued that adapter from the inside when I built mine so there are no external wires. It works very well and one LPS powers everything. The board is clearly labeled as well so it’s hard to screw things up.
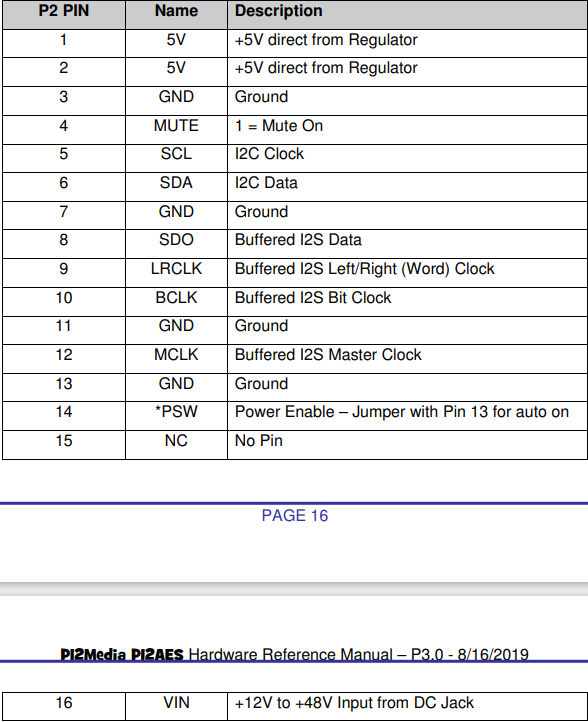
Ugh I don’t remember the exact pins but there’s a pin jumper change you make on the Pi2AES board and it stops 5V going to Pi board. Then you can use the 5V power directly to Pi board. Do a search on SBAF and you should find the details.
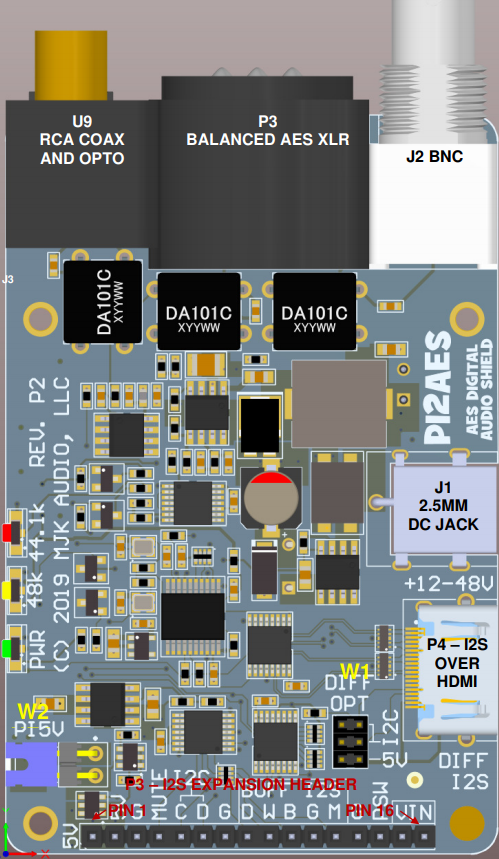
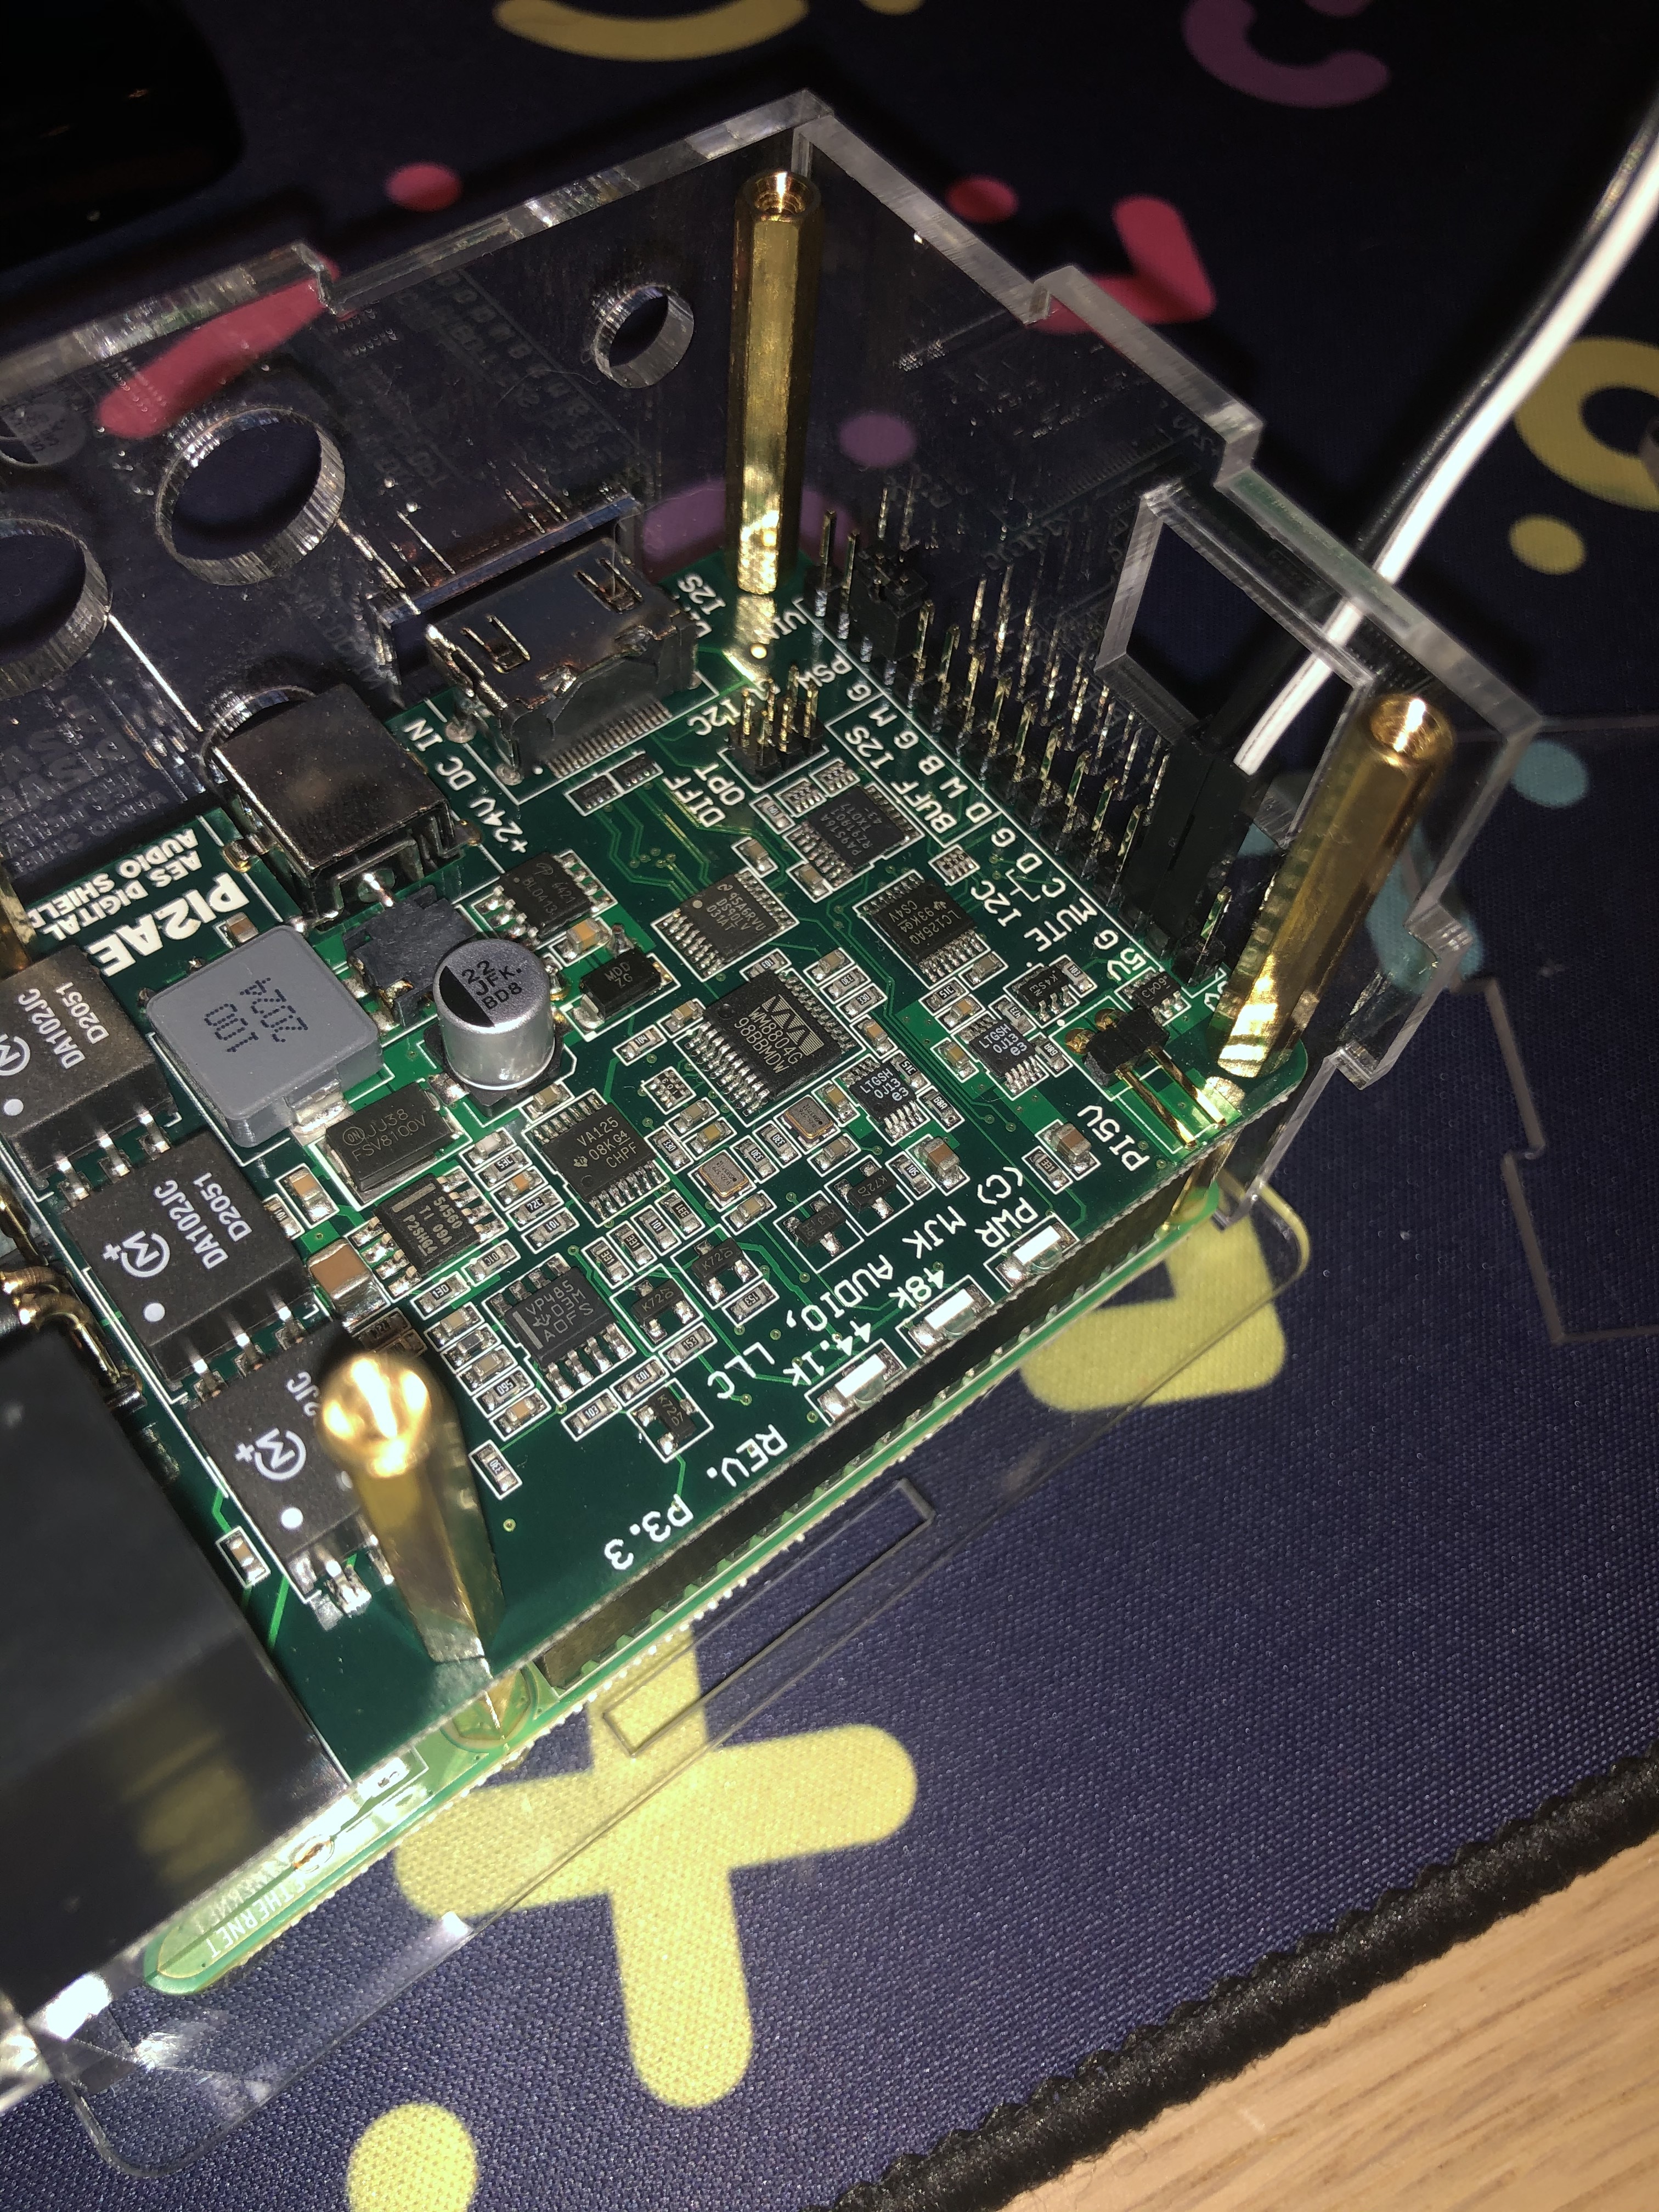
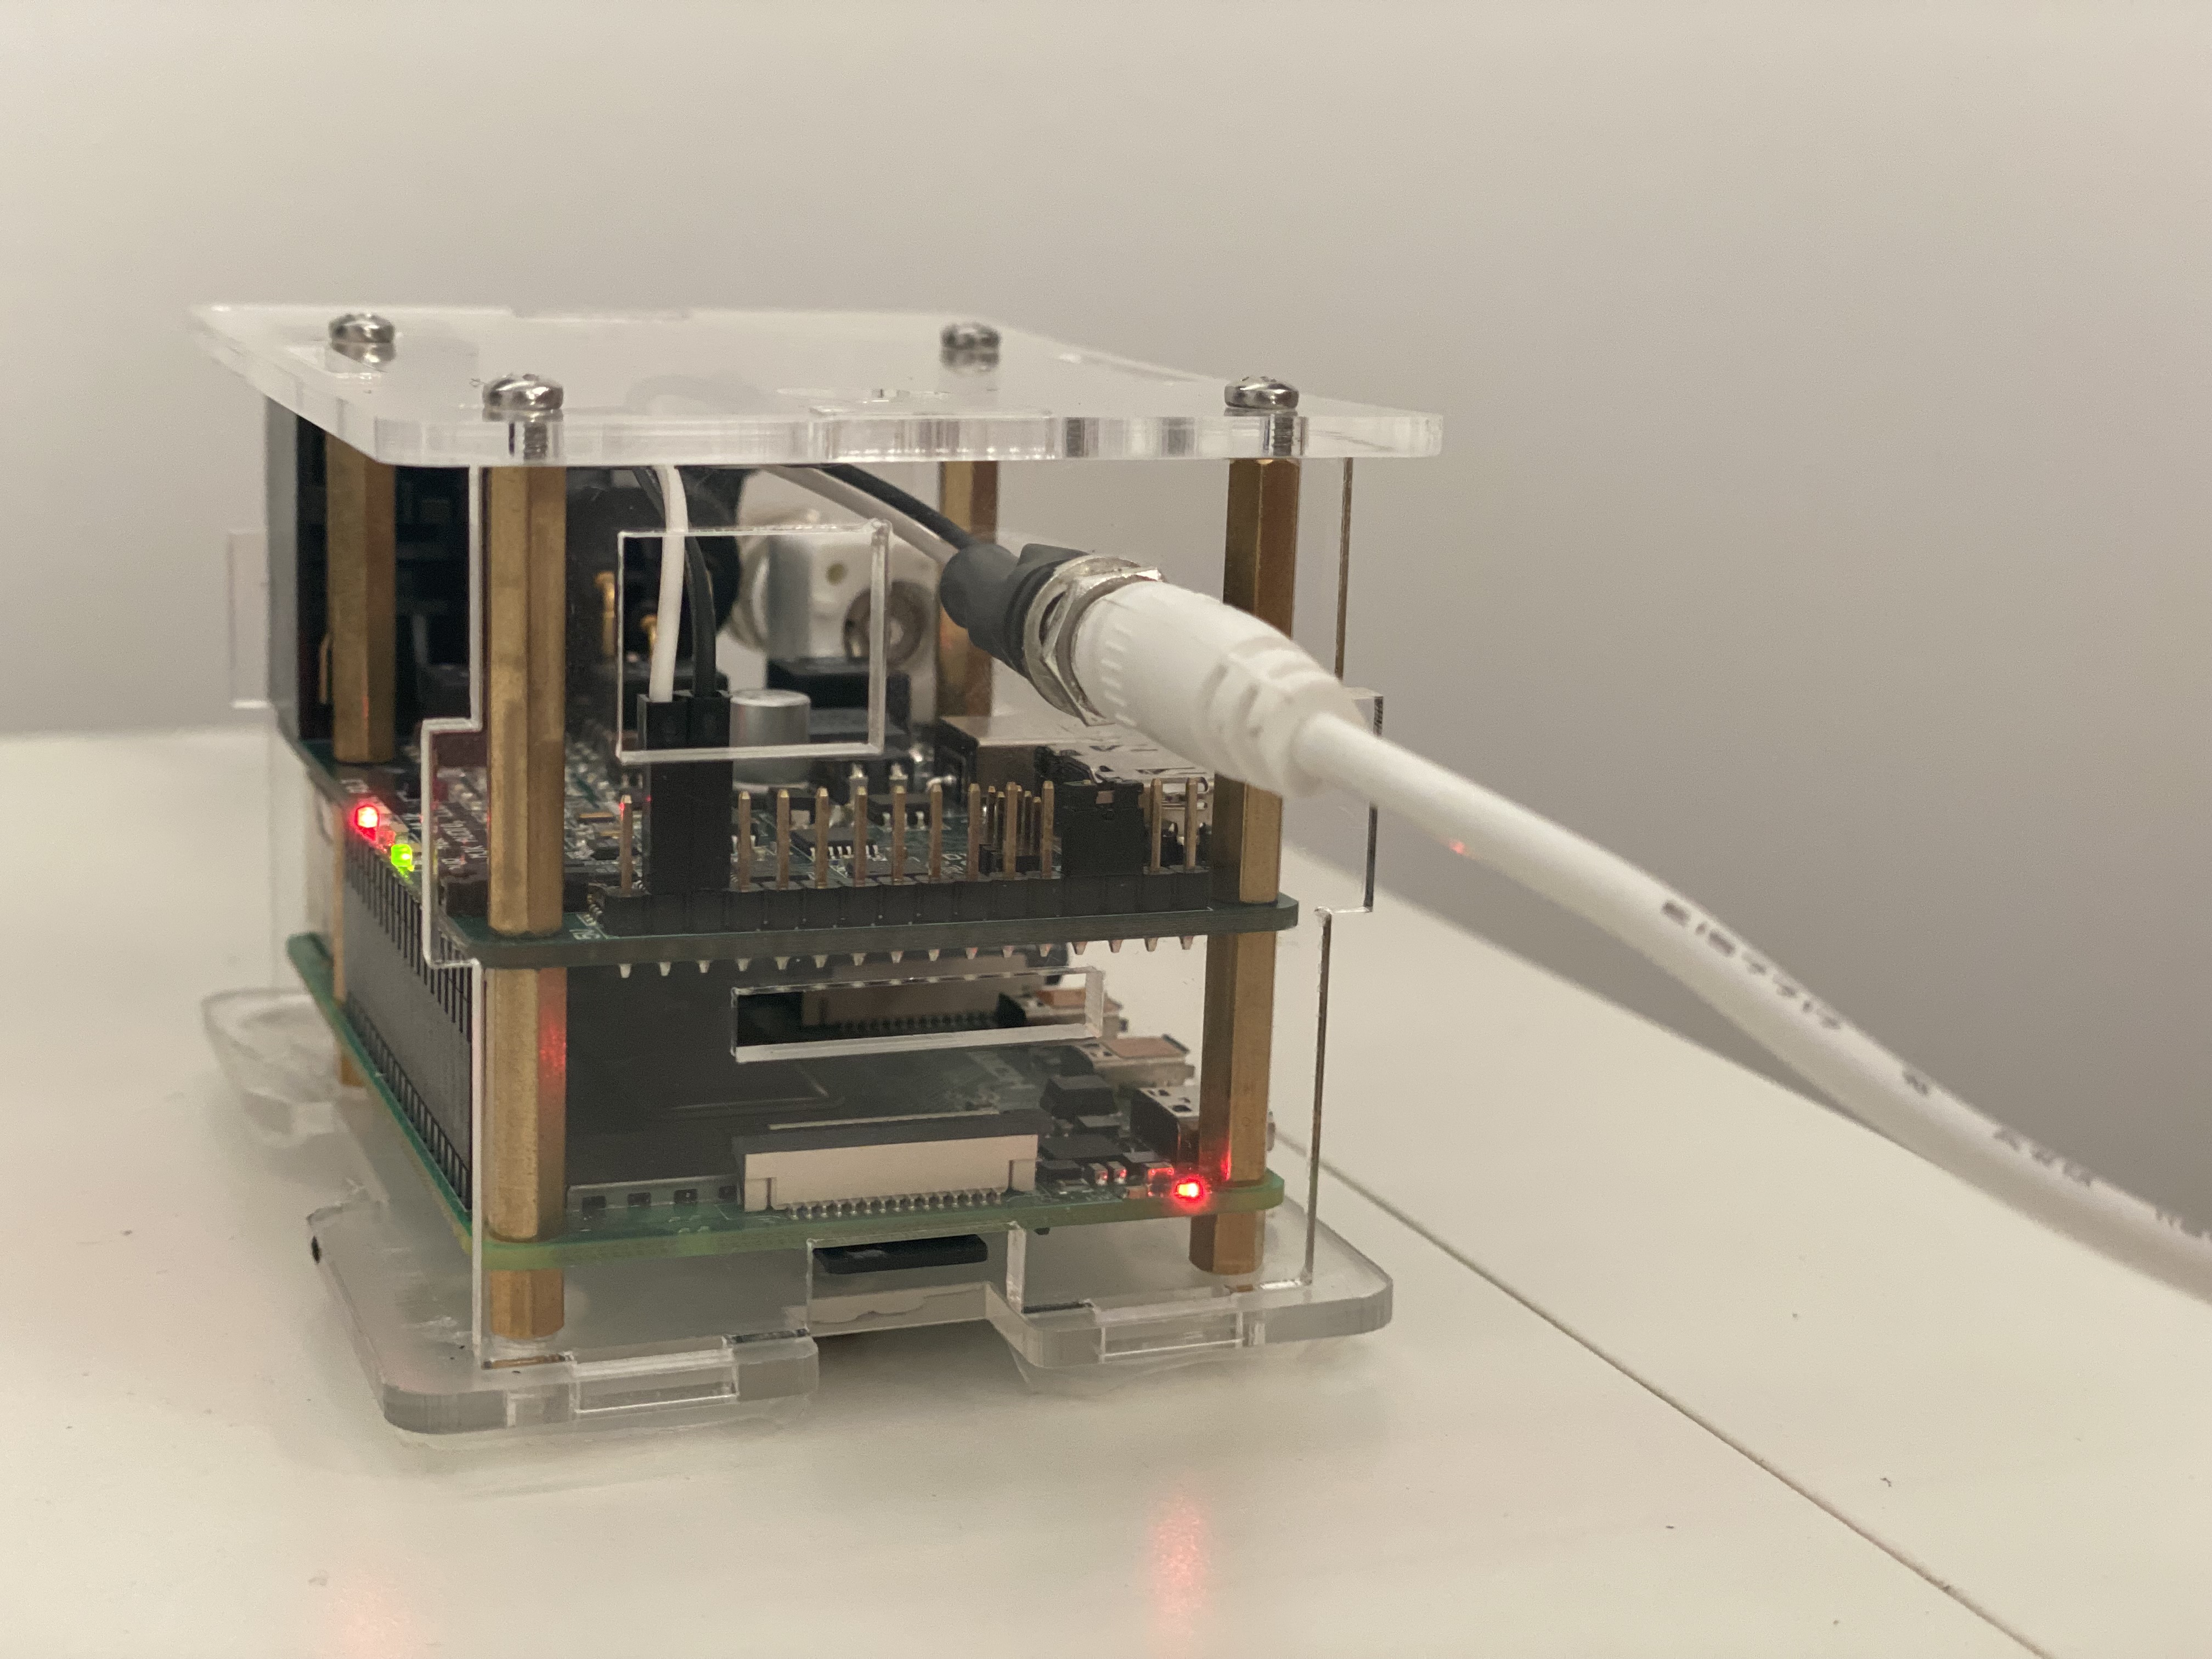
This image shows it a little more clearly. There is a 5v pin and gnd pin which you can directly connect a 5v psu to in order to bypass the onboard switcher and power the pi2aes (and pi) with 5v direct. This allows you to use something like an ifi ipower or LPS.
In this image white is 5v and black is gnd
Easiest way is to get some male to female jumper leads and a DC barrel adapter. Plus PSU of your choice. This way there’s no soldering or ‘diy’ stuff needed. literally just plug it together and you’re good.
Kinda have to buy the bigger packs of both but they’re super cheap anyway. Will cost ~$15 for both
Once that’s done, decide if you’re going to power the pi separately or with your 5v PSU. If powering both, I’d strongly recommend getting one that is at least 2a. If you only have a 1a psu like the topping p50 then you probably want to power them separately.
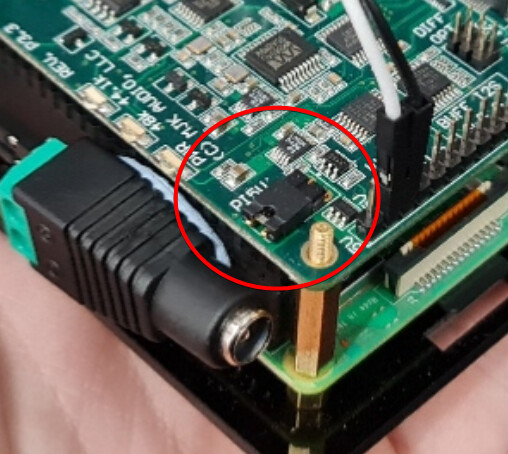
If you’d like to power them separately, remove the jumper circled in this image.
If you’d like to power both from one PSU, leave it on.
Lastly, for the OS I personally would recommend RopieeeXL ( https://ropieee.org/xl/ ). Supports roon, DNLA/UPNP, spotify connect, airplay, HQPlayer and just about anything you could need.
In Ropiee (or your chosen OS), enable SSH, connect, and edit the config.txt ( sudo nano /boot/config.txt by default ) and add the following to the file:
This will underclock the pi and reduce power consumption, to ensure you don’t end up with any psu issues which I’ve found sometimes happens on some 2a/2.5a psus.
Thanks I will give this a try with my Allo Shanti. Shanti Dual Linear Ultra Low Noise PSU although I’ll need to order some wires first. I asked Michael Kelly about this and he said that this can bypass the esd and over voltage protection. Is that true or something you’ve had any issues with?
This is probably true yes so do this at your own risk. As long as you aren’t using a dodgy PSU then it’s fine. Wouldn’t recommend doing this with one of those aliexpress linear PSUs (and wouldn’t recommend using one of those in ANY situation, seriously PSUs are the one thing you do not want to screw about with or cheap out on). But if you have an allo, ifi ipower, sbooster or other proper reliable model then it’s fine
As it shows in @GoldenOne picture, pins 2 and 3 are what is needed for connecting an external supply. The wires that I require to connect all of this arrive tomorrow so I’ll post some impressions of how it all sounds tomorrow hopefully
Hey @GoldenOne I pinged you the other day since I’m interested in your comentary of the SOtM. I picked one up and it turned out to be a special edition. Streamer/DDC Showdown: Pi2AES vs Sotm SMS200 Ultra Neo - #15 by db_Cooper
A lot of hardware (with one of the new ifi Power Elite) and it’s seem about the same, maybe I’d give it a slight edge compared to the Pi2AES with a 5v LPS. The SOtM has to feed USB out to my Lampi, where the Pi could use the BNC which is stated to be SE AES on the Pi2 so that helps keep it in the game.
All in $350 for the complete Pi setup to $1800 for the SOtM, so five times the cost and it more than holds its own.
Is the suggested underclock only to weed out iffy power supplies or does the reduced processing help to further reduce noise?
I ssh’d to the rpi and edited the config file per the instructions then did the following. Plugged in the pi2aes to my shanti linear power supply from Allo. I connected the 3A output to the pi and the 1A output to the pi2aes as that was how I connected it up when I was using the digione board. Maybe I could just power both with the 3A connection, I’m not sure. Btw both of the power outputs are 5V. Nothing seems to have gone wrong but I haven’t listened yet as I’m waiting for my amp to warm up. Will update with some impressions later.
Chain is pi2aes (i2s) → Denafrips Pontus II → Flux FA-12 → LCD-4z and HD800S
I’ve been listening to the pi2aes powered by the shanti linear power supply over the past couple of hours after my amp warmed up for an hour or so before that. Performance has been stable so I think the way I connected it and edited the config file have not presented any issues.
Sound impressions are that it sounds mostly the same. I wasn’t really listening to the pi2aes with the mean well supply right before so its hard to make a comparison. It definitely doesn’t sound worse and things that I might be hearing are slightly better separation / imaging. After I listen using the linear power supply for a few days I want to go back to the mean well psu and see what I think and also try just powering it off of the 5V 3A connection instead of powering the pi and pi2aes separately.
Even if I don’t think it sounds better or noticeably different at the moment, I am glad that I can make use of the linear power supply that I had instead of the standard one offered with the pi2aes.
So I’ve been listening to the pi2aes with the shanti linear power supply from Allo for a few days now. I just disconnected the power from the pi and pi2aes and connected the mean well supply to the pi2aes and the shanti linear to the pi. I could have just powered it with the mean well supply but I didn’t want to reconnect the jumper so I figured that leaving the pi powered by the shanti and just changing how the pi2aes HAT is powered would be fine. So to clarify this is a comparison between the pi2aes powered by the mean well supply and the pi2aes powered by the 5v 1a output of the shanti supply. In both cases the pi is powered separately by the 5v 3a output of the shanti and the jumper on the pi2aes is removed.
For this test I used the Ether CX as they isolate well and are pretty flat sounding. The main song I used to test this is California Soil by London Grammar as I am familiar with it and it has a good variety of things going on like vocals, cymbal hits, and bass but isn’t too busy sounding. For my test the volume was matched as I left the amp volume position in the same position while swapping the power connection to the pi2aes.
I do think that powering the pi2aes with the linear power supply as opposed to the mean well supply sounds better overall. When I first connected the mean well supply it just seemed wrong. It sounded thinner with less dynamics and the details were more “squished” together. I do think that improving the psu improves the imaging and separation and I think in this case the overall tonality was just more pleasing too. I have no science to back this up as these are just my listening impressions so do take this with a grain of salt.
If you have a pi2aes and willing to invest in a linear psu or just a higher quality power supply I do think that the upgrade is worthwhile.
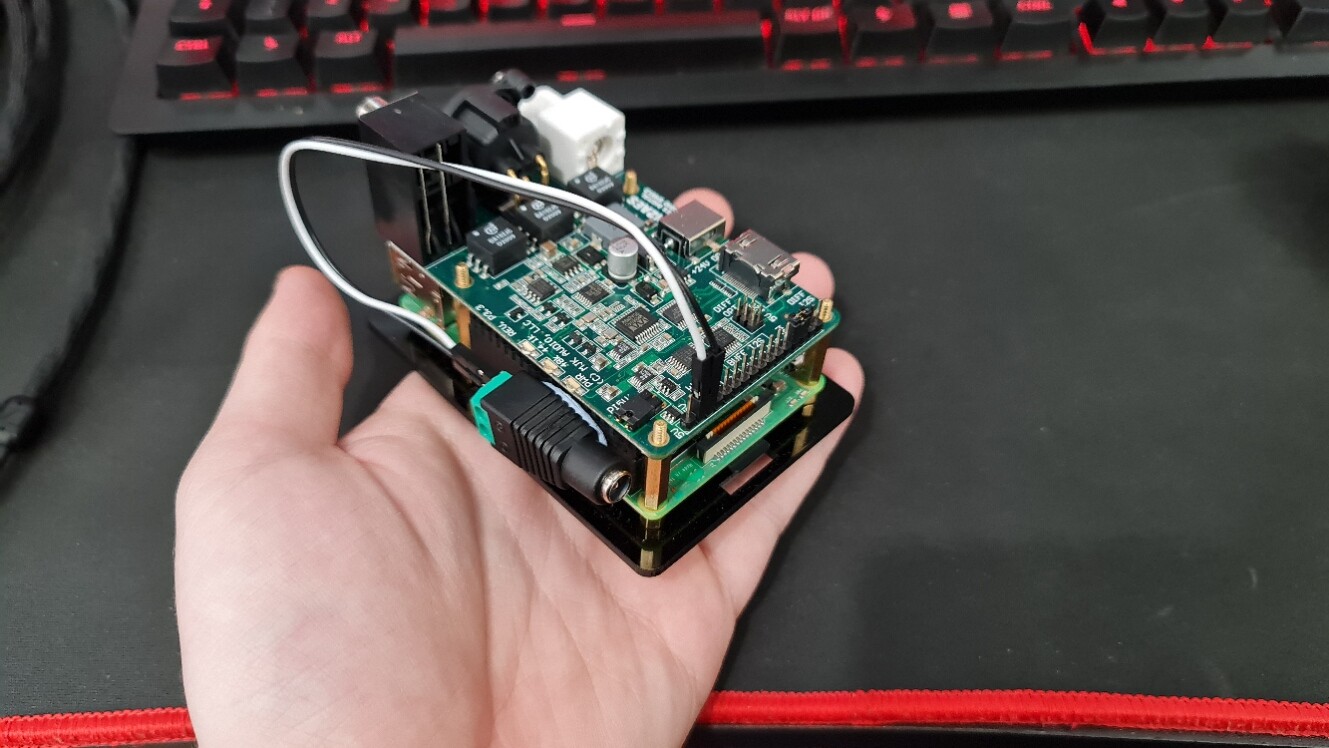
Here’s a picture of my setup with a new dark acrylic case on the pi2aes so I don’t have a rpi light show in my room when I go to bed.
It’s such a good little product. I wish someone would be a more audiophile case for it so I could display it proudly in my main 2 channel system. (vanity, I know)
Currently I use mine in my desktop so I can bypass the PC when I’m going to critically listen or just want the max from my gear.
I was just about to grab a LPS 24vdc supply (Currently using the meanwell)
I found a nice one on Aliexpress with 1uv noise.
Now I can continue to use my ifi power x for both the PI and Pi2aes hat.
Off to my local electronics store tomorrow to pick up the pin adapters and DC terminal.
Just a tip!, if you are installing a 2.1/2.5mm DC socket into the pi2aes case, make sure you take your time when drilling. Start with a small drill bit size, and increase your hole size slowly. This should prevent the case from cracking, as I did on the HDMI/DC side plastic rushing the process.